We’ve all been there – craving that perfect café-quality coffee drink but not wanting to leave the house. That’s where whipped coffee comes to the rescue! This viral sensation took social media by storm and transformed our morning routines with its incredibly fluffy texture and rich flavor that rivals any coffee shop creation.
Also known as Dalgona coffee this Korean-inspired treat requires just three simple ingredients you probably already have in your pantry: instant coffee sugar and hot water. The magic happens when you whip these ingredients together creating a cloud-like foam that’s both Instagram-worthy and absolutely delicious.
We’re about to show you how to master this trending beverage that’s surprisingly easy to make at home. Whether you’re looking to impress guests or simply treat yourself to something special this whipped coffee recipe will become your new go-to comfort drink.
Ingredients
We only need a handful of simple ingredients to create this viral whipped coffee masterpiece. These common pantry staples transform into an impressive café-worthy drink in minutes.
For the Whipped Coffee
- 2 tablespoons instant coffee (granules or powder work equally well)
- 2 tablespoons granulated sugar
- 2 tablespoons hot water (just off boiling)
For Serving
- 1 cup milk of choice (whole milk, almond milk, or oat milk)
- Ice cubes (for iced version)
- Optional: cocoa powder for dusting
- Optional: cinnamon stick for garnish


Equipment Needed

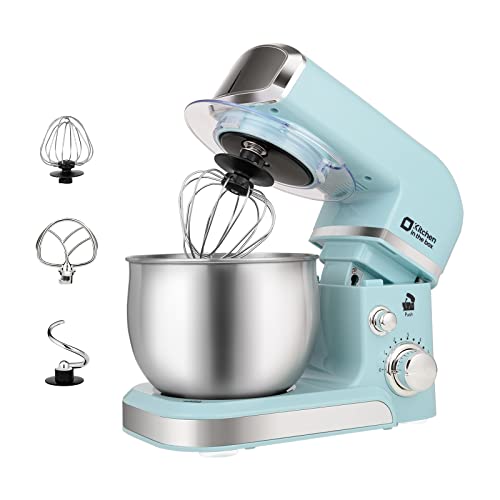
Creating perfect whipped coffee requires the right tools to achieve that signature fluffy texture we all love. We recommend gathering these essential items before starting your Dalgona coffee journey.
Mixing Bowl serves as your primary workspace for whipping the coffee mixture. We suggest using a large bowl that allows plenty of room for air incorporation during the whipping process. The extra space prevents spillage and ensures optimal volume development.
Electric Hand Mixer or Stand Mixer makes the whipping process effortless and efficient. We can achieve the perfect consistency in just 2-3 minutes using electric equipment. While whisking by hand remains possible, it requires 10-12 minutes of continuous effort and important arm strength.
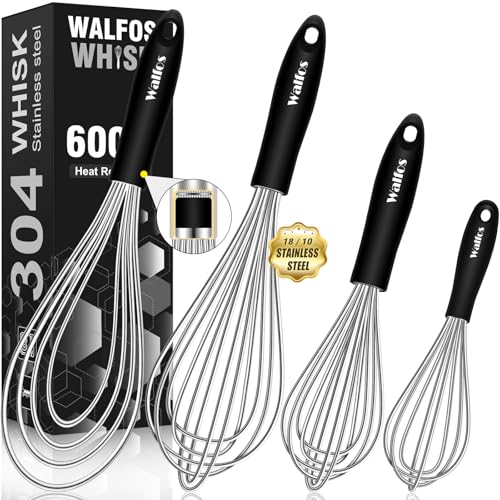
Whisk works as a manual alternative when electric mixers aren’t available. We find that a balloon whisk with multiple wires performs better than standard whisks for incorporating air into the mixture.
Spoon or Spatula helps with scraping the bowl and transferring the whipped coffee to your serving glass. We prefer using a large spoon for easy dolloping onto the milk.
Tall Glass showcases the beautiful layered effect of whipped coffee over milk. We recommend using clear glasses to display the stunning visual contrast between the dark coffee foam and light milk beneath.
| Equipment | Purpose | Time Required |
|---|---|---|
| Electric Mixer | Whipping coffee mixture | 2-3 minutes |
| Manual Whisk | Hand whipping alternative | 10-12 minutes |
| Large Mixing Bowl | Workspace for whipping | N/A |
| Tall Glass | Serving and presentation | N/A |
Having these tools ready ensures smooth preparation and helps us achieve that Instagram-worthy whipped coffee every single time.


Instructions

Now that we have our ingredients and equipment ready, let’s walk through the simple process of creating this Instagram-worthy whipped coffee that will transform your kitchen into a trendy café.
Prep the Coffee Mixture
We start by combining our three key ingredients in a clean mixing bowl. Measure 2 tablespoons of instant coffee, 2 tablespoons of granulated sugar, and 2 tablespoons of boiling water into the bowl. The equal parts ratio creates the perfect balance for a strong coffee base that will hold its fluffy texture once whipped. Make sure to use boiling water as the heat helps dissolve the sugar completely and activates the coffee for better flavor extraction.
Whip the Coffee
Using our electric hand mixer or stand mixer, we whip the coffee mixture at high speed for 2 to 5 minutes until magic happens. Watch as the mixture transforms from a dark liquid into a thick, creamy foam that forms stiff peaks when the beaters are lifted. The color will lighten to a beautiful golden brown, and the texture becomes incredibly fluffy and voluminous. For those using a manual whisk, expect to invest 15 to 25 minutes of vigorous whisking, but the arm workout is worth the result.
Prepare the Milk Base
While our whipped coffee rests, we fill a tall glass with 1 cup of our chosen milk. For an iced version, add several ice cubes to the glass before pouring the chilled milk. Hot whipped coffee lovers should use warmed milk instead. The tall glass showcases the beautiful layered effect we’re about to create and provides enough space for proper mixing when ready to drink.
Assemble the Whipped Coffee
Using a spoon, we gently dollop the whipped coffee mixture on top of our prepared milk base. The fluffy coffee foam should sit beautifully on the surface, creating distinct layers. Sprinkle optional cinnamon or cocoa powder on top for extra flavor and visual appeal. Serve immediately with a spoon or straw, allowing each person to stir and blend the frothy coffee with the milk as they drink for the perfect flavor balance.


Directions for Perfect Results

We’ve perfected the technique to create the most luxurious whipped coffee that delivers consistent results every time. Following our precise guidelines ensures you’ll achieve that signature creamy texture and maximum fluffiness that made this drink a viral sensation.
Getting the Right Consistency
Our standard 1:1:1 ratio of instant coffee, sugar, and hot water creates the optimal foundation for a creamy and stable froth. This balanced combination ensures the mixture whips properly without becoming too thick or remaining too thin.
We recommend whipping for approximately 2 to 4 minutes until the mixture transforms from a dark liquid to a thick, glossy foam. The whipped coffee reaches perfect consistency when it forms stiff peaks that hold their shape upon lifting the whisk or mixer. You’ll know it’s ready when the texture becomes smooth and glossy, indicating thorough incorporation of air and sugar.
During the whipping process, we suggest scraping down the sides of the bowl as needed to ensure all ingredients mix thoroughly. The final texture should resemble thick peanut butter and maintain its shape when spooned.
Achieving Maximum Fluffiness
We always use high-quality instant coffee and granulated sugar for quicker and more consistent whipping results. These ingredients dissolve more efficiently and create a more stable foam structure.
Our preferred method involves using a hand mixer, stand mixer, or electric frother on high speed rather than manual whisking. Electric mixing tools reduce whipping time significantly compared to manual whisking, which requires 15 to 20 minutes of continuous effort.
We ensure the water temperature reaches 195°F to 205°F (90°C to 96°C) for optimal results. Using hot and freshly boiled water helps dissolve the sugar and coffee faster, improving the overall fluffiness of the mixture.
| Whipping Method | Time Required | Fluffiness Level |
|---|---|---|
| Electric Hand Mixer | 2-4 minutes | Maximum |
| Stand Mixer | 2-3 minutes | Maximum |
| Electric Frother | 3-4 minutes | High |
| Manual Whisk | 15-20 minutes | Moderate |
We taste the mixture before serving and adjust sweetness if needed, as the whipped coffee will have a strong and sweet flavor profile. The final product should maintain its fluffy texture for several minutes after whipping, making it perfect for creating that Instagram-worthy layered effect.


Serving Suggestions

Now that we’ve mastered the whipped coffee base, let’s explore how to serve this delicious creation in both hot and iced variations. Each serving style offers a unique experience that transforms our fluffy coffee mixture into a café-quality beverage.
Hot Whipped Coffee
We create the perfect hot whipped coffee by warming 1 cup of milk in a saucepan over medium heat until steaming but not boiling. Pour the heated milk into a large mug, leaving about an inch of space at the top for our whipped coffee foam. Using a spoon, we carefully dollop the whipped coffee mixture on top of the hot milk, creating an impressive layered effect.
The hot version delivers a cappuccino-like experience with its frothy texture and comforting warmth. We recommend stirring the drink vigorously before sipping to combine the creamy coffee foam with the milk base. This creates a rich, satisfying beverage that’s perfect for cool mornings or cozy afternoons.
| Style | Preparation | Experience |
|---|---|---|
| Hot Whipped Coffee | Pour hot milk into mug, top with whipped coffee foam, stir before sipping | Resembles a frothy cappuccino; warm and comforting |
Iced Whipped Coffee
For our iced version, we fill a tall glass with ice cubes and pour 1 cup of cold milk over the ice. The glass should be about three-quarters full to accommodate our whipped coffee topping. We then spoon the coffee foam generously on top, creating beautiful layers that showcase the contrast between the dark coffee and light milk.
The iced whipped coffee offers a refreshing and luxurious experience that’s perfect for warm weather or afternoon treats. We suggest stirring the drink just before drinking to blend the creamy coffee foam with the cold milk and ice. This creates a smooth, indulgent beverage that rivals any specialty coffee shop creation.
Our leftover whipped coffee mixture can be refrigerated and reused within a day without losing its fluffy texture. We can experiment with different milk types such as oat, almond, or soy milk to customize the flavor profile. Adding a pinch of cinnamon or vanilla extract to the whipped mixture creates additional depth and complexity to our coffee creation.


Variations and Flavor Options

We can easily transform our basic whipped coffee into delicious flavor combinations that satisfy different taste preferences. These variations allow us to customize our Dalgona coffee experience with simple ingredient additions.
Chocolate Whipped Coffee
We create this indulgent mocha variation by adding chocolate syrup directly to our milk before topping with the whipped coffee mixture. The chocolate base provides a rich foundation that complements the coffee foam beautifully. Our preferred method involves stirring 2 tablespoons of chocolate syrup into the cold milk until fully combined.
The whipped coffee preparation remains identical to our basic recipe using instant coffee, sugar, and hot water. We spoon the fluffy coffee mixture over the chocolate milk and stir before drinking to achieve the perfect chocolate coffee blend. This variation delivers a café mocha experience with the signature whipped texture we love.
Vanilla Whipped Coffee
We enhance our whipped coffee with vanilla through two distinct approaches that create different flavor profiles. The first method involves adding vanilla syrup directly to our milk base before topping with the traditional whipped coffee foam. We recommend using 1 to 2 tablespoons of vanilla syrup for optimal flavor balance.
Our second approach creates a vanilla whipped cream topping instead of the coffee foam. We whip heavy cream with sugar and powdered vanilla extract until soft peaks form. This vanilla cream gets spooned over plain milk for a sweeter, creamier variation that appeals to those who prefer milder coffee flavors.
Caramel Whipped Coffee
We transform our whipped coffee into a caramel delight by incorporating caramel syrup into both the milk base and as a finishing touch. Our technique involves stirring 2 tablespoons of caramel syrup into the cold milk before adding the whipped coffee topping. The caramel creates a sweet base that enhances the coffee’s natural richness.
For extra indulgence, we drizzle additional caramel sauce over the completed whipped coffee foam. This dual caramel approach intensifies the sweetness and creates beautiful visual appeal with caramel streaks throughout the drink. The combination of caramel and coffee flavors produces a luxurious coffeehouse experience at home.
Storage and Make-Ahead Tips

We can enjoy whipped coffee beyond just making it fresh each time. Our fluffy whipped coffee mixture stores beautifully when properly handled and can be prepared ahead of busy mornings.
Proper Storage Methods
Store your whipped coffee in an airtight container to maintain its signature texture and prevent it from absorbing unwanted odors from the refrigerator. We recommend using a glass jar or sealed plastic container that fits snugly in your fridge.
Refrigeration works best for short-term storage. Our whipped coffee mixture stays fresh in the refrigerator for 2-3 days without losing quality. Keep the container at a consistent temperature and avoid opening it frequently to preserve the fluffiness and rich flavor we worked hard to achieve.
For longer storage periods, freezing extends the life of our whipped coffee up to 1 month. The mixture remains creamy and scoopable even after freezing and thawing. Unlike ice cream, it won’t solidify into a hard block, making it easy to portion out whenever we need it.
| Storage Method | Duration | Container Type | Temperature |
|---|---|---|---|
| Refrigeration | 2-3 days | Airtight jar/container | Consistent fridge temp |
| Freezing | 1 month | Airtight container | Freezer safe |
Make-Ahead Preparation
Prepare larger batches by doubling or tripling our recipe ingredients. This approach saves time during busy mornings and ensures we always have whipped coffee ready for unexpected guests or our daily coffee ritual.
The whipped mixture might separate slightly during storage, with liquid pooling at the bottom of the container. Simple stirring restores the creamy texture before use, bringing back that perfect consistency we love.
We achieve the best results when using instant espresso powder rather than regular brewed coffee for our make-ahead batches. Regular coffee doesn’t froth well and won’t maintain the stable foam structure needed for proper storage.
Store the prepared mixture in sealed jars or containers to maintain freshness. This method allows us to scoop out portions as needed while keeping the remaining mixture protected from air exposure and flavor loss.


Troubleshooting Common Issues

Even with the perfect recipe and technique, we sometimes encounter challenges when making whipped coffee. Let’s address the most common problems and their answers to ensure your Dalgona coffee turns out perfectly every time.
Insufficient Instant Coffee
We often see failed whipped coffee attempts when people use less than the recommended 2 tablespoons of instant coffee per serving. This shortage weakens foam formation and dilutes the rich flavor we’re after. The result is typically a watery or runny texture that refuses to form stiff peaks. We recommend sticking to the precise 2 tablespoons measurement for optimal results.
Too Little Sugar
Sugar serves a dual purpose in our whipped coffee recipe beyond just sweetness. We need the full 2 tablespoons to create that signature light and fluffy texture. When we skimp on sugar, the foam becomes bitter and develops a dense, grainy consistency instead of the smooth peaks we want. The sugar quantity should always match the coffee amount equally.
Not Whipping Long Enough
Time is crucial when creating the perfect whipped coffee foam. We need to whip for at least 2 minutes with an electric mixer to achieve proper volume and texture. Stopping too early results in a flat, less voluminous mixture that won’t hold its shape when spooned over milk. Manual whisking requires significantly more time and effort, often taking 15-20 minutes to reach the same consistency.
Using the Wrong Coffee Type
We must use instant coffee or instant espresso powder for successful whipping. Regular ground coffee or brewed coffee simply won’t work because they lack the concentrated properties needed for foam formation. Fresh coffee grounds are too coarse and contain oils that prevent proper whipping, while brewed coffee is too diluted to create the necessary structure.
Inadequate Whipping Tools
Our choice of whipping tools directly impacts the final result. Electric mixers and handheld frothers dramatically speed up the process and create more consistent foam. While manual whisks work, they require substantially more effort and time to achieve the same fluffy texture. We recommend using electric tools whenever possible for the best experience and results.
| Issue | Problem | Solution | Time Required |
|---|---|---|---|
| Insufficient Coffee | Watery texture, no peaks | Use 2 tablespoons instant coffee | 2-4 minutes |
| Too Little Sugar | Bitter, grainy foam | Match sugar to coffee (2 tablespoons) | 2-4 minutes |
| Under-whipped | Flat, low volume | Whip until stiff peaks form | 2-4 minutes (electric), 15-20 minutes (manual) |
| Wrong Coffee | Won’t whip properly | Use instant coffee only | N/A |
| Poor Tools | Inconsistent results | Use electric mixer when possible | Varies |


Conclusion
We’ve shown you everything you need to create café-quality whipped coffee at home with just three simple ingredients. From mastering the perfect 1:1:1 ratio to exploring delicious variations like chocolate and caramel versions this trendy drink is surprisingly easy to make.
The beauty of whipped coffee lies in its versatility and make-ahead convenience. Whether you’re craving an iced treat on a hot day or a warming hot version during cooler months you can customize it to match your taste preferences perfectly.
With our troubleshooting tips and storage guidance you’ll never have to worry about failed batches again. Now it’s time to grab your electric mixer and create your own Instagram-worthy whipped coffee masterpiece that’ll impress everyone who tries it.
Frequently Asked Questions
What is whipped coffee and why is it so popular?
Whipped coffee, also known as Dalgona coffee, is a viral beverage made by whipping instant coffee, sugar, and hot water into a fluffy foam that’s served over milk. It became popular on social media due to its Instagram-worthy appearance, café-quality taste, and the fact that it requires only three common ingredients that most people have at home.
What ingredients do I need to make whipped coffee?
You need just three ingredients for the whipped coffee base: 2 tablespoons of instant coffee, 2 tablespoons of granulated sugar, and 2 tablespoons of hot water. For serving, you’ll need 1 cup of milk (any type), ice cubes for iced versions, and optional garnishes like cocoa powder or cinnamon sticks.
What equipment is necessary for making whipped coffee?
Essential equipment includes a large mixing bowl, an electric hand mixer or stand mixer for best results, and a tall glass for serving. You can use a manual whisk as an alternative, though it requires more effort. A spoon or spatula helps transfer the whipped mixture, and the tall glass showcases the beautiful layered effect.
How long does it take to whip the coffee mixture?
With an electric mixer, whipping takes 2-4 minutes to achieve stiff peaks and a smooth, glossy texture. Using a manual whisk requires 8-15 minutes of vigorous whisking. The mixture should transform from liquid to a thick, creamy foam that holds its shape when lifted.
Can I make whipped coffee ahead of time?
Yes, whipped coffee can be stored in an airtight container in the refrigerator for 2-3 days or frozen for up to 1 month. If the mixture separates during storage, simply stir it to restore the creamy texture. You can also make larger batches by doubling or tripling the recipe.
What are some popular variations of whipped coffee?
Popular variations include Chocolate Whipped Coffee (add chocolate syrup to milk), Vanilla Whipped Coffee (add vanilla syrup or vanilla whipped cream), and Caramel Whipped Coffee (add caramel syrup to milk and drizzle on top). You can also experiment with different milk types and spices like cinnamon.
Why won’t my whipped coffee whip properly?
Common issues include using regular coffee instead of instant coffee, incorrect ratios of ingredients, or insufficient whipping time. Make sure to use the 1:1:1 ratio of instant coffee, sugar, and hot water, and whip for at least 2 minutes with an electric mixer. Regular ground coffee won’t create the proper foam.
Can I make hot whipped coffee instead of iced?
Absolutely! For hot whipped coffee, warm your milk and pour it into a mug, then dollop the whipped coffee mixture on top. This creates a cappuccino-like experience. The contrast between the warm milk and fluffy coffee foam makes for a comforting and delicious hot beverage.