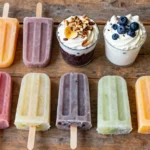
Nothing beats the refreshing rush of a perfectly crafted frozen coffee on a sweltering summer day. We’ve all experienced that moment when our regular hot coffee just won’t cut it – when what we really crave is something cold, creamy, and energizing all at once.
This frozen coffee recipe delivers exactly that perfect balance of rich coffee flavor and icy refreshment that’ll transform your caffeine routine. We’re talking about a drink that’s smoother than your average iced coffee yet more substantial than a typical frappé – it’s the sweet spot between indulgence and energy.
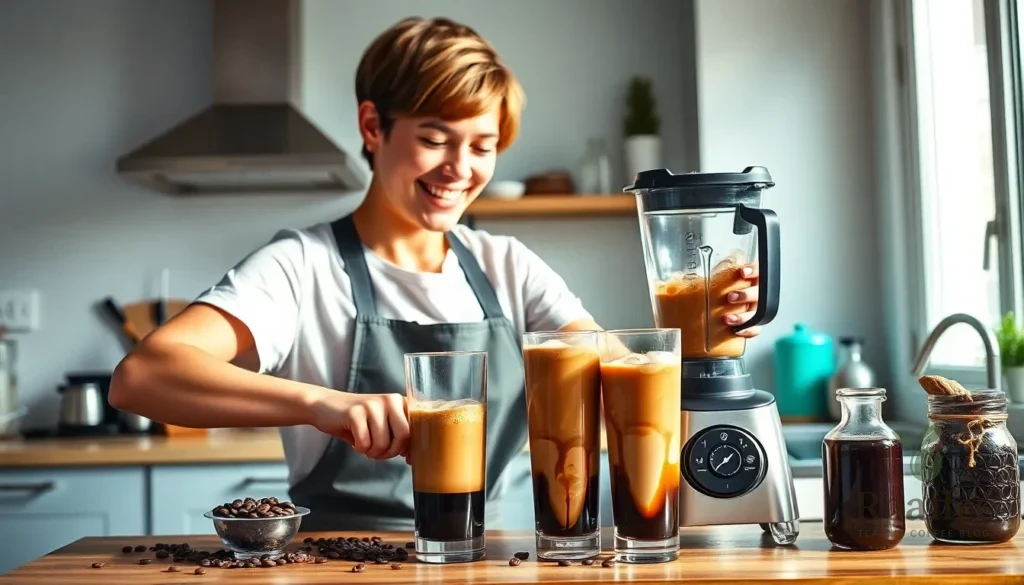
The best part? You don’t need expensive equipment or barista skills to create this coffeehouse-quality treat at home. With just a few simple ingredients and a blender, we’ll show you how to whip up this frozen delight that’ll keep you cool and caffeinated all season long.
Ingredients
Our frozen coffee recipe relies on simple pantry staples that most coffee lovers already have on hand. The magic happens when these everyday ingredients transform into a refreshing coffeehouse-quality beverage through proper blending and proportions.
For the Coffee Base
- 1 cup strong brewed coffee, cooled to room temperature
- 2 tablespoons instant coffee granules (for extra intensity)
- 1/4 cup granulated sugar (adjust to taste)
- 1/2 cup whole milk or heavy cream
- 1 teaspoon vanilla extract
For the Frozen Elements
- 2 cups ice cubes (about 12-15 cubes)
- 1/2 cup frozen coffee cubes (optional, made from leftover coffee)
- 1 cup crushed ice (for smoother texture)
Optional Add-ins and Toppings
- 2 tablespoons chocolate syrup or caramel sauce
- 1 tablespoon cocoa powder
- 1/2 teaspoon cinnamon
- 1/4 cup cold brew concentrate (for deeper flavor)
- Whipped cream for topping
- Chocolate shavings or sprinkles
- Sea salt flakes (for salted caramel variation)
- 1 tablespoon hazelnut or almond syrup


Equipment Needed

Creating our frozen coffee masterpiece requires minimal equipment that most home kitchens already contain. We need a reliable blender as our primary tool to achieve that perfect slushy texture that makes frozen coffee so irresistible.
A coffee maker becomes essential for brewing our strong coffee base. We can use any brewing method that suits our preference, including drip coffee makers, French presses, espresso machines, moka pots, or even Vietnamese phin filters. The key lies in producing a robust coffee concentrate that won’t get diluted when blended with ice.
Our coffee grinder proves invaluable when working with whole beans. Fresh ground coffee delivers superior flavor compared to pre-ground options, and we can control the grind size to match our chosen brewing method.
Tall glasses serve as our presentation vessels for this coffeehouse-quality drink. We recommend using glasses that hold at least 12 ounces to accommodate the generous portion our recipe creates.
| Equipment | Purpose | Alternative Options |
|---|---|---|
| Blender | Creates slushy texture | Immersion blender (limited results) |
| Coffee maker | Brews strong coffee base | Any brewing method |
| Coffee grinder | Grinds fresh beans | Pre-ground coffee |
| Tall glasses | Serving vessel | Mason jars, large mugs |
Straws become helpful additions for easy sipping, especially when we add whipped cream or other toppings that create layers in our drink. We can choose regular straws or wide-bore straws that handle the thicker consistency better.
Additional measuring tools like liquid measuring cups and measuring spoons help us achieve consistent results every time we make our frozen coffee. These basic kitchen tools ensure we maintain the perfect balance of coffee to milk to ice that creates our signature smooth and creamy texture.


Instructions

Now that we have our ingredients and equipment ready, let’s jump into creating this delicious frozen coffee drink. Follow these step-by-step instructions to achieve the perfect balance of coffee flavor and icy refreshment.
Prep the Coffee Base
We start by brewing a strong coffee concentrate using 2 tablespoons of ground coffee with less water than usual. Alternatively, we can use a shot or double shot of espresso for an even more robust flavor. The key is creating a concentrated coffee base that won’t get diluted when blended with ice.
Once our coffee is brewed, we let it cool completely in the refrigerator for about 1 hour. This cooling step is crucial because hot coffee will instantly melt our ice and create a watery drink instead of the thick, slushy texture we want.
Prepare the Ice Components
We gather about 1 cup of ice cubes for our blending base. For an even stronger coffee flavor with less dilution, we can use a mixture of regular ice and frozen coffee cubes that we’ve prepared ahead of time in ice cube trays.
Next, we decide on our milk component, measuring out ¼ to 1 cup of half and half, whole milk, or our preferred dairy-free alternative. The amount depends on how creamy we want our final drink to be.
Blend the Frozen Coffee
We combine our chilled coffee, ice, and milk in the blender. For sweetness, we add 1 tablespoon of sugar or flavored syrup such as chocolate or caramel if desired.
Starting on low speed, we gradually increase to high and blend for at least 30 seconds until the mixture reaches a frothy, slushy consistency. The gradual speed increase ensures even blending without overworking the motor.
Assemble and Serve
We pour our blended coffee into a tall glass immediately while it’s still cold. For an extra indulgent touch, we top with whipped cream made from heavy cream, powdered sugar, and vanilla extract whisked to peaks.
We finish with optional garnishes like chocolate syrup, mini chocolate chips, caramel drizzle, or whole coffee beans for both decoration and added flavor. The drink should be served immediately to maintain its perfect frozen texture and refreshing temperature.


Directions for Different Variations

Each variation builds upon the foundation we established while adding unique flavors and textures. We’ll guide you through four distinct approaches that transform your basic frozen coffee into specialized treats.
Classic Frozen Coffee
We start by brewing our coffee with ground coffee and sugar, then chill the mixture for about 1 hour to ensure proper temperature. The cooling process prevents ice from melting too quickly during blending.
Add the chilled coffee, ice, and half & half to your blender. Blend on high speed until the mixture reaches a frothy consistency. The texture should be smooth with no visible ice chunks.
Pour the blended coffee into a tall glass and top with whipped cream if desired. Drizzle chocolate syrup or sprinkle chocolate chips on top for additional flavor depth.
Mocha Frozen Coffee
We combine strong chilled coffee with milk in the blender first. Add chocolate syrup and sugar to create the signature mocha flavor profile.
Measure 1½ cups of ice and add to the coffee mixture. Blend all ingredients until the consistency becomes smooth and velvety. The chocolate should be fully incorporated throughout.
Serve immediately with whipped cream and an extra drizzle of chocolate sauce. Optional chocolate chips can be added during the final seconds of blending for texture contrast.
Caramel Frozen Coffee
We prepare the glass first by drizzling caramel sauce inside and placing it in the freezer briefly. This creates an attractive presentation and prevents the caramel from mixing immediately.
Blend the chilled coffee, remaining caramel sauce, brown sugar, milk, and ice until the mixture reaches a slushy consistency. The brown sugar enhances the caramel notes naturally.
Add cookie pieces during the last few pulses if desired for crunch. Pour into the prepared glass and top with whipped cream, additional caramel drizzle, and cookie pieces.
Vanilla Frozen Coffee
We blend the chilled coffee with vanilla ice cream for the creamiest texture. Alternatively, mix regular milk with a dash of vanilla extract for a lighter version.
Add ice gradually while blending to control the final consistency. The vanilla ice cream method creates a milkshake-like texture, while the milk version produces a more traditional frozen coffee feel.
Top with whipped cream and serve immediately. A light dusting of vanilla powder or cinnamon complements the vanilla flavor beautifully.
Make-Ahead Instructions

Planning ahead transforms our frozen coffee routine into a seamless experience that delivers coffeehouse quality in under 5 minutes. We can prepare several components in advance to streamline the process and ensure consistent results every time.
Brew Coffee in Advance
Strong coffee forms the foundation of our frozen drink, so we recommend brewing extra coffee and storing it properly. Use less water than usual to create a concentrated brew that won’t dilute when blended with ice. Allow the coffee to cool completely at room temperature before transferring it to a sealed container or mason jar. Store the chilled coffee in the refrigerator for up to one week, making it readily available whenever cravings strike.
Prepare Frozen Coffee Cubes
Coffee ice cubes prevent dilution while adding extra coffee flavor to our blend. Pour cooled coffee into standard ice cube trays and freeze for at least 4 hours or overnight. These frozen cubes maintain the drink’s intensity even as they melt, creating a richer experience than regular ice alone. Store the frozen coffee cubes in freezer bags for up to 3 months.
Batch Preparation Strategy
We can prepare larger quantities of frozen coffee and store them for future enjoyment. Blend multiple servings using our standard recipe proportions, then divide the mixture into individual portions. Pour each serving into airtight containers or mason jars, leaving space for expansion during freezing. Label containers with the date and freeze for up to 2 weeks.
Quick Assembly Method
Keep essential ingredients organized in the refrigerator for instant access. Store creamers, syrups, and whipped cream in easily accessible spots. Pre-measure sweeteners into small containers if desired. This preparation reduces our active time to just blending and serving.
| Make-Ahead Component | Storage Method | Duration | Benefits |
|---|---|---|---|
| Brewed Coffee | Sealed container in fridge | 1 week | Quick 5-minute prep |
| Coffee Ice Cubes | Freezer bags | 3 months | Prevents dilution |
| Bulk Frozen Coffee | Airtight containers | 2 weeks | Portion control |
| Ingredient Organization | Refrigerator setup | Ongoing | Streamlined process |
Serving Frozen Batches
Frozen coffee naturally separates during storage, so we need to thaw it slightly before serving. Remove containers from the freezer 15-20 minutes before desired serving time. Stir the mixture thoroughly to recombine ingredients, then add fresh ice if needed for optimal texture. Blend briefly to restore the signature slushy consistency that makes our frozen coffee irresistible.
Storage Tips

Proper storage techniques can significantly extend the life of your frozen coffee creations and ensure optimal flavor retention. We recommend freezing leftover frozen coffee drinks in ice cube trays for up to two weeks, which allows you to enjoy individual portions without waste. Cover the trays with airtight lids or place them in freezer bags to prevent absorption of unwanted freezer odors that can compromise taste.
Storing Coffee Components
Always freeze whole coffee beans rather than ground coffee to preserve flavor integrity. Ground coffee has increased surface area that leads to faster oxidation and flavor loss. We suggest using small airtight containers or centrifuge tubes for freezing coffee beans, avoiding large bags that require repeated opening and exposure to air and moisture.
Portion your coffee beans into weekly doses before freezing to minimize repeated thawing cycles. Before grinding frozen beans, allow them to reach room temperature to prevent condensation formation that can negatively impact flavor profiles.
Preserving Frozen Coffee Mixtures
Cold brew concentrate maintains its quality when refrigerated in sealed containers for up to two weeks. This storage method ensures you always have a strong coffee base ready for your frozen creations. Store blended frozen coffee for short periods up to 2 hours in airtight containers in the freezer, then re-blend briefly with milk before serving to restore optimal texture.
Make-Ahead Storage Strategies
| Storage Method | Duration | Container Type | Temperature |
|---|---|---|---|
| Coffee ice cubes | 2 weeks | Airtight trays/bags | Freezer |
| Cold brew concentrate | 2 weeks | Sealed containers | Refrigerator |
| Blended frozen coffee | 2 hours | Airtight containers | Freezer |
| Whole coffee beans | Several weeks | Small airtight containers | Freezer |
Prepare your coffee base and flavor enhancers in advance for quick assembly. Brew and chill your coffee concentrate ahead of time, then portion ingredients for efficient blending when ready to serve. This preparation strategy reduces active preparation time while maintaining the fresh taste that makes homemade frozen coffee superior to store-bought alternatives.
Serving Suggestions

Transform your homemade frozen coffee into a cafe-worthy presentation with these expert serving techniques. We recommend serving your frozen coffee in chilled glasses that hold at least 12 ounces to accommodate the generous portions and maintain the ideal temperature longer.
Glass Preparation and Temperature Control
Start by chilling your serving glasses in the freezer for 10-15 minutes before pouring. This simple step prevents the frozen coffee from melting too quickly and maintains that perfect slushy consistency we’ve worked to achieve. Clear glass mugs or tall tumblers showcase the beautiful layers and textures of your creation.
Essential Toppings and Garnishes
Top your frozen coffee with a generous dollop of whipped cream for the classic coffeehouse experience. We suggest making fresh whipped cream by whipping ¼ cup heavy cream with 2 teaspoons powdered sugar and ¼ teaspoon vanilla extract until peaks form. Drizzle chocolate syrup over the whipped cream in decorative patterns for visual appeal.
Sprinkle cocoa powder or cinnamon directly onto the whipped cream for an aromatic finish that enhances both flavor and presentation. Mini chocolate chips or chocolate shavings add textural contrast and extra indulgence to each sip.
Flavor Enhancement Options
Customize your frozen coffee with flavored syrups to match your taste preferences. Caramel syrup creates a sweet butterscotch note while vanilla extract adds warmth and depth. French vanilla syrup combined with vanilla ice cream or milk creates an exceptionally creamy variation.
Serving Accessories and Timing
Provide wide straws or long spoons to help guests navigate the thick frozen texture comfortably. Serve immediately after blending to maintain the optimal consistency and prevent separation. The frozen coffee reaches its peak texture within the first 15 minutes of preparation.
Present your frozen coffee on small plates or saucers to catch any condensation and create a more polished presentation. This attention to detail elevates the entire serving experience from casual refreshment to special treat.


Conclusion
We’ve shown you how simple it is to create coffeehouse-quality frozen coffee drinks right in your own kitchen. With just a few basic ingredients and a blender you can enjoy this refreshing treat whenever the craving strikes.
The versatility of this recipe means you’ll never get bored. Whether you’re in the mood for a classic frozen coffee or want to experiment with mocha and caramel variations there’s something for every taste preference.
Remember to serve your frozen coffee immediately for the best texture and don’t forget those essential toppings that make each sip special. Now you’re ready to beat the heat with your own delicious frozen coffee creations.
Frequently Asked Questions
What ingredients do I need to make frozen coffee at home?
You’ll need strong brewed coffee, instant coffee granules, sugar, milk or cream, vanilla extract, and ice cubes. Optional ingredients include frozen coffee cubes for smoother texture, chocolate syrup, caramel sauce, and whipped cream for customization. All ingredients are basic pantry staples that create coffeehouse-quality drinks.
What equipment is required for making frozen coffee?
The essential equipment includes a reliable blender and a coffee maker. You’ll also want tall glasses for serving. That’s it! The simplicity of equipment needed makes this an accessible recipe for most home kitchens without requiring specialized tools.
How do I make frozen coffee ice cubes?
Brew extra strong coffee and let it cool completely. Pour the cooled coffee into ice cube trays and freeze until solid. These coffee ice cubes prevent dilution while blending and create a smoother, more concentrated coffee flavor in your frozen drink.
Can I make frozen coffee ahead of time?
While frozen coffee is best enjoyed immediately after blending, you can prepare components ahead. Brew extra coffee and store it in the refrigerator, prepare coffee ice cubes in advance, and have all ingredients ready for quick assembly when you’re ready to blend.
What are the different frozen coffee variations I can make?
The article features four main variations: Classic (traditional coffee flavor), Mocha (with chocolate syrup), Caramel (with caramel sauce), and Vanilla (with extra vanilla extract). Each variation uses the same base recipe with specific flavor additions to create unique taste profiles.
How should I serve frozen coffee for the best experience?
Serve immediately in chilled tall glasses to maintain temperature and prevent quick melting. Use wide straws or long spoons for easy consumption. Top with whipped cream, chocolate syrup, or your preferred garnishes. The drink’s texture is optimal when consumed right after blending.
Can I customize my frozen coffee with different flavors?
Absolutely! Add flavored syrups like hazelnut, caramel, or vanilla for variety. You can also incorporate chocolate syrup, caramel sauce, or different types of milk. Experiment with toppings like whipped cream, chocolate shavings, or cinnamon to create your perfect personalized frozen coffee drink.