We’ve all been there – standing in the coffee aisle staring at endless rows of store-bought creamers packed with artificial ingredients and wondering if there’s a better way. Making your own coffee creamer at home isn’t just possible; it’s surprisingly simple and incredibly rewarding. With just a few basic ingredients, you can create rich, creamy blends that rival any commercial brand.
Homemade coffee creamer gives you complete control over what goes into your morning cup. You’ll know exactly what ingredients you’re consuming, and you can customize flavors to match your taste preferences perfectly. Whether you’re craving vanilla bean, caramel, or seasonal spices, we’ll show you how to create the perfect creamer.
The best part? Making your own creamer costs a fraction of what you’d spend on store-bought versions. You’ll save money while enjoying fresher, more flavorful results that transform your daily coffee routine into something truly special.
Why Make Your Own Coffee Creamer
Control over ingredients stands as the primary advantage of crafting your own coffee creamer. Store-bought versions often contain hydrogenated oils, artificial flavors, and high fructose corn syrup that we can easily avoid in our homemade versions. We gain complete transparency about what enters our morning cup when we create our own creamer from scratch.
Financial savings make homemade creamer an attractive option for budget-conscious coffee lovers. A single batch costs significantly less than purchasing multiple bottles of commercial creamer throughout the month. We can produce weeks worth of creamer using simple pantry staples that cost a fraction of premium store brands.
Customization opportunities expand dramatically when we take control of our creamer production. We can adjust sweetness levels, experiment with unique flavor combinations, and modify thickness to match our exact preferences. Vanilla, caramel, hazelnut, or seasonal flavors like pumpkin spice become easily achievable without searching store shelves for specialty varieties.
Freshness guarantees better taste and longer satisfaction with our daily coffee ritual. We know exactly when our creamer was made and can ensure optimal freshness by preparing smaller batches more frequently. This approach eliminates the guesswork of expiration dates and the disappointment of spoiled store-bought creamer.
Health benefits multiply when we eliminate artificial preservatives and stabilizers from our coffee routine. We can incorporate wholesome ingredients like real vanilla extract, pure maple syrup, or organic coconut milk instead of synthetic alternatives. This conscious choice supports our overall wellness goals while maintaining the creamy texture we crave.


Essential Equipment and Tools

Creating homemade coffee creamer requires minimal equipment that most home cooks already have in their kitchens. We recommend gathering these basic tools before starting your creamer-making journey to ensure a smooth and efficient process.
Mixing and Blending Tools
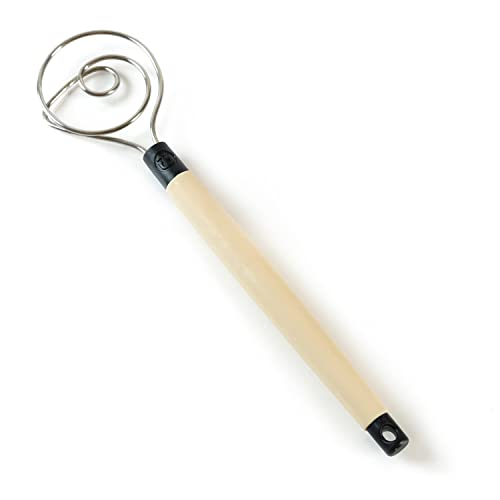
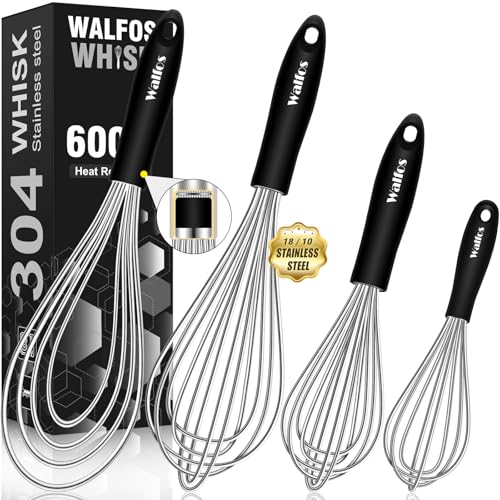
A medium-sized mixing bowl serves as our primary workspace for combining ingredients. Whisk or electric hand mixer helps achieve the perfect consistency and ensures all components blend seamlessly together. For those who prefer ultra-smooth results, an immersion blender works exceptionally well to eliminate any lumps or separation.
Measuring Equipment
Accurate measurements create consistently delicious results every time. We use standard measuring cups for liquid ingredients like milk or cream. Measuring spoons handle smaller amounts of vanilla extract, spices, and sweeteners with precision. A kitchen scale provides the most accurate measurements for powdered ingredients when following weight-based recipes.
Storage Answers
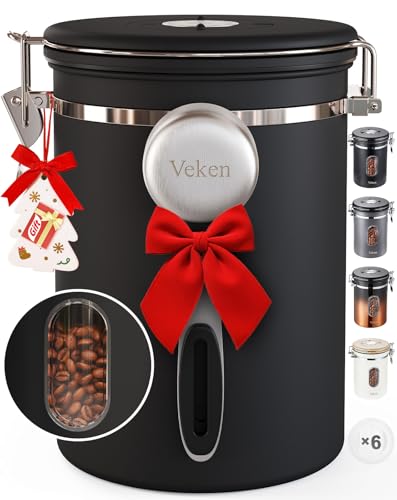
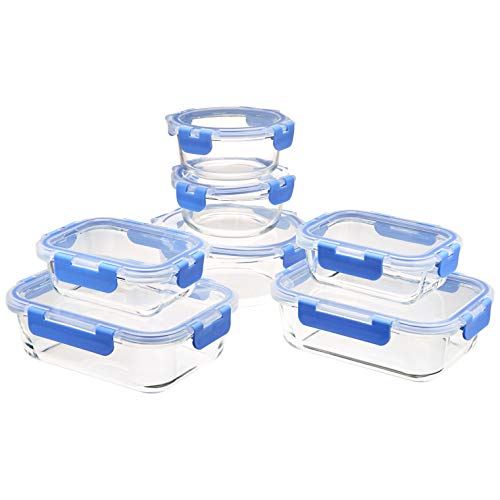
Glass mason jars offer the ideal storage option for homemade coffee creamer. These containers maintain freshness while allowing us to see the contents at a peek. We prefer 16-ounce jars for single batches or 32-ounce jars for larger quantities. Airtight plastic containers work as alternatives but glass provides superior flavor preservation.
Optional Enhancement Tools
A fine-mesh strainer removes any undissolved particles for silky smooth creamer. Small funnel makes transferring creamer from mixing bowl to storage container mess-free. Labels help track flavors and preparation dates when making multiple varieties. Some home cooks find a small saucepan useful for warming ingredients to help dissolve sweeteners more effectively.
Equipment Maintenance
Clean equipment ensures fresh flavors in every batch. We wash all tools with warm soapy water immediately after use. Glass storage containers require thorough cleaning between different flavor varieties to prevent taste transfer. Proper equipment care extends the life of our tools and maintains the quality of our homemade creamer.


Basic Ingredients for Homemade Coffee Creamer

Creating your own coffee creamer starts with selecting the right foundation ingredients. We’ll explore each category to help you build the perfect creamer that matches your taste preferences and dietary needs.
Dairy-Based Options
Whole milk serves as the most traditional base for homemade coffee creamer. We recommend using whole milk for its rich texture and natural creaminess that blends seamlessly with coffee. Heavy cream creates the ultimate luxury creamer with an incredibly smooth consistency. Half and half offers a middle ground between milk and cream providing balanced richness without being too heavy.
Evaporated milk delivers concentrated flavor and extended shelf life making it perfect for those who want convenience. Sweetened condensed milk acts as both base and sweetener combining creamy texture with built-in sweetness. Fresh buttermilk adds tangy complexity that works especially well in flavored variations.
Non-Dairy Alternatives
Coconut milk provides rich tropical flavor and natural thickness that rivals traditional dairy options. We find canned coconut milk works better than carton versions for achieving proper consistency. Cashew milk creates an exceptionally smooth texture when made fresh and blends beautifully with coffee.
Almond milk offers a light nutty flavor that complements coffee without overpowering it. Oat milk delivers natural sweetness and creamy mouthfeel that many coffee enthusiasts prefer. Soy milk provides protein content and neutral flavor that works well as a dairy substitute.
Macadamia milk creates luxurious texture with subtle nutty undertones. Hemp milk adds nutritional benefits while maintaining smooth consistency perfect for daily coffee routines.
Sweetening Options
Granulated sugar dissolves easily and provides clean sweetness without competing flavors. We recommend superfine sugar for even quicker dissolution and smoother texture. Brown sugar adds caramel notes that enhance coffee’s natural flavors beautifully.
Maple syrup brings natural sweetness with complex flavor depth that elevates your coffee experience. Honey offers floral notes and natural sweetness but requires gentle warming to blend properly. Agave nectar provides neutral sweetness that works well with various flavor combinations.
Stevia extract delivers intense sweetness without calories making it ideal for health-conscious coffee lovers. Monk fruit sweetener offers natural zero-calorie sweetness with no bitter aftertaste. Coconut sugar adds subtle caramel flavor while maintaining lower glycemic impact than regular sugar.
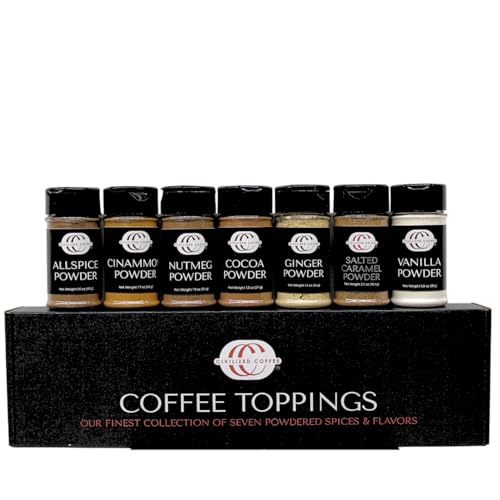
Flavor Enhancers
Pure vanilla extract transforms basic creamer into café-quality indulgence with just a few drops. We always use real vanilla extract rather than artificial versions for authentic flavor. Cocoa powder creates rich chocolate notes that satisfy dessert cravings in your morning coffee.
Cinnamon adds warm spice that pairs perfectly with coffee’s natural bitterness. Nutmeg provides subtle complexity that enhances both sweet and savory flavor profiles. Cardamom delivers exotic warmth that creates sophisticated coffee shop flavors at home.
Almond extract offers intense nutty flavor that requires careful measurement due to its strength. Peppermint extract creates refreshing holiday-inspired creamer perfect for seasonal enjoyment. Sea salt enhances sweetness while adding depth that balances coffee’s natural acidity.
Espresso powder intensifies coffee flavor creating double-strength richness for true coffee enthusiasts. Orange zest adds bright citrus notes that complement chocolate and vanilla variations beautifully.


Classic Vanilla Coffee Creamer Recipe

Now that we’ve covered the essential ingredients and equipment, let’s jump into our most popular recipe that perfectly balances sweetness and vanilla flavor. This classic version serves as the foundation for countless variations you can explore later.
Ingredients
- 1 cup whole milk
- 1/2 cup heavy cream
- 1/3 cup granulated sugar
- 2 teaspoons pure vanilla extract
- Pinch of sea salt
Instructions
- Combine the dairy base: Pour the whole milk and heavy cream into a medium-sized mixing bowl. We find this ratio creates the perfect creamy consistency without being too thick or too thin.
- Add the sugar: Sprinkle the granulated sugar into the milk mixture. The sugar dissolves better when added gradually rather than all at once.
- Whisk thoroughly: Use a whisk or electric hand mixer to blend the ingredients for 2-3 minutes until the sugar completely dissolves. We recommend whisking vigorously to ensure no sugar crystals remain.
- Incorporate the vanilla: Add the pure vanilla extract and pinch of sea salt to the mixture. The salt enhances the vanilla flavor and balances the sweetness perfectly.
- Final mixing: Whisk the creamer for another 30 seconds to fully incorporate all ingredients. Taste and adjust sweetness if needed.
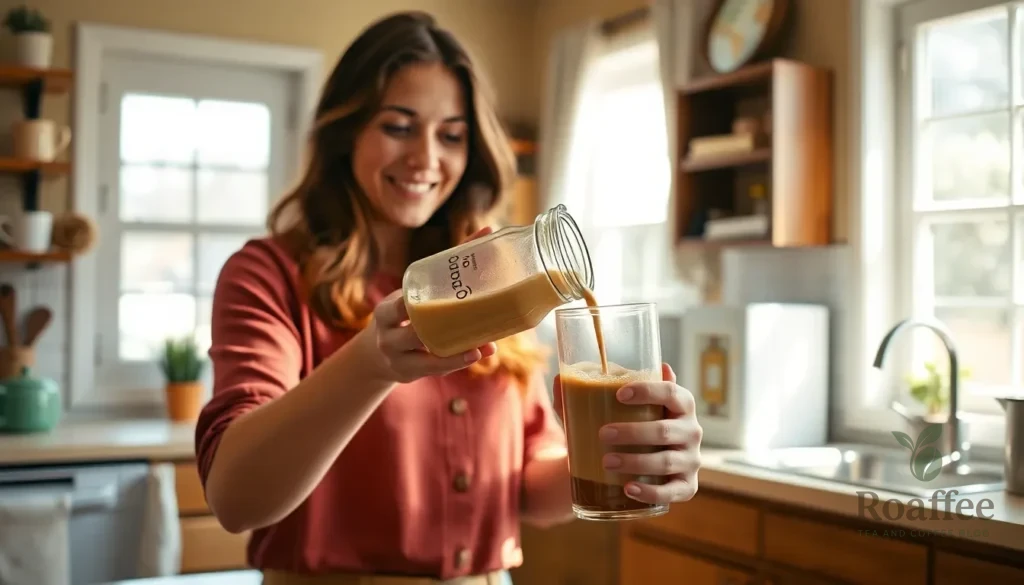
- Store properly: Transfer the finished creamer to a clean glass mason jar using a funnel if available. Seal tightly and refrigerate immediately.
- Shake before use: Always give your homemade creamer a good shake before adding it to your coffee since natural separation occurs during storage.


Popular Flavor Variations

Building on our classic vanilla recipe, we can create exciting flavor combinations that transform your daily coffee routine. These variations use the same base technique while incorporating exact flavor profiles that rival any commercial creamer.
French Vanilla Creamer
French vanilla elevates the classic vanilla with a richer and more complex flavor profile. We combine 1 cup whole milk with 1 cup heavy cream as our base. The sweetening comes from 1/2 cup granulated sugar mixed with 2 tablespoons pure vanilla extract and 1 teaspoon vanilla bean paste for that authentic French vanilla depth. A pinch of sea salt enhances all the flavors beautifully.
Heat the milk and cream mixture in a saucepan over medium heat until it begins to steam. Whisk in the sugar until completely dissolved. Remove from heat and stir in both vanilla extract and vanilla bean paste. The tiny black specks from the vanilla bean paste create that signature French vanilla appearance. Allow the mixture to cool completely before transferring to your storage container.
Chocolate Hazelnut Creamer
This indulgent variation brings café quality flavor to your kitchen counter. Our base starts with 1 cup whole milk and 1 cup heavy cream. We add 1/2 cup granulated sugar along with 3 tablespoons unsweetened cocoa powder and 2 tablespoons hazelnut syrup or 1 teaspoon hazelnut extract. A pinch of sea salt balances the sweetness perfectly.
Whisk the cocoa powder with a small amount of the milk first to prevent lumps from forming. Heat the remaining milk and cream in a saucepan until steaming. Add the cocoa mixture and sugar while whisking constantly. Continue heating until the sugar dissolves completely. Remove from heat and stir in the hazelnut flavoring. Strain the mixture through a fine mesh strainer to ensure smoothness.
Caramel Creamer
Caramel lovers will appreciate this rich and buttery variation that adds warmth to any coffee cup. We use 1 cup whole milk and 1 cup heavy cream as our foundation. The sweetening comes from 1/2 cup brown sugar which provides natural caramel notes. Add 2 tablespoons caramel sauce or 1 teaspoon caramel extract along with 1 teaspoon pure vanilla extract and a generous pinch of sea salt.
Brown sugar creates a deeper flavor than regular granulated sugar in this recipe. Heat the milk and cream mixture while whisking in the brown sugar until it dissolves completely. Remove from heat and stir in the caramel flavoring vanilla extract and salt. The brown sugar gives this creamer a beautiful golden color that looks as good as it tastes.
Seasonal Pumpkin Spice Creamer
Perfect for fall mornings, this seasonal favorite captures the essence of autumn in every sip. Our base includes 1 cup whole milk and 1 cup heavy cream. We sweeten with 1/2 cup brown sugar and add 2 tablespoons pumpkin puree for authentic flavor. The spice blend includes 1 teaspoon ground cinnamon, 1/2 teaspoon ground nutmeg, 1/4 teaspoon ground ginger, and 1/8 teaspoon ground cloves. Pure vanilla extract and sea salt complete this cozy combination.
Whisk the pumpkin puree with a small amount of milk to create a smooth mixture. Heat the remaining milk and cream while adding the brown sugar and spice blend. Stir constantly until the sugar dissolves and the spices are well incorporated. Remove from heat and whisk in the pumpkin mixture and vanilla extract. Strain through a fine mesh strainer to remove any spice particles for a silky smooth texture.


Dairy-Free Coffee Creamer Options

Plant-based alternatives offer the same creamy richness as traditional dairy options while accommodating dietary restrictions and preferences. We can create delicious dairy-free creamers using various non-dairy milk bases that deliver exceptional flavor and texture.
Coconut Milk Creamer
Coconut milk creates the richest and most luxurious dairy-free creamer option available. The natural fats in coconut milk provide an incredibly smooth texture that rivals heavy cream.
Ingredients:
- 1 cup full-fat coconut milk (canned)
- 1/2 cup unsweetened coconut milk (carton)
- 1/3 cup maple syrup
- 1 teaspoon pure vanilla extract
- 1/4 teaspoon sea salt
Instructions:
- Combine full-fat coconut milk and carton coconut milk in a medium mixing bowl
- Whisk in maple syrup until completely dissolved
- Add vanilla extract and sea salt
- Whisk vigorously for 2-3 minutes until smooth and well combined
- Transfer to a clean glass jar and refrigerate for up to 10 days
- Shake well before each use as coconut milk naturally separates
Almond Milk Creamer
Almond milk produces a lighter creamer with a subtle nutty flavor that complements coffee beautifully. This option works perfectly for those seeking a lower-calorie alternative.
Ingredients:
- 1 1/2 cups unsweetened almond milk
- 1/4 cup cashews (soaked for 2 hours)
- 1/4 cup agave nectar
- 1 teaspoon vanilla extract
- Pinch of sea salt
Instructions:
- Drain and rinse soaked cashews thoroughly
- Blend cashews with 1/2 cup almond milk in a high-speed blender until completely smooth
- Add remaining almond milk, agave nectar, vanilla extract, and salt
- Blend on high speed for 60 seconds until creamy
- Strain through fine-mesh strainer if desired for ultra-smooth texture
- Store in refrigerator for up to 7 days
- Stir before using as ingredients may settle
Oat Milk Creamer
Oat milk delivers natural sweetness and incredible creaminess that makes it ideal for coffee creamer. The beta-glucans in oats create a naturally thick consistency without additional thickeners.
Ingredients:
- 1 1/2 cups unsweetened oat milk
- 1/3 cup brown sugar
- 2 tablespoons coconut oil (melted)
- 1 teaspoon vanilla extract
- 1/4 teaspoon cinnamon
- Pinch of sea salt
- Heat oat milk in a small saucepan over medium heat until warm but not boiling
- Remove from heat and whisk in brown sugar until dissolved
- Add melted coconut oil while whisking continuously to prevent separation
- Stir in vanilla extract, cinnamon, and sea salt
- Let cool to room temperature before transferring to storage jar
- Refrigerate for up to 5 days
- Shake vigorously before each use to redistribute ingredients


Sugar-Free and Low-Calorie Alternatives

We understand that many coffee lovers want to enjoy creamy coffee without the added sugar and calories. These sugar-free alternatives provide the same rich texture and sweetness without compromising your health goals.
Stevia-Sweetened Creamer
Our stevia-sweetened creamer delivers exceptional sweetness without any calories or artificial ingredients. This natural alternative provides the perfect balance of creamy richness and gentle sweetness that enhances your coffee experience.
Ingredients:
- 1 cup whole milk
- 1/2 cup heavy cream
- 1/4 teaspoon liquid stevia extract
- 1 teaspoon pure vanilla extract
- 1/8 teaspoon sea salt
Instructions:
- Pour the whole milk and heavy cream into a medium mixing bowl.
- Add the liquid stevia extract and whisk gently to combine the ingredients.
- Incorporate the vanilla extract and sea salt into the mixture.
- Whisk vigorously for 30 seconds until the creamer reaches a smooth consistency.
- Taste and adjust the stevia amount according to your preferred sweetness level.
- Transfer the creamer to a clean glass jar and refrigerate for up to one week.
- Shake well before each use to ensure proper mixing of ingredients.
Monk Fruit Creamer
We love monk fruit sweetener for its zero-calorie profile and natural origin. This creamer option provides intense sweetness without any bitter aftertaste commonly associated with artificial sweeteners.
Ingredients:
- 1 cup unsweetened almond milk
- 1/2 cup coconut cream
- 1/4 teaspoon monk fruit sweetener powder
- 1 teaspoon vanilla extract
- 1/8 teaspoon sea salt
Instructions:
- Combine the almond milk and coconut cream in a medium mixing bowl.
- Sprinkle the monk fruit sweetener powder over the milk mixture.
- Whisk the ingredients together until the sweetener completely dissolves.
- Add the vanilla extract and sea salt to the mixture.
- Continue whisking for 45 seconds to achieve a smooth and creamy texture.
- Test the sweetness level and add more monk fruit sweetener if desired.
- Pour the creamer into a glass storage container and refrigerate.
- Use within 5 days for optimal freshness and flavor quality.
- Stir thoroughly before adding to your coffee as separation may occur naturally.


Storage and Shelf Life

Understanding proper storage and shelf life ensures your homemade coffee creamer maintains its freshness and quality. We’ll explore the best storage methods and how long you can expect your creamer to last.
Proper Storage Techniques
We recommend storing your homemade coffee creamer in clean glass mason jars or airtight containers in the refrigerator. Glass containers prevent flavor absorption and maintain the creamer’s taste integrity better than plastic alternatives. Always ensure your storage container is completely clean and dry before transferring the creamer to prevent bacterial growth.
Keep your creamer stored in the main body of the refrigerator rather than the door compartments. Temperature fluctuations in door storage can affect the creamer’s consistency and shelf life. We suggest storing the creamer toward the back of the refrigerator where temperatures remain most consistent.
Label your containers with the preparation date to track freshness accurately. This simple step helps you monitor how long the creamer has been stored and when it needs replacement. Shake the container gently before each use since natural separation occurs with homemade creamers containing no stabilizers.
How Long Homemade Creamer Lasts
Different types of homemade coffee creamers have varying shelf lives depending on their ingredients and preparation methods. Here’s a breakdown of expected storage times:
| Creamer Type | Refrigerator Storage | Notes |
|---|---|---|
| Dairy-based creamer | 5-7 days | Contains fresh milk and cream |
| Coconut milk creamer | 7-10 days | Coconut milk has longer shelf life |
| Almond milk creamer | 5-7 days | Similar to dairy-based options |
| Oat milk creamer | 5-7 days | Comparable to other plant-based options |
| Sugar-free varieties | 5-7 days | Shelf life matches base ingredients |
Dairy-based creamers typically last five to seven days when stored properly in the refrigerator. The fresh milk and cream components determine this timeframe since they’re the most perishable ingredients in your homemade creamer. Always check for signs of spoilage before use including off odors or curdled texture.
Plant-based creamers generally maintain quality for seven to ten days depending on the base milk used. Coconut milk creamers tend to last slightly longer than other non-dairy options due to coconut milk’s natural preservative properties. Almond and oat milk creamers follow similar timelines to dairy-based versions.
We strongly advise against freezing homemade coffee creamers as this can cause separation and texture changes that affect the final product quality. The cream components may separate during thawing and won’t recombine properly even with vigorous shaking. Fresh preparation in smaller batches ensures optimal taste and texture for your daily coffee routine.


Tips for Perfect Consistency

Achieving the perfect consistency for homemade coffee creamer requires attention to detail and proper technique. We’ve learned through countless batches that the key lies in understanding how different ingredients interact and following exact preparation methods.
Temperature matters significantly when combining ingredients. We always bring dairy components to room temperature before mixing to prevent separation and ensure smooth blending. Cold ingredients often resist proper incorporation and can create lumps or uneven texture throughout your creamer.
Whisking technique determines final results more than most people realize. We recommend using a figure-eight motion when whisking by hand, which creates better emulsification than circular motions. Electric mixers work exceptionally well for larger batches, but we suggest starting on low speed and gradually increasing to prevent splattering.
Straining eliminates unwanted particles that can affect mouthfeel. We pass our finished creamer through a fine-mesh strainer to remove any undissolved sugar crystals or ingredient clumps. This extra step takes only minutes but dramatically improves the final product’s smoothness.
Sweetener integration requires exact timing for optimal dissolution. We add granulated sugar during the mixing process while liquid sweeteners like maple syrup or honey blend better when added after the base mixture reaches room temperature. Powdered sweeteners dissolve more readily when mixed with a small amount of warm liquid before adding to the main batch.
Fat content directly impacts creaminess and consistency. We’ve found that using a combination of whole milk and heavy cream creates the ideal balance between richness and pourability. Higher fat content produces thicker consistency while lower fat creates a lighter texture that may not provide the desired mouthfeel.
Emulsification prevents separation during storage and use. We always shake or stir our creamer thoroughly before each use, as natural separation occurs in homemade versions without commercial stabilizers. Adding a pinch of sea salt helps maintain emulsification and enhances flavor complexity.
Storage container selection affects consistency over time. We use glass mason jars exclusively because they don’t absorb flavors or odors that can alter taste. Plastic containers may impart unwanted flavors and don’t maintain temperature as consistently as glass options.
Batch size influences texture quality in the final product. We recommend making smaller batches that you’ll use within a week rather than large quantities that may degrade in quality. Fresh batches consistently deliver better texture and flavor than creamers stored for extended periods.


Troubleshooting Common Issues

Even the most carefully crafted homemade coffee creamer can present challenges during preparation or storage. We’ve identified the most common problems and their answers to help you achieve creamer perfection every time.
Creamer Too Thick
Thick creamer often results from using too much heavy cream or coconut cream in your recipe. We recommend gradually adding warm milk or your preferred liquid base while whisking continuously to achieve the desired consistency. Start with one tablespoon at a time until the texture flows smoothly from a spoon.
Temperature plays a crucial role in creamer thickness. Cold ingredients naturally create a thicker consistency than room temperature components. Allow your creamer to sit at room temperature for 10-15 minutes before use if it seems too thick straight from the refrigerator.
Fat content significantly impacts thickness levels. Substitute half of the heavy cream with whole milk or use a lighter alternative like half and half to reduce the overall richness. For dairy-free options we suggest mixing coconut milk with a thinner plant-based milk like almond or oat milk.
Creamer Separating
Separation occurs when fat and liquid components don’t properly emulsify during mixing. We always bring all ingredients to room temperature before combining them to prevent this common issue. Cold ingredients shock the mixture and create an unstable emulsion that leads to separation.
Insufficient mixing causes many separation problems. Use a whisk or electric hand mixer for at least 2-3 minutes to ensure all components blend thoroughly. The mixture should appear smooth and uniform without visible streaks or lumps.
Adding sweeteners too quickly can destabilize the emulsion. We dissolve granulated sugar or other dry sweeteners in a small amount of warm liquid before incorporating them into the main mixture. This technique prevents crystallization and maintains smooth consistency.
Storage temperature affects separation rates. Keep your creamer in the main refrigerator compartment rather than the door where temperature fluctuations occur. Give the container a gentle shake before each use to redistribute any minor separation that may develop over time.
Lack of Flavor
Insufficient flavoring agents result in bland coffee creamer that fails to enhance your coffee experience. We recommend increasing vanilla extract by half-teaspoon increments until you achieve the desired taste intensity. Pure vanilla extract provides stronger flavor than imitation versions.
Timing affects flavor development in homemade creamer. Allow your mixture to rest for at least 30 minutes after preparation so flavors can properly meld together. Overnight refrigeration further enhances taste complexity and creates a more balanced flavor profile.
Quality ingredients make a important difference in overall taste. We use pure extracts rather than artificial flavorings whenever possible. Fresh spices like cinnamon or nutmeg should be finely ground to prevent settling and ensure even distribution throughout the creamer.
Sweetness levels can mask or enhance other flavors in your creamer. Balance is essential for optimal taste. Start with less sweetener than you think you need and adjust gradually. Taste testing throughout the process helps you achieve the perfect flavor combination for your preferences.
Make-Ahead Instructions

Preparing homemade coffee creamer in advance transforms your morning routine into a seamless experience. We recommend creating larger batches during weekend preparation sessions to ensure fresh creamer throughout the week. The process requires minimal time investment while delivering maximum convenience for busy mornings.
Batch Preparation Guidelines
Start by doubling or tripling your favorite creamer recipe on Sunday evenings. This approach provides sufficient quantities for 5-7 days of coffee enjoyment. Store prepared creamer in multiple small containers rather than one large batch to maintain optimal freshness. We suggest using 8-ounce mason jars that provide perfect single-week portions.
Advanced Preparation Schedule
| Preparation Day | Batch Size | Storage Duration | Best For |
|---|---|---|---|
| Sunday | 2-3 cups | 5-7 days | Dairy-based creamers |
| Saturday | 4 cups | 7-10 days | Coconut milk creamers |
| Friday | 1-2 cups | 3-5 days | Fresh herb flavors |
Flavor Development Techniques
Allow flavor-infused creamers to rest for 24 hours before first use. This resting period enables vanilla extract and spices to fully integrate with the base ingredients. Complex flavors like cinnamon cardamom or chocolate hazelnut benefit from longer development times. We notice important flavor improvement when seasonal creamers like pumpkin spice mature overnight.
Make-Ahead Storage Systems
Label each container with preparation dates and flavor profiles using waterproof markers. Organize containers in your refrigerator with oldest batches positioned at the front for easy access. Keep backup ingredients stocked in your pantry to maintain consistent creamer availability. This system prevents morning disappointments when your favorite creamer runs low.
Weekly Preparation Routine
Sunday becomes creamer preparation day when you establish this routine. Wash all containers thoroughly and prepare ingredient mise en place before beginning. Mix your base recipe first then divide portions for different flavor variations. This method allows you to create multiple creamer types from one preparation session.
Conclusion
Making your own coffee creamer transforms your daily coffee ritual into something truly special. We’ve shown you that creating delicious homemade creamer isn’t just possible—it’s surprisingly simple and rewarding.
The journey from basic ingredients to creamy perfection puts you in complete control of your coffee experience. Whether you prefer classic vanilla sweetness or adventurous seasonal flavors your homemade creamer will elevate every cup.
Remember that practice makes perfect and don’t be afraid to experiment with different combinations. Your taste buds will thank you and your wallet will appreciate the savings. Start with our basic recipe and let your creativity guide you toward your perfect cup of coffee.
Frequently Asked Questions
What are the main benefits of making homemade coffee creamer?
Homemade coffee creamer offers complete control over ingredients, avoiding harmful additives like hydrogenated oils and high fructose corn syrup. It’s significantly more cost-effective than store-bought options, provides unlimited customization for flavors and sweetness levels, guarantees freshness, and supports better health through wholesome ingredients while maintaining the desired creamy texture.
What equipment do I need to make homemade coffee creamer?
You’ll need basic kitchen tools: a medium-sized mixing bowl, whisk or electric hand mixer, measuring cups and spoons, and glass mason jars for storage. Optional tools include a fine-mesh strainer and small funnel. Most kitchens already have these items, making homemade creamer accessible without special equipment purchases.
What ingredients can I use for dairy-based coffee creamer?
Popular dairy options include whole milk, heavy cream, half and half, evaporated milk, sweetened condensed milk, and fresh buttermilk. These provide rich, creamy textures and can be combined in various ratios to achieve your preferred consistency and flavor profile for the perfect homemade creamer.
What are the best non-dairy alternatives for coffee creamer?
Excellent non-dairy options include coconut milk, cashew milk, almond milk, oat milk, soy milk, macadamia milk, and hemp milk. Each offers unique flavor profiles and textures, allowing you to create delicious plant-based creamers that accommodate dietary restrictions while maintaining creamy richness.
How can I sweeten my homemade coffee creamer?
You can use granulated sugar, brown sugar, maple syrup, honey, agave nectar, stevia extract, monk fruit sweetener, or coconut sugar. Each sweetener provides different flavor notes and sweetness levels, allowing you to customize your creamer’s taste while accommodating various dietary preferences and health goals.
What flavor enhancers can I add to my coffee creamer?
Popular flavor enhancers include pure vanilla extract, cocoa powder, cinnamon, nutmeg, cardamom, almond extract, peppermint extract, sea salt, espresso powder, and orange zest. These ingredients allow endless customization possibilities, from classic vanilla to seasonal favorites like pumpkin spice or rich chocolate hazelnut combinations.
How long does homemade coffee creamer last?
Dairy-based creamers typically last 5-7 days when stored properly in the refrigerator, while coconut milk creamers can last 7-10 days. Store in clean glass mason jars or airtight containers away from temperature fluctuations. Always label containers with preparation dates and avoid freezing as it affects texture.
Can I make sugar-free coffee creamer at home?
Yes! You can create delicious sugar-free creamers using stevia extract or monk fruit sweetener. These natural alternatives provide sweetness without added calories or the bitter aftertaste of artificial sweeteners. Both options blend well with dairy and non-dairy bases while maintaining creamy texture and rich flavor.
What should I do if my homemade creamer separates?
Separation often occurs due to temperature differences or inadequate mixing. Bring all dairy components to room temperature before combining, whisk thoroughly using a figure-eight motion, and consider straining the finished creamer. If separation occurs after storage, simply shake well before use to re-emulsify the ingredients.
Can I make coffee creamer in advance?
Absolutely! Prepare larger batches during weekend sessions and store in small containers for optimal freshness. Double or triple your favorite recipes, allow infused creamers to rest 24 hours for enhanced flavor development, and establish a weekly preparation routine to ensure consistent availability of fresh homemade creamer.