There’s something magical about that first sip of a perfectly crafted cappuccino – the velvety microfoam dancing on your tongue while rich espresso awakens your senses. We’ve all experienced that moment of pure coffee bliss at our favorite café but wondered if we could recreate it at home.
The good news? You absolutely can master the art of cappuccino making without expensive equipment or barista training. This beloved Italian coffee drink is surprisingly simple when you understand the fundamentals: equal parts espresso, steamed milk, and that signature layer of creamy foam that makes every cup Instagram-worthy.
We’re about to share our foolproof cappuccino recipe that’ll transform your morning routine and impress your guests. Whether you’re using a fancy espresso machine or working with basic kitchen tools, you’ll discover techniques that bring café-quality results straight to your kitchen counter.
Ingredients
Creating the perfect cappuccino at home requires just a few simple ingredients that you likely already have in your kitchen. Each component plays a crucial role in achieving that signature café-quality taste and texture.
For the Espresso Base
- 2 tablespoons freshly ground espresso beans (dark roast preferred)
- 2 ounces hot water (195-205°F)
- 1 shot espresso (1 ounce) per cappuccino
For the Steamed Milk
- 4 ounces whole milk (cold from refrigerator)
- 2% milk as alternative option
- Oat milk or almond milk for dairy-free version
For the Milk Foam
- 2 ounces of the same milk used for steaming
- Additional 1 ounce milk for extra foam volume
- Pinch of sugar to stabilize foam (optional)
Optional Toppings and Flavorings
- Cocoa powder for dusting
- Ground cinnamon
- Vanilla extract (1/4 teaspoon)
- Caramel syrup (1 tablespoon)
- Hazelnut syrup (1 tablespoon)
- Brown sugar (1 teaspoon)
- Whipped cream for extra indulgence
Equipment Needed
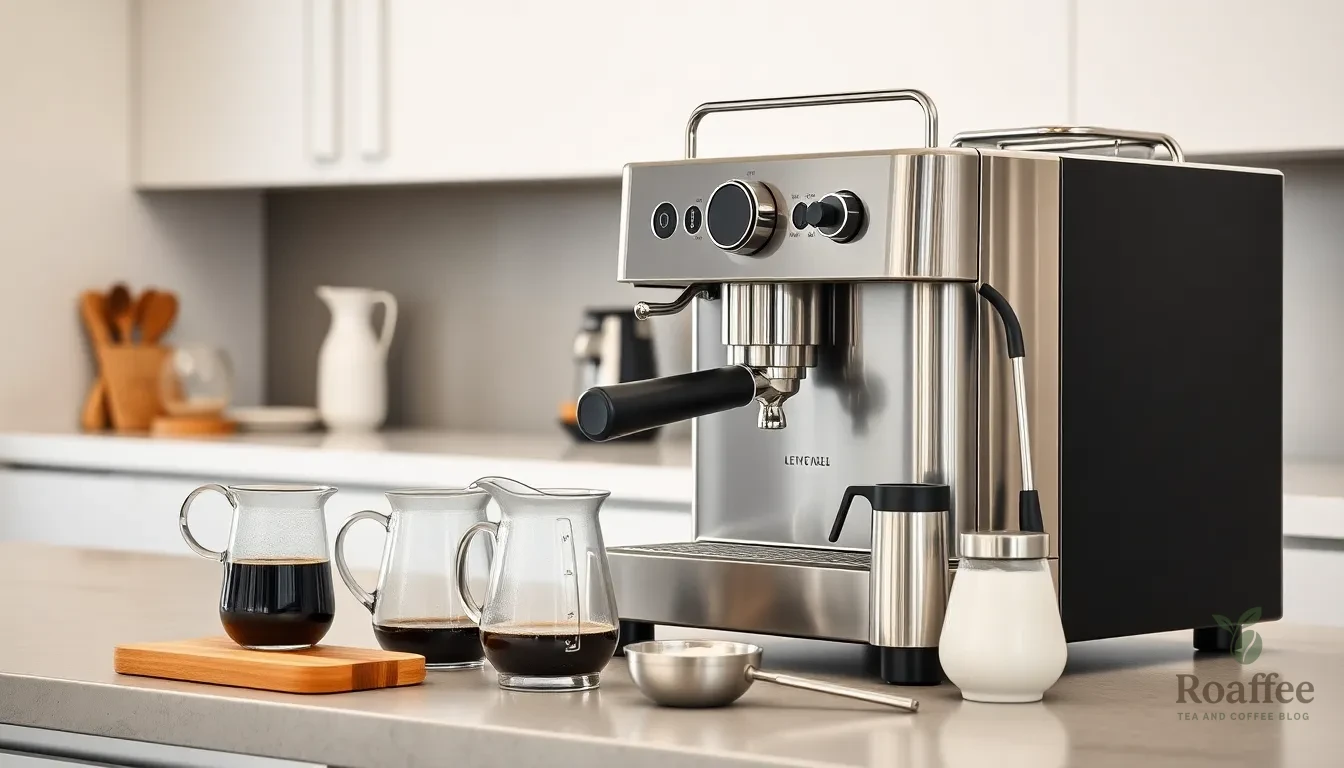
Creating café-quality cappuccinos at home requires exact equipment to achieve the perfect balance of rich espresso and velvety steamed milk. We’ve compiled a comprehensive list of essential tools that will transform your kitchen into a professional coffee station.
| Equipment | Purpose | Notes |
|---|---|---|
| Espresso machine | Pulling espresso shots; steaming milk | Essential for authentic cappuccino |
| Coffee grinder | Grinding beans finely and consistently | Burr grinders preferred |
| Milk steaming pitcher | Steaming and frothing milk | Stainless steel with narrow spout recommended |
| Thermometer | Monitoring milk temperature | Helps achieve ideal steaming between 140-150°F |
| Cappuccino cup | Serving the drink | Typically 5-6 oz ceramic cup |
| Milk frother (optional) | Frothing milk without espresso machine | For alternative methods |
Essential Equipment
Espresso Machine
An espresso machine stands as the cornerstone of authentic cappuccino preparation. This device pulls espresso shots under approximately 9 bars of pressure while simultaneously steaming milk to create the perfect microfoam. Professional-grade machines deliver consistent results, though quality home models can produce exceptional cappuccinos when operated correctly.
Coffee Grinder
Freshly ground beans make an extraordinary difference in flavor extraction. Burr grinders provide the most consistent particle size, ensuring optimal extraction during the 25-second brewing process. Blade grinders work as alternatives, though they produce less uniform grounds that may affect taste consistency.
Milk Steaming Pitcher
Stainless steel pitchers with narrow spouts give us precise control over milk pouring and foam creation. The narrow spout allows for delicate latte art while the stainless steel construction conducts heat evenly during the steaming process.
Thermometer
Temperature control separates good cappuccinos from exceptional ones. Monitoring milk temperature between 140-150°F ensures optimal foam texture without scalding the milk proteins that create creamy microfoam.
Alternative Equipment Options
Manual Frothers
Hand-held milk frothers offer budget-friendly alternatives to expensive espresso machines. These devices create satisfactory foam when paired with heated milk, though the texture may differ from steam-generated microfoam.
Alternative Brewing Methods
AeroPress, Moka pot, or French press systems can substitute for espresso machines when necessary. These methods produce concentrated coffee that approximates espresso strength, allowing us to create cappuccino-style drinks without traditional equipment.
Serving Cups
Traditional cappuccino cups hold 5-6 ounces and feature wide brims that showcase the drink’s layered appearance. Ceramic construction retains heat while providing the classic presentation that elevates the entire drinking experience.
Instructions

Now that we have our ingredients and equipment ready, let’s walk through the precise steps to create a perfect cappuccino at home. We’ll break down each stage to ensure you achieve that coveted café-quality balance of rich espresso and velvety milk foam.
Prep the Coffee
We start by measuring 7 grams of fresh espresso grounds per shot for optimal extraction. The grind should be fine and suitable for espresso brewing to ensure proper flavor concentration. Using an espresso machine, we set the pressure to approximately 9 bars, which is the standard for professional-grade extraction. Our brewing time targets around 25 seconds to pull the perfect shot. This timing allows us to extract approximately 20-25 ml of espresso with the ideal balance of oils and flavors.
Brew the Espresso
We pull a double shot of espresso into a warmed cup, targeting approximately 2 ounces total. The espresso should appear rich and concentrated with a beautiful crema layer on top. This foundation provides the robust coffee base that will support our steamed milk and foam. Warming the cup beforehand helps maintain the espresso’s temperature and prevents thermal shock when we add the milk components.
Steam the Milk
We pour around 4 ounces (125 ml) of cold milk into our metal pitcher for the perfect milk-to-espresso ratio. The steam wand goes just below the surface of the milk before we turn it on. We position the wand tip near the pitcher’s side to create a gentle vortex that helps incorporate air evenly. Our target temperature is 150°F (65°C), which provides the ideal heat without scalding the milk proteins.
Create the Perfect Foam
We incorporate air by keeping the steam wand near the surface briefly during the initial heating phase. The milk volume should approximately double as we generate small, dense microfoam bubbles. Once our milk reaches temperature, we swirl the pitcher gently to even out the texture and create smooth, creamy foam. The perfect foam measures about 1 cm thick and appears snowy-white with a velvety consistency.
Assemble Your Cappuccino
We pour our double shot of espresso into the serving cup first. Next, we gently add the steamed milk, followed by our thick layer of foamed milk to achieve the classic one-third ratio of espresso, steamed milk, and foam. For finishing touches, we can dust the foam with cocoa powder or cinnamon to enhance both flavor and presentation. Optional flavor syrups like vanilla or chocolate can be incorporated during the milk steaming process for customized taste preferences.
Directions for Different Cappuccino Variations

Once you’ve mastered the fundamental cappuccino technique, exploring different variations opens up a industry of flavor possibilities. Each variation builds upon the classic foundation while introducing unique elements that transform your coffee experience.
Classic Italian Cappuccino
We begin with the traditional Italian approach that maintains the perfect balance of equal parts espresso, steamed milk, and milk froth. This time-honored method requires precision in both temperature and technique.
Step-by-Step Instructions:
- Brew the espresso using your preferred method, ensuring a rich extraction with a golden crema layer
- Steam the milk to achieve a creamy texture with microfoam, maintaining the ideal temperature of 150-160°F (65-71°C)
- Pour the steamed milk over the espresso in a steady stream, creating a seamless blend
- Top with milk froth using a spoon to create a thick, velvety layer that sits proudly above the liquid
- Serve immediately with an optional sprinkle of cocoa powder or cinnamon for the finishing touch
The classic Italian cappuccino pairs beautifully with small sweet treats like biscotti or mini pastries that complement rather than compete with the coffee’s natural flavors.
Flavored Cappuccino Options
Flavored variations allow us to customize our cappuccino experience while preserving the essential coffee character. The key lies in using restraint when adding syrups to avoid overwhelming the espresso’s natural complexity.
Popular Flavor Combinations:
| Flavor Type | Key Ingredients | Application Method | Special Notes |
|---|---|---|---|
| Vanilla Cappuccino | Vanilla syrup or extract | Add to espresso before milk | Madagascar vanilla provides the richest flavor |
| Caramel Cappuccino | Caramel syrup | Mix with espresso | Perfect for those preferring sweeter profiles |
| Hazelnut Cappuccino | Hazelnut syrup or ground hazelnuts | Syrup in espresso; nuts as topping | Roasted ground hazelnuts mixed with sugar create authentic flavor |
Preparation Steps:
- Add flavoring to the freshly brewed espresso, starting with just half a teaspoon of syrup
- Stir gently to incorporate the flavor without disrupting the crema
- Steam the milk using the same technique as the classic version
- Pour and top following the traditional method
- Garnish creatively with flavored toppings like hazelnut sugar mixture instead of cocoa powder
Remember that less is more when it comes to flavored syrups. We want to enhance the coffee experience rather than mask it completely.
Iced Cappuccino
The iced version transforms our beloved hot cappuccino into a refreshing cold beverage perfect for warmer weather while maintaining the signature velvety texture we love.
Cold Preparation Method:
- Brew the espresso and allow it to cool to room temperature, or prepare it directly over ice for immediate cooling
- Fill a glass with ice cubes, leaving room for the liquid components
- Add the cooled espresso over the ice and stir gently to distribute the flavor
- Froth cold milk using a frother or steam wand, creating the same microfoam texture as the hot version
- Pour the frothed milk over the iced espresso, maintaining the classic proportions
- Finish with cinnamon dusting for added aroma and visual appeal
The cold frothing technique requires slightly more effort since cold milk doesn’t foam as readily as heated milk. We recommend using whole milk for the best texture results, though alternatives work well with proper technique.
Temperature Considerations:
| Component | Temperature | Timing |
|---|---|---|
| Espresso | Room temperature or chilled | Can be prepared ahead |
| Milk | Cold (refrigerated) | Froth immediately before serving |
| Serving | Immediately | Prevents ice dilution |
This refreshing variation retains all the sophisticated flavors of traditional cappuccino while providing the cooling satisfaction perfect for hot days or afternoon treats.
Tips for Perfect Cappuccino at Home

We’ve discovered that achieving café-quality cappuccinos requires attention to several key details that can make or break your coffee experience. Preheating your cup stands as our most crucial first step because it maintains the optimal temperature throughout the entire drink. Cold cups immediately cool down the espresso and disrupt the delicate balance we’re working to create.
Working quickly becomes essential once you begin combining ingredients. The foam stays intact only when we move swiftly from steaming to pouring, preventing the delicate microfoam from collapsing. We recommend having your preheated cup ready before you start the milk steaming process.
Temperature control requires precision for both components. We heat milk to exactly 140-150°F (60-65°C) using a thermometer rather than guessing. This temperature range ensures the milk remains hot enough to complement the espresso without scalding, which would create an unpleasant bitter taste.
Whole milk creates the best foam texture in our experience, though we’ve found success with oat milk as a plant-based alternative. The fat content in whole milk produces that signature creamy, velvety foam that defines a perfect cappuccino. Other milk alternatives often produce less stable foam that dissipates quickly.
Coffee strength balance determines whether your cappuccino tastes like coffee or merely milk. We ensure the espresso remains rich and concentrated to cut through the milk’s natural sweetness. The coffee should taste strong enough to be noticeable in every sip, not overwhelmed by the dairy components.
Practice makes perfect with frothing technique particularly. Getting the right texture takes several attempts as we learn to position the steam wand correctly and create that gentle vortex motion. We’ve found that starting with the wand just below the milk surface and gradually lowering the pitcher creates the most consistent results.
Maintaining the 1:1:1 ratio of espresso, steamed milk, and foam ensures authentic cappuccino proportions. We measure approximately 1 ounce of espresso with 3 ounces of steamed milk, topped with a thick foam layer. This traditional balance prevents the drink from becoming too milky or too coffee-forward.
Garnishing adds the final touch without overwhelming the coffee’s natural flavors. We lightly dust the foam with cinnamon or cocoa powder, using restraint to enhance rather than mask the cappuccino’s inherent taste profile.
Make-Ahead Instructions

We can prepare several cappuccino components in advance to streamline our morning coffee routine. The espresso shots form the foundation of our cappuccino and should be pulled fresh for optimal flavor and crema. But, we can grind our coffee beans the night before and store them in an airtight container to save precious minutes during busy mornings.
Our milk preparation offers more flexibility for advance planning. We can measure out the exact amount of milk needed for our cappuccino and store it in the refrigerator overnight. Cold milk actually steams better than room temperature milk, creating that dense microfoam we desire for the perfect 1:1:1 ratio of espresso, steamed milk, and foam.
Prepping stations becomes crucial when we want to serve multiple cappuccinos efficiently. We should arrange our cappuccino cups, milk steaming pitcher, and any desired toppings like cocoa powder or cinnamon within easy reach. Preheating our cups by filling them with hot water while we prepare other components ensures our cappuccino maintains its ideal temperature of 140-150°F.
Sugar and flavorings integrate best when added before brewing the espresso shots. We can pre-measure vanilla syrup, honey, or maple syrup into our cups the night before. This technique allows the sweeteners to dissolve completely when we add the hot espresso, creating a more balanced flavor profile.
Equipment preparation saves valuable time during the actual brewing process. We should clean our espresso machine portafilter and steam wand the evening before, ensuring they’re ready for immediate use. Our milk steaming pitcher can be chilled in the refrigerator overnight, which actually helps create better foam texture when steaming begins.
The key limitation involves the steamed milk and foam components, which cannot be prepared in advance. Milk foam loses its stiff, creamy texture within minutes of creation, making fresh preparation essential for achieving that authentic cappuccino experience we’re seeking.
Serving Suggestions

We enhance our cappuccino experience by serving it in prewarmed cups to maintain the perfect temperature throughout our drinking session. Warming the cup prevents the ceramic from drawing heat away from our carefully crafted beverage and keeps that velvety foam intact longer.
Our favorite finishing touch involves a light dusting of cocoa powder across the foam surface. This classic presentation adds a subtle chocolate note that complements the espresso without overpowering the delicate milk flavors. We apply the cocoa powder through a fine mesh strainer for even distribution.
Cinnamon offers another aromatic option that pairs beautifully with cappuccino’s creamy texture. We sprinkle ground cinnamon directly over the foam or use a stencil to create decorative patterns. The warm spice enhances the coffee’s natural sweetness and adds visual appeal to our presentation.
For those seeking richer indulgence we add a small dollop of whipped cream on top of the traditional foam layer. This creates a luxurious texture contrast and transforms our cappuccino into a more dessert-like experience. The whipped cream melts slowly into the drink providing continuous richness.
We serve cappuccinos immediately after preparation to preserve the foam’s ideal texture and temperature. The microfoam begins to separate within minutes so prompt service ensures our guests experience the drink at its peak quality.
Pairing suggestions include light pastries or biscotti that complement rather than compete with the cappuccino’s balanced flavors. We avoid heavy foods that might overwhelm the delicate coffee and milk harmony we’ve worked to achieve.
Our serving temperature should reach between 150-160°F for optimal flavor extraction and comfortable drinking. We monitor this carefully since overheated milk develops a scalded taste that diminishes the cappuccino’s appeal.
Storage and Reheating

We understand that brewing fresh cappuccinos every time isn’t always practical, so proper storage and reheating techniques become essential for maintaining quality. Coffee beans and ground coffee require exact storage conditions to preserve their flavor and aroma for future cappuccino preparations.
Proper Coffee Storage
Store your coffee beans or ground coffee in airtight containers made of ceramic, glass, or non-reactive metal to maintain freshness. We recommend avoiding moisture, heat, light, and strong odors that can compromise the flavor profile of your coffee. Refrigeration should be avoided due to moisture that accelerates deterioration of the coffee’s quality.
| Storage Factor | Recommendation | Reason |
|---|---|---|
| Container Material | Ceramic, glass, or non-reactive metal | Prevents flavor contamination |
| Environment | Cool, dry, dark place | Avoids moisture and light damage |
| Refrigeration | Not recommended | Moisture accelerates deterioration |
| Vacuum-sealed packaging | Use until opened | Preserves roasted coffee for extended periods |
Vacuum-sealed packaging can preserve roasted coffee for extended periods until opened. Once you break the seal, transfer the coffee to an appropriate airtight container following our storage guidelines.
Reheating Cappuccino
Reheating a cappuccino presents unique challenges since the process can affect the quality of foam and texture. We recommend gentle reheating methods to preserve as much of the original quality as possible.
The best approach involves warming milk separately using low heat or a microwave in short bursts. Combine the reheated milk with fresh espresso if possible rather than reheating the entire cappuccino together. This method helps maintain better texture and flavor integrity.
Avoid overheating during the reheating process as it can scald the milk and degrade the overall flavor profile. We suggest monitoring the temperature closely and stopping the heating process once the milk reaches approximately 140-150°F.
For optimal taste results, we always recommend freshly preparing the espresso and milk foam rather than storing pre-made cappuccinos for later consumption. The foam quality and texture simply cannot be fully restored once it has settled and cooled.
Conclusion
We’ve covered everything you need to master cappuccino-making at home from selecting the right beans to perfecting that silky microfoam. With these techniques and tips you’ll be creating café-quality cappuccinos that rival your favorite coffee shop.
Remember that practice makes perfect when it comes to steaming milk and pulling espresso shots. Don’t be discouraged if your first few attempts aren’t flawless – even professional baristas took time to develop their skills.
The beauty of making cappuccinos at home lies in the ability to customize every element to your taste preferences. Whether you prefer classic Italian-style or flavored variations you now have the knowledge to create your perfect cup every single time.
Frequently Asked Questions
What are the essential ingredients for making a cappuccino at home?
The essential ingredients include freshly ground espresso beans, hot water, and whole milk (or milk alternatives). Optional ingredients for enhanced flavor include cocoa powder, cinnamon, vanilla extract, and caramel syrup. The key is maintaining the classic 1:1:1 ratio of espresso, steamed milk, and foam for an authentic cappuccino experience.
Do I need expensive equipment to make a good cappuccino?
No, you don’t need expensive equipment. While an espresso machine, coffee grinder, milk steaming pitcher, and thermometer are ideal, there are alternative methods available. The article provides techniques for achieving café-quality cappuccinos without professional equipment, making it accessible for any home kitchen setup.
What’s the perfect milk temperature for cappuccino?
The ideal milk temperature for cappuccino is between 150-160°F. This temperature range ensures optimal flavor extraction and creates the perfect microfoam texture. Using a thermometer helps maintain precise temperature control, which is crucial for achieving professional-quality results at home.
Can I make cappuccino variations at home?
Yes, you can easily create various cappuccino flavors at home. Popular variations include vanilla cappuccino with vanilla extract, caramel cappuccino with caramel syrup, and iced cappuccino for cold preparation. The key is maintaining the essential cappuccino structure while adding your preferred flavoring elements.
How should I store coffee beans for the best cappuccino?
Store coffee beans in airtight containers made of ceramic, glass, or non-reactive metal. Keep them away from moisture, heat, light, and strong odors. For best results, grind beans fresh before each use, though you can grind them the night before and store in an airtight container as a time-saving measure.
Can I prepare cappuccino components ahead of time?
You can prepare some components in advance, such as grinding coffee beans the night before and measuring out milk. However, steamed milk and foam must be prepared fresh to maintain their texture and quality. Pre-measuring sweeteners and prepping your station can help streamline the process.
What’s the best way to reheat a cappuccino?
The best method is to warm the milk separately and combine it with fresh espresso rather than reheating the entire cappuccino. This maintains quality and prevents overheating. Avoid microwaving the complete cappuccino as it can break down the foam and negatively affect the taste and texture.
Why is whole milk recommended for cappuccinos?
Whole milk creates the best foam texture due to its fat content, which helps create dense, creamy microfoam essential for authentic cappuccinos. The fat content also contributes to the rich, smooth taste that defines a quality cappuccino. Milk alternatives can be used but may produce different foam textures.
