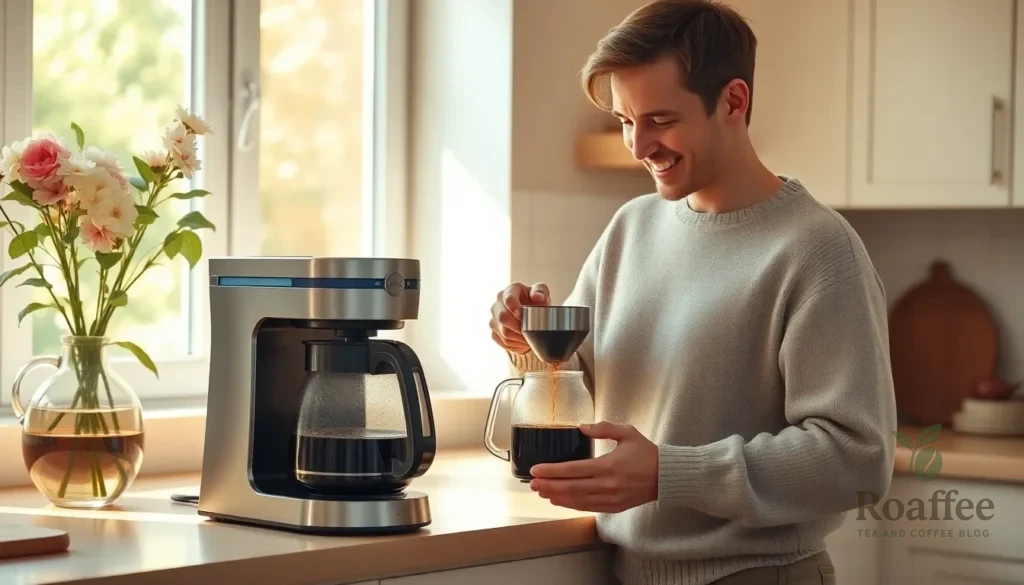
There’s nothing quite like waking up to the rich aroma of freshly brewed coffee filling your kitchen. While coffee culture has evolved with fancy espresso machines and pour-over techniques, the trusty drip coffee maker remains the backbone of most American households – and for good reason.
We’ve all been there: standing bleary-eyed in the kitchen, desperately needing that first cup of coffee but somehow managing to brew a pot that tastes more like bitter water than the liquid gold we’re craving. The truth is, making exceptional coffee in a standard coffee maker isn’t just about pressing a button and hoping for the best.
With a few simple techniques and the right know-how, we can transform your everyday coffee routine into a consistently delicious experience. Whether you’re a coffee novice or someone who’s been making mediocre morning brews for years, mastering your coffee maker will revolutionize how you start each day.
What You’ll Need
We’ll walk you through the essential equipment and ingredients needed to brew exceptional coffee in your drip coffee maker. Having the right tools and quality ingredients makes all the difference between a mediocre cup and one that truly satisfies.
Coffee Maker Equipment
Drip Coffee Maker – Any standard automatic drip coffee maker will work perfectly for this method. We recommend models with programmable features and adjustable brew strength settings for maximum control.
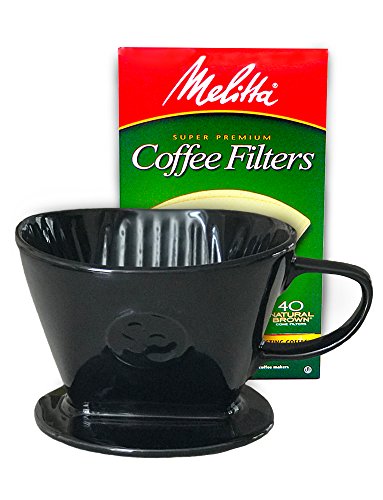
Coffee Filter – Use paper filters designed for your exact coffee maker model. Bleached or unbleached paper filters both work well though unbleached filters may add a subtle papery taste if not rinsed first.
Coffee Grinder – A burr grinder produces the most consistent grind size which leads to better extraction. Blade grinders work as an alternative but may create uneven particle sizes.
Kitchen Scale – Measuring coffee and water by weight ensures consistent results every time. Digital scales with gram measurements provide the most accuracy.
Measuring Spoons – Standard measuring spoons serve as backup measurement tools when a scale isn’t available.
Coffee and Water
Fresh Coffee Beans – Choose whole bean coffee roasted within 2-4 weeks of brewing. Medium roast beans typically work best for drip coffee makers as they balance flavor and extraction.
Filtered Water – Quality water makes quality coffee since your cup contains roughly 98% water. Use filtered or bottled water if your tap water tastes heavily chlorinated or has strong mineral flavors.
Water Temperature – Most coffee makers heat water to the proper temperature automatically. The ideal range sits between 195-205°F for optimal extraction.
Optional Add-ins
Salt – A tiny pinch of salt can reduce bitterness and enhance coffee’s natural flavors. Use no more than 1/4 teaspoon per 6 cups of coffee.
Cinnamon – Ground cinnamon added to coffee grounds before brewing creates warm spice notes. Start with 1/4 teaspoon per 4 cups of coffee.
Vanilla Extract – A few drops of pure vanilla extract in the carafe adds subtle sweetness without sugar. Add after brewing to prevent heating the alcohol.
Cream or Milk – Fresh dairy products or plant-based alternatives can be added after brewing to taste preferences.


Ingredients
 2")
Creating the perfect cup of coffee in our drip coffee maker requires carefully selected ingredients that work together to extract maximum flavor. We recommend gathering these essential components before beginning the brewing process.
Essential Ingredients
Coffee Grounds
- 1 tablespoon ground coffee per 6-ounce cup of water
- Medium roast beans work best for drip coffee makers
- Freshly ground coffee produces superior flavor compared to pre-ground options
Water
- Fresh cold water (filtered or distilled preferred)
- 6 ounces water per tablespoon of coffee grounds
- Room temperature or cold water allows proper extraction
Coffee Filter
- Standard paper filter sized for your exact drip coffee maker
- Fresh filter for each brewing session
Optional Flavor Enhancers
Basic Additions
- Pinch of salt (enhances natural coffee flavors)
- Ground cinnamon (adds warmth and complexity)
- Vanilla extract (1-2 drops per cup)
Serving Additions
- Milk or cream (dairy or non-dairy alternatives)
- Sugar or sweeteners to taste
- Flavored syrups or spices
Measurement Guidelines
| Coffee Strength | Coffee Grounds | Water | Ratio |
|---|---|---|---|
| Mild | 1 tablespoon | 8 ounces | 1:8 |
| Standard | 1 tablespoon | 6 ounces | 1:6 |
| Strong | 1.5 tablespoons | 6 ounces | 1:4 |
We always use the standard 1:6 ratio as our starting point and adjust according to personal taste preferences. Fresh ingredients make the difference between ordinary coffee and an exceptional morning brew that rivals your favorite coffee shop.

Instructions
 4")
Now that we have our equipment and ingredients ready, let’s walk through the precise steps to brew exceptional coffee in our drip coffee maker. These carefully tested techniques will transform your morning routine into a consistently satisfying experience.
Prep Your Coffee Maker
We always start by ensuring our coffee maker is completely clean and ready for brewing. Insert a paper filter into the brew basket first, then rinse it with hot water to eliminate any papery taste while simultaneously warming both the brewer and carafe. This small step makes a noticeable difference in the final cup quality. Empty any rinse water from the carafe before we begin the actual brewing process.
Measure Your Coffee
Accurate measurement forms the foundation of great coffee, so we use approximately 1 tablespoon of coffee grounds per cup we want to brew. Here’s our measurement guide based on different batch sizes:
| Cups | Coffee Grounds (Tablespoons) | Coffee Grounds (Grams) |
|---|---|---|
| 4 | ~14 | 80 |
| 6 | ~10 | 60 |
| 8 | ~14 | 80 |
We recommend using medium grind coffee for optimal extraction and flavor balance.
Add Water to the Reservoir
Pour cold, filtered water into the reservoir using the graduated markings to measure our desired amount based on cups. We never exceed the maximum capacity indicated on our coffee maker. The quality of water directly impacts our coffee’s taste, so filtered water consistently produces superior results compared to tap water.
Insert the Coffee Filter
Place the coffee filter securely into the brew basket, ensuring it sits properly without folding or bunching. A well-positioned filter prevents grounds from escaping into our finished coffee and ensures even water distribution during brewing.
Add Ground Coffee
Add the measured coffee grounds evenly into the filter, then gently shake the brew basket to level the grounds for consistent extraction. Even distribution allows water to flow through all the coffee at the same rate, preventing over-extraction in some areas and under-extraction in others.
Start the Brewing Process
Close the lid firmly and press the ON or Brew button to begin the brewing cycle. Our brewing times vary based on the amount we’re making:
| Cups | Brewing Time |
|---|---|
| 4 | 4-5 minutes |
| 6 | 5-6 minutes |
| 8 | 6-7 minutes |
The water heats and flows through a shower head over the coffee grounds, then drips into the carafe below. When brewing completes, we remove the carafe immediately, discard the used filter and grounds, and serve our coffee right away for the best flavor experience.


Directions for Perfect Coffee
 6")
We’ve covered the preparation steps, and now we’ll focus on the crucial elements that separate mediocre coffee from exceptional brews. These temperature, timing, and serving techniques will transform your daily coffee routine into a consistently satisfying experience.
Water Temperature Tips
The ideal brewing temperature sits between 195°F and 205°F (90-96°C) to extract the best flavor without creating unwanted bitterness. Most automatic coffee makers maintain this temperature range for optimal extraction, which eliminates the guesswork from your brewing process.
When heating water manually, we recommend bringing it to a full boil then letting it cool for about 30 to 60 seconds before starting your brew. This cooling period ensures you hit that perfect temperature zone where coffee oils and flavors extract properly without burning the grounds.
| Temperature Range | Extraction Quality | Flavor Profile |
|---|---|---|
| Below 195°F (90°C) | Under-extraction | Weak, sour taste |
| 195°F – 205°F (90-96°C) | Optimal extraction | Balanced, full flavor |
| Above 205°F (96°C) | Over-extraction | Bitter, harsh taste |
Timing Your Brew
A typical drip coffee maker takes around 4 to 8 minutes to complete the brewing process, depending on how many cups you’re making. We always recommend allowing the machine to finish its full cycle without interruption to ensure complete extraction of coffee oils and flavors.
Avoid the temptation to pour coffee mid-brew, as this prevents proper extraction and can leave you with weak, underdeveloped coffee. Patience during these few minutes makes the difference between average and exceptional coffee.
Automatic machines often keep brewed coffee warm for up to 2 hours before shutting off, giving you flexibility in your morning routine without compromising safety.
Serving Your Coffee
Once brewing completes, we suggest pouring your coffee immediately for the best flavor experience. Fresh coffee delivers the brightest, most vibrant taste that gradually diminishes as it sits on the warming plate.
Add your preferred milk, cream, sugar, or sweetener while the coffee is hot to ensure proper mixing and optimal flavor integration. The heat helps dissolve sweeteners completely and allows dairy products to blend smoothly.
Consume your coffee within 1 to 2 hours of brewing to avoid the bitter, burnt taste that develops when coffee sits too long on heat. This timing ensures you experience the full spectrum of flavors your careful preparation has created.

Equipment and Tools
 8")
The success of our coffee brewing depends heavily on having the right equipment and tools at our disposal. We need exact items to ensure consistent extraction and optimal flavor development throughout the brewing process.
Essential Equipment
Coffee Maker serves as the foundation of our brewing setup. We recommend using a standard automatic drip coffee maker that offers reliable performance and consistent results. Models with programmable features and adjustable brew strength settings provide better control over our brewing process.
Coffee Filter plays a crucial role in achieving clean extraction. We use paper filters designed specifically for our machine type, though reusable filters work as viable alternatives. Paper filters typically deliver cleaner cups with less sediment.
Coffee Pot or Carafe collects our finished brew and maintains temperature during serving. Most coffee makers include a thermal carafe or glass pot that integrates seamlessly with the brewing system.
Measuring and Preparation Tools
Kitchen Scale ensures accurate measurements for consistent results. We measure both coffee grounds and water by weight rather than volume for precision brewing. Digital scales with gram measurements work best for our needs.
Burr Grinder creates uniform particle sizes that extract evenly during brewing. We prefer burr grinders over blade grinders because they produce consistent medium grind suitable for drip machines.
Measuring Spoons serve as backup tools when scales are unavailable. We use standard measuring spoons to portion coffee grounds, following the guideline of 1 to 2 tablespoons per 6 ounces of water.
Water and Filtration
Water Filtration System removes impurities that affect taste. We use filtered water rather than tap water to eliminate chlorine and mineral deposits that can create off flavors in our final cup.
Water Reservoir holds the precise amount of water needed for brewing. We fill the reservoir with clean, cold water using the machine’s measurement markings as our guide.
| Coffee Maker Size | Ground Coffee Amount | Water Amount |
|---|---|---|
| 4-cup | 1.1 oz (31g) | 18 oz (532ml) |
| 6-cup | 1.6 oz (45g) | 27 oz (798ml) |
| 10-cup | 2.75 oz (78g) | 45 oz (1331ml) |
| 12-cup | 3.3 oz (93g) | 54 oz (1597ml) |
Having these tools properly organized and maintained ensures we can brew exceptional coffee consistently. Each piece of equipment contributes to the overall quality of our brewing process and helps us achieve the perfect cup every time.

Make-Ahead Tips
 10")
Preparing your coffee setup the night before transforms your morning routine from rushed to relaxed. These simple preparation steps ensure you wake up to fresh coffee without the early morning hassle.
Prepping Coffee the Night Before
We recommend measuring your coffee grounds according to your desired brewing amount the evening before. The standard ratio remains 2 tablespoons of coffee grounds per 6 ounces of water for optimal extraction.
You can place the measured coffee grounds directly in the filter basket and fill the water reservoir ahead of time for maximum convenience. But, we prefer keeping fresh water and dry grounds until morning for the best possible taste. This approach prevents any overnight moisture absorption that could affect the coffee’s flavor profile.
Store your pre-measured coffee grounds in an airtight container if you choose not to place them in the filter basket immediately. This method maintains the grounds’ freshness while still saving precious morning minutes.
Setting Up Your Coffee Maker
Place a fresh coffee filter into the filter basket before adding your grounds. Most machines use disposable paper filters, though some models feature reusable mesh filters that work equally well.
Add your measured coffee grounds into the positioned filter, ensuring even distribution across the bottom. Pour the correct amount of cold, filtered water into the reservoir using the machine’s measurement markings as your guide.
Position the carafe or pot properly on the hot plate to catch every drop of brewed coffee. Double-check that the filter basket sits securely in place and that all components align correctly before starting your brew cycle.
We suggest doing a final visual inspection of your setup to ensure everything is positioned correctly. This quick check prevents common issues like overflow or incomplete brewing that can ruin your morning coffee experience.
Troubleshooting Common Issues
 12")
Even with the best preparation, we sometimes encounter coffee that doesn’t meet our expectations. These common issues have straightforward answers that can transform your disappointing cup into the perfect morning brew.
Weak Coffee Answers
We can easily fix weak coffee by adjusting our coffee-to-water ratio. Using 1 to 2 tablespoons of medium-ground coffee per 6 ounces of water creates the ideal strength that avoids watery or mild-tasting coffee.
Our grind size plays a crucial role in extraction strength. Medium grind works best for drip coffee makers because coarse grounds produce weak coffee that lacks flavor depth. We should ensure our coffee grounds have a consistent texture similar to coarse sand.
Regular cleaning prevents mineral buildup and stale oils that reduce flavor quality. We need to clean our coffee maker thoroughly to maintain optimal brewing performance. These residues can block proper water flow and interfere with the extraction process.
Fresh coffee beans make a important difference in strength and flavor. We should use beans roasted within 2-4 weeks of brewing and grind them just before use. Stale coffee produces weak flavor regardless of our brewing technique.
Bitter Coffee Fixes
Water temperature control prevents over-extraction that causes bitterness. We should maintain water temperature at 200°F (93°C) for optimal extraction. Water that’s too hot scorches coffee grounds and creates unpleasant bitter notes.
Our grind size affects extraction rate and flavor balance. Fine grounds over-extract quickly and produce bitter coffee that tastes harsh. We need to use medium grind specifically designed for drip coffee makers to achieve proper extraction timing.
Equipment cleanliness eliminates bitter flavors from old coffee oils and mineral residues. We should clean our coffee maker regularly to remove these contaminants that accumulate over time. Stale oils from previous brews can create persistent bitter tastes.
Brewing time management prevents over-extraction of bitter compounds. We should allow our coffee maker to complete its full 4 to 8 minute brewing cycle without interruption. Extending brewing time beyond manufacturer recommendations can increase bitterness levels.
| Issue | Primary Cause | Solution |
|---|---|---|
| Weak Coffee | Incorrect coffee-to-water ratio | Use 1-2 tablespoons per 6 oz water |
| Weak Coffee | Coarse grind size | Switch to medium grind |
| Bitter Coffee | Water too hot | Maintain 200°F (93°C) temperature |
| Bitter Coffee | Over-extraction | Use medium grind and proper timing |


Storage and Cleaning
 14")
The quality of your coffee depends heavily on proper storage and regular maintenance of your equipment. These essential practices ensure every cup tastes as fresh and flavorful as possible.
Proper Coffee Storage
We recommend storing coffee beans or grounds in an airtight container away from heat, light, and moisture to preserve freshness and flavor. This simple step prevents oxidation and extends the life of your coffee significantly.
Keep your coffee in a cool, dark pantry or cupboard rather than on the counter where light and heat can degrade the beans. Room temperature storage maintains optimal flavor compounds that heat and sunlight destroy over time.
Transfer coffee from its original packaging to a vacuum-sealed container or jar with a tight-fitting lid. Glass containers with rubber seals work exceptionally well for maintaining freshness.
Avoid storing coffee in the refrigerator or freezer as temperature fluctuations create condensation that damages the beans. The pantry provides the most stable environment for preserving coffee quality.
Cleaning Your Coffee Maker
Regular cleaning after each use ensures good tasting coffee and prolongs the lifespan of your coffee maker. Start by removing coffee grounds and filters immediately after brewing.
Daily Cleaning Steps:
Remove the carafe, filter basket, and any reusable filters from the machine. Wash these components with warm, soapy water and a soft cloth or sponge to prevent oil buildup.
Dispose of used grounds and filters properly. Coffee grounds can be composted for garden use, but single-serve pods should go directly to the trash.
Deep Cleaning Process:
Clean stubborn stains like tannins inside the glass carafe using a natural method. Fill the carafe with warm, soapy water and add dry white rice, then swirl gently to loosen stains.
For tougher stains, sprinkle baking soda into the carafe with warm water and let it sit for 15 minutes before scrubbing. Rinse thoroughly to remove all residue.
Internal Machine Cleaning:
Run cleaning cycles monthly using coffee maker cleaner or a mixture of equal parts vinegar and water. This removes mineral deposits and coffee oils from internal components.
Always follow cleaning cycles with fresh water cycles to rinse away any cleaning solution residue. Run two complete brew cycles with plain water to ensure no taste remains.
Wipe down the exterior with a damp cloth and dry thoroughly to prevent water spots and maintain the machine’s appearance.

Conclusion
We’ve covered everything you need to transform your daily coffee routine from ordinary to extraordinary. The key lies in understanding that great coffee isn’t just about pressing a button—it’s about mastering the fundamentals of measurement timing and temperature.
By implementing these techniques you’ll notice an immediate improvement in your coffee’s flavor and consistency. Remember that small adjustments make a big difference whether you’re tweaking your coffee-to-water ratio or perfecting your brewing temperature.
The beauty of drip coffee makers is their simplicity combined with the potential for exceptional results. With proper preparation maintenance and attention to detail you’ll create coffee that rivals your favorite café every single morning. Your perfect cup is just a few steps away.
Frequently Asked Questions
What is the ideal coffee-to-water ratio for drip coffee makers?
The standard ratio is 1 tablespoon of medium roast coffee grounds per 6 ounces of water, which equals approximately a 1:6 coffee-to-water ratio. This serves as a starting point that can be adjusted based on your taste preferences. For stronger coffee, increase the coffee amount; for milder coffee, reduce it slightly.
What type of water should I use for brewing coffee?
Use fresh, cold filtered or distilled water for the best results. Filtered water eliminates impurities that can negatively affect the taste of your coffee. Avoid using hot water from the tap, as it can contain minerals and sediments that will compromise the flavor of your brew.
What is the optimal brewing temperature for drip coffee?
The ideal brewing temperature is between 195°F and 205°F (90-96°C). This temperature range extracts the best flavors without creating bitterness. If heating water manually, bring it to a boil and let it cool for 30 to 60 seconds before brewing.
How long should the brewing process take?
A complete brewing cycle typically takes 4 to 8 minutes, depending on the number of cups being brewed. Allow the coffee maker to complete its full cycle without interruption. Avoid pouring coffee mid-brew, as this can result in uneven extraction and poor flavor.
How should I store coffee beans and grounds?
Store coffee beans or grounds in an airtight container away from heat, light, and moisture. Keep them in a cool, dark pantry for optimal freshness. Freshly ground coffee provides the best flavor, so grind beans just before brewing when possible.
Can I prepare coffee the night before?
Yes, you can streamline your morning routine by measuring coffee grounds and filling the water reservoir the night before. However, keep fresh water and dry grounds separate until morning to preserve flavor. Store pre-measured grounds in an airtight container if not placed in the filter basket immediately.
How do I fix weak coffee?
Weak coffee can be improved by adjusting the coffee-to-water ratio – use more coffee grounds or less water. Ensure you’re using a medium grind size, as too coarse a grind can result in under-extraction. Also, check that your coffee maker is functioning properly and completing the full brewing cycle.
How do I prevent bitter coffee?
Bitter coffee is often caused by over-extraction due to water that’s too hot or brewing for too long. Keep water temperature between 195°F-205°F and avoid extending the brewing time. Also, ensure your coffee maker is clean, as buildup can create bitter flavors.
How often should I clean my coffee maker?
Clean your coffee maker daily by washing removable parts and wiping down surfaces. Perform a deep cleaning monthly by running a cleaning cycle with vinegar or a commercial cleaning solution. Regular maintenance prevents oil buildup and stale flavors that can affect your coffee’s taste.
How long does brewed coffee stay fresh?
Serve coffee immediately after brewing for the best flavor experience. Consume brewed coffee within 1 to 2 hours to avoid developing a bitter taste. For optimal mixing, add milk, cream, or sweeteners while the coffee is still hot.