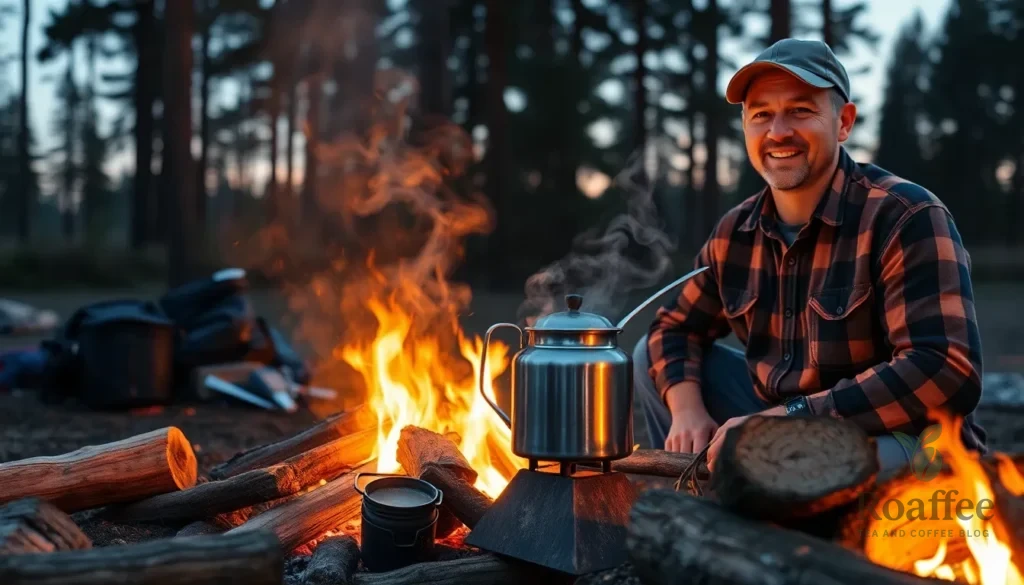
There’s something magical about brewing coffee over an open fire while surrounded by nature’s symphony. Campfire coffee transforms your outdoor adventure into a sensory experience that combines the rich aroma of freshly brewed coffee with the smoky essence of wood and wilderness.
We’ve all been there – craving that perfect cup of joe while camping but settling for instant coffee that tastes like disappointment. Making authentic campfire coffee isn’t just about caffeine; it’s about creating a ritual that connects us to generations of outdoor enthusiasts who’ve mastered this timeless brewing method.
The best part? You don’t need fancy equipment or barista skills to brew coffee that rivals your favorite café. With just a few simple tools and our tried-and-true techniques, you’ll discover how to make campfire coffee that’s bold, flavorful, and perfectly suited for your outdoor adventures. Get ready to elevate your camping experience one sip at a time.
Equipment Needed
Creating exceptional campfire coffee requires the right tools to transform your outdoor brewing experience. We’ll break down the essential gear and optional equipment that will help you achieve that perfect cup around the fire.
Essential Campfire Coffee Gear
Fire-Safe Coffee Pot or Kettle
We recommend using a sturdy metal coffee pot or kettle designed for open flame cooking. Cast iron and stainless steel options work best as they distribute heat evenly and withstand the intense temperatures of campfire flames. Look for a pot with a secure lid and heat-resistant handle.
Coffee Filters or Strainer
Paper coffee filters remain the most convenient option for campfire brewing. We suggest packing extra filters since outdoor conditions can easily damage them. Alternatively a metal mesh strainer or cheesecloth works well for filtering grounds from your finished brew.
Coffee Grinder or Pre-Ground Coffee
Fresh ground coffee beans deliver superior flavor for campfire brewing. We prefer a manual hand grinder for camping trips since it doesn’t require electricity. Pre-ground coffee works perfectly fine when grinding fresh beans isn’t practical.
Measuring Cup or Spoon
Accurate measurements ensure consistent coffee strength every time. We use a simple measuring cup or large spoon to portion coffee grounds and water properly. This prevents weak or overly strong coffee that can ruin your outdoor experience.
Heat-Resistant Gloves
Campfire cooking generates extreme heat that can cause serious burns. We always pack heat-resistant gloves to safely handle hot coffee pots and adjust equipment near the flames. These gloves provide essential protection during the brewing process.
Optional Tools for Better Results
Coffee Grinder Scale
A portable scale helps achieve precise coffee-to-water ratios for consistently excellent results. We find that measuring coffee by weight rather than volume creates more reliable brewing outcomes. Digital scales designed for camping weigh very little and pack easily.
Thermometer
Water temperature significantly affects coffee extraction and flavor development. We use a simple camping thermometer to monitor water temperature and avoid over-extraction that creates bitter coffee. The ideal brewing temperature ranges between 195-205°F.
Insulated Mugs
Quality insulated mugs keep coffee hot longer in cold outdoor conditions. We prefer stainless steel mugs with secure lids that prevent spills around the campfire. These mugs also protect hands from hot beverages.
Tripod Grill Grate
A tripod grill grate provides stable support for coffee pots over the fire. We position our brewing equipment at the perfect height above the flames for optimal heat control. This setup prevents direct contact with burning logs that can damage equipment.
Wind Screen
Wind can interfere with consistent heat distribution during brewing. We use a simple wind screen or aluminum foil shield to protect the flame and maintain steady cooking temperatures. This tool proves especially valuable in windy camping locations.


Ingredients

Creating exceptional campfire coffee requires quality ingredients that work harmoniously with the outdoor brewing process. We’ve organized these ingredients based on the three popular methods we recommend for different camping situations.
Basic Campfire Coffee Ingredients
- 2-3 tablespoons coarsely ground coffee (per cup of water)
- 1 cup filtered water (per serving)
- Pinch of salt (optional, reduces bitterness)
Fireside Coffee Mix Ingredients
Our convenient pre-made mix eliminates guesswork and provides consistent results every time:
- 2 cups powdered cocoa mix
- 2 cups powdered coffee creamer
- 1 cup instant coffee
- 1½ cups sugar
- 1 teaspoon cinnamon
- ½ teaspoon nutmeg (or substitute with pumpkin pie spice)
Campfire Coffee with Alcohol Ingredients
For those cozy evening moments around the fire, this warming blend serves 4 people:
- 940 ml hot decaf coffee
- 120 ml rum
- 120 ml bourbon or Irish whiskey
- 120 ml oat milk
- 4 teaspoons brown sugar
Campfire Mocha Latte Variation Ingredients
Transform your basic campfire coffee into a rich dessert drink:
- Marshmallow syrup or s’mores syrup (2-3 tablespoons)
- Dark chocolate syrup or melted chocolate (2-3 tablespoons)
- Milk (cow’s milk or plant-based alternative, ½ cup)
- Strong coffee or espresso (1 shot per serving)
| Ingredient Ratios | Basic Coffee | Fireside Mix | Alcohol Version |
|---|---|---|---|
| Coffee to Water | 2-3 tbsp per cup | 2 heaping tbsp per ⅔ cup | 940 ml coffee base |
| Sweetener | Optional | 1½ cups sugar | 4 tsp brown sugar |
| Dairy/Alternative | None | 2 cups creamer | 120 ml oat milk |
Quality ingredients make the difference between mediocre and memorable campfire coffee. Fresh ground coffee beans provide the best flavor profile while our instant mix offers convenience when time or equipment is limited.
Setting Up Your Campfire

A well-built campfire forms the foundation of exceptional campfire coffee brewing. We need to create the right conditions for steady heat and safe coffee preparation.
Building the Perfect Coffee Fire
We select a designated fire pit or create a safe fire area away from flammable materials for our coffee brewing setup. Dry seasoned hardwoods like oak and maple provide the best results since they burn longer and hotter without producing excess smoke or resin flavors that could affect our coffee taste.
Our fire structure begins with arranging wood in a teepee or log cabin formation to ensure proper airflow. We light the fire using matches or a lighter while maintaining careful control to contain the flames. The key to perfect campfire coffee lies in patience – we allow our fire to burn down to a bed of hot coals for approximately 20 minutes.
These hot coals provide the steady even heat we need for optimal coffee brewing. We separate these coals from active flames and arrange them in a circle or stable bed to efficiently heat our coffee pots or percolators. A small but hot fire works better than large flames since excessive heat can burn our coffee or boil water too quickly.
| Fire Building Timeline | Duration | Purpose |
|---|---|---|
| Initial fire setup | 5-10 minutes | Wood arrangement and lighting |
| Burn down to coals | 20 minutes | Creating steady heat source |
| Coffee brewing | 5-10 minutes | Maintaining consistent temperature |
We place our coffee equipment on a grill grate flat rock or directly on the bed of coals for stability and consistent heat distribution. Positioning pots directly in flames creates a burnt coffee taste that we want to avoid. Our heat level should remain low to medium throughout the brewing process to prevent burnt flavors and grounds overflow.
Safety Considerations
Fire safety remains our top priority when brewing campfire coffee. We always build our fires in designated areas or carefully prepared spaces to prevent forest fires from spreading. Using only dry wood minimizes smoke production and creates steadier flames that are easier to control.
We handle hot pots and percolators with extreme care to prevent burns during the brewing process. Heat resistant gloves become essential equipment when managing our coffee gear over hot coals. Excessive heat on coffee pots can cause dangerous boil-overs and spillage that create safety hazards.
Our responsibility extends beyond brewing – we ensure our fire is completely extinguished after coffee preparation to avoid wildfires. Water should be poured over coals and ashes stirred until no heat or smoke remains. This final step protects the environment and other campers who may use the area after us.
Instructions

Now that we have our equipment ready and fire burning to the perfect coal stage, we can begin the brewing process that transforms simple ingredients into aromatic campfire coffee.
Prep
We gather our coarse ground coffee and select our brewing vessel, whether it’s a sturdy kettle, coffee pot, or campfire percolator. Our heat source should display hot coals arranged in a circle for even heating distribution. We ensure our coffee grounds are coarsely ground to prevent over-extraction and bitter flavors that can ruin our outdoor coffee experience.
Heat the Water
We fill our kettle or coffee pot with the desired amount of water, typically 2 cups for 2 servings. Our small hot fire with arranged coals provides the ideal heating surface for consistent temperature control. We set our pot directly over the hot coals and bring the water to a rolling boil, which usually takes around 10 minutes depending on fire intensity and pot size.
Add the Coffee
Once our water reaches a full boil, we remove the pot from heat and allow it to cool for 30 seconds to 1 minute. We add coffee grounds directly to the hot water using a ratio of 1 heaping tablespoon of coarse ground coffee per cup of water. For percolator users, we place coffee grounds in the percolator basket using approximately 1 tablespoon per 6-8 ounces of water, eliminating the need for filters when grounds are properly coarsened.
Brew
We stir the mixture briefly to ensure all grounds become saturated evenly throughout the water. Our coffee steeps for 4-5 minutes to extract optimal flavor without creating bitterness. For cowboy coffee method, we allow grounds to settle naturally before pouring, while French press users gently press the plunger after steeping time completes.
Serve
We carefully pour our brewed coffee into mugs, avoiding any settled grounds that remain at the bottom. Before serving, we stir the coffee to ensure flavor consistency throughout each cup. Our fresh campfire coffee delivers a strong, flavorful experience that perfectly complements the outdoor setting and creates lasting memories around the fire.


Different Campfire Coffee Methods

We can explore four distinct approaches to brewing coffee over an open fire, each offering unique advantages for different camping situations and taste preferences. Let’s examine these proven methods that will help you create exceptional campfire coffee regardless of your equipment or experience level.
Cowboy Coffee Method
Equipment needed: Tin pot or percolator pot
We recommend the cowboy coffee method for its simplicity and authentic camping experience. Add coffee grounds directly to fresh water in your pot using approximately 1-2 tablespoons per 8 ounces of water. Place the pot over hot coals rather than flames to ensure controlled heating throughout the brewing process.
Bring the mixture to a gentle boil and immediately remove from heat to prevent over-extraction. Allow the grounds to settle naturally for 2-3 minutes before pouring your coffee. We suggest avoiding stirring during this settling period to minimize grounds in your cup.
Pro tips: Use coarser grounds to reduce sediment and create a cleaner cup. Monitor the boiling process carefully since coffee can foam and spill over the pot edges when heated too rapidly.
French Press Over Fire
Equipment needed: French press suitable for outdoor use
We find the French press method delivers rich and aromatic coffee with excellent control over brewing strength. Begin by boiling water over your fire separately in a kettle or pot. Add medium-fine ground coffee to your French press while the water heats.
Pour the hot water over the grounds and stir gently to ensure even saturation. Let the coffee steep for 4-5 minutes to extract optimal flavor compounds. Slowly press the plunger down to separate the grounds from the finished coffee.
Pro tips: Use filtered or clean water whenever possible and stick to medium grind coffee to avoid clogging the mesh filter. This method consistently produces the richest and most aromatic results among campfire brewing techniques.
Percolator Method
Equipment needed: Camping percolator
We recommend the percolator method for brewing multiple cups efficiently around the campfire. Fill the bottom chamber with water and add coarsely ground coffee to the basket using approximately 1 tablespoon per 6 ounces of water. Assemble the percolator components and place over hot coals or your camp stove.
Water boils and percolates through the grounds repeatedly for 5-10 minutes creating a strong, robust coffee. Remove from heat and let sit briefly before pouring to allow any remaining grounds to settle.
Pro tips: Use coarser grounds or add a basket filter to minimize sediment in your final cup. Keep your fire at moderate heat to avoid burning the coffee during the extended brewing process.
Pour Over Camping Style
Equipment needed: Portable pour-over dripper and paper filter
We favor the pour-over method for precise control over every aspect of the brewing process. Boil water over your fire and place a paper filter with medium grind coffee grounds in the dripper set atop your cup. Rinse the filter with hot water and discard the rinse water to eliminate any papery taste.
Pour a small amount of water to bloom the grounds for approximately 30 seconds. Continue pouring the remaining water in a slow, circular motion until your cup is full.
Pro tips: This method requires a kettle or controlled pouring device for best results. Pour-over camping style produces the cleanest and most flavorful coffee with minimal sediment compared to other campfire methods.
| Method | Brew Time | Grind Size | Equipment Weight | Servings |
|---|---|---|---|---|
| Cowboy Coffee | 5-7 minutes | Coarse | Light | 2-4 cups |
| French Press | 6-8 minutes | Medium-fine | Medium | 1-4 cups |
| Percolator | 8-12 minutes | Coarse | Heavy | 4-8 cups |
| Pour Over | 4-6 minutes | Medium | Light | 1-2 cups |
Tips for Perfect Campfire Coffee

Mastering the art of campfire coffee requires attention to several key factors that can make or break your outdoor brewing experience. We’ve compiled the most effective techniques to ensure every cup delivers exceptional flavor and aroma.
Water Quality and Temperature
Clean fresh water forms the foundation of exceptional campfire coffee. We recommend using filtered or spring water whenever possible to avoid any off-flavors that might interfere with your brew’s taste profile.
Temperature control becomes critical when brewing over an open fire. Position your water vessel over hot coals rather than direct flames to prevent scorching and maintain consistent heating. We target water temperature around 200°F for optimal extraction without burning the coffee grounds.
Watch for small bubbles forming on the water’s surface as your indicator that the water has reached the ideal brewing temperature. Boiling water directly over flames can create bitter compounds and uneven heating that compromises your coffee’s flavor.
Coffee-to-Water Ratio
Our recommended ratio is 2 tablespoons of coffee per 8 oz. of water for a robust cup that stands up to the outdoor environment. This measurement creates a strong brew that won’t taste weak when served in the fresh mountain air.
For those who prefer precision brewing we suggest using 1 gram of coffee to 17 grams of water by weight. A portable coffee scale ensures consistent results every time you brew at camp.
| Brewing Method | Coffee Amount | Water Amount | Grind Size |
|---|---|---|---|
| Cowboy Coffee | 2 tbsp | 8 oz | Coarse |
| French Press | 1g | 17g | Coarse |
| Percolator | 2 tbsp | 8 oz | Coarse |
Coarse grind coffee works best for campfire brewing methods since it prevents grounds from escaping into your cup. Fine grounds can create muddy coffee and clog filters when brewing outdoors.
Timing Your Brew
Cowboy coffee requires 4-5 minutes of brewing time after the water reaches near-boiling temperature. Remove the pot from heat during this steeping period to prevent over-extraction and bitterness.
French press style camp coffee benefits from a 4-minute brewing window followed by slow pressing to separate grounds effectively. We press down gradually to avoid forcing grounds through the filter mesh.
Allow grounds to settle naturally for 30 seconds before pouring cowboy coffee. This settling time helps separate the grounds from the liquid and produces a cleaner cup without sediment.
Monitor your brewing time carefully since over-extraction creates harsh bitter flavors that can overpower the coffee’s natural characteristics. Under-extraction results in weak sour coffee that lacks the bold flavor profile perfect for outdoor adventures.


Troubleshooting Common Issues

Even experienced campers encounter challenges when brewing coffee over an open fire. We’ve identified the most common problems and their proven answers to help you achieve perfect campfire coffee every time.
Bitter Coffee Answers
Temperature control makes the biggest difference in preventing bitter coffee. We recommend maintaining water temperature between 195°F and 205°F for balanced flavor extraction. Boiling water above 205°F extracts harsh bitter compounds that overpower the coffee’s natural taste.
Grind size plays a crucial role in bitterness prevention. Using coarser grounds reduces over-extraction of bitter compounds while allowing the coffee’s natural sweetness to shine through. Fine grounds increase surface area contact with water leading to excessive extraction.
Timing your brew prevents bitterness from developing. We suggest shortening brew time when you notice bitter flavors and removing the coffee pot from heat as soon as brewing completes. Extended exposure to heat continues extracting unwanted compounds even after optimal brewing time.
Weak Coffee Fixes
Coffee strength depends on three adjustable factors working together. We increase our coffee-to-water ratio to 2 tablespoons per 8 oz of water when brewing weak coffee. This ratio provides the robust flavor most campers prefer around the fire.
Grind size adjustment strengthens weak coffee effectively. Using finer grounds increases extraction by creating more surface area contact with water. We recommend grinding slightly finer than your usual setting while avoiding powder-fine consistency.
Brew time extension helps extract more flavor compounds. We extend brewing time gradually while monitoring taste to avoid crossing into bitter territory. The sweet spot typically adds 1-2 minutes to your standard brewing time.
Dealing with Grounds in Your Cup
Coarse grounds work best for percolators and direct brewing methods. We use coarsely ground coffee to prevent small particles from passing through brewing equipment. This approach significantly reduces sediment in your finished cup.
Coffee filters solve the grounds problem when using finer grinds. We add paper filters to our brewing setup when camping with pre-ground coffee that’s finer than ideal. This simple addition keeps grounds contained while allowing full flavor extraction.
Settling time reduces sediment naturally. We let our coffee rest briefly after brewing before pouring to allow grounds to settle at the bottom. This technique works especially well with cowboy coffee and other direct brewing methods.
Make-Ahead Tips

Preparation transforms our campfire coffee experience from stressful to seamless. We recommend grinding coffee beans at home before heading out on our camping adventure. Fresh ground coffee maintains its flavor better than pre-ground options and ensures we achieve the perfect consistency for our chosen brewing method.
Pre-measuring coffee portions eliminates guesswork at the campsite. We suggest portioning our coffee grounds into individual servings using small containers or resealable bags. This approach streamlines our morning routine and prevents waste when we’re tired or dealing with challenging weather conditions.
Organizing our coffee supplies creates efficiency around the campfire. We pack our coffee equipment in a dedicated container that includes our measuring spoons, filters, and any specialty tools we need. This system prevents us from searching through gear bags when we’re eager for that first cup.
Water preparation saves valuable time during our camping trip. We fill our water containers the night before or identify reliable water sources near our campsite. Clean water makes a important difference in our final brew quality and reduces the time we spend preparing coffee in the morning.
Testing our chosen brewing method at home builds confidence for the trail. We practice our technique in our backyard or kitchen to understand timing and ratios before we rely on these skills in the wilderness. This preparation ensures we avoid common mistakes when we’re dealing with unpredictable campfire conditions.
Weather contingency planning protects our coffee ritual. We pack backup brewing methods like instant coffee or portable coffee makers in case wind or rain makes our primary method impractical. Having alternatives ensures we never miss our morning coffee regardless of outdoor conditions.
Storage and Cleanup

Once we’ve savored that perfect cup of campfire coffee, proper storage and cleanup ensure our equipment stays in excellent condition for future adventures. Smart storage practices and thorough cleanup not only preserve our gear but also protect the natural environment we love to explore.
Storing Leftover Coffee
We recommend transferring any remaining brewed coffee into an insulated thermos immediately after brewing. This method keeps our coffee warm for hours while preventing the bitter taste that develops when coffee sits over heat. The thermos creates a sealed environment that preserves both temperature and flavor throughout our camping day.
Unused coffee grounds require different storage considerations. We store them in an airtight container away from moisture and direct sunlight to maintain freshness. Metal containers or sealed plastic bags work exceptionally well for protecting grounds from humidity and odors that can compromise taste.
Equipment Cleaning Process
After finishing our coffee, we clean our coffee pot or percolator with hot water and mild soap when available. Hot water dissolves coffee oils and removes residue that can build up over time. We scrub gently with a soft brush or cloth to avoid scratching the interior surface.
Thorough rinsing eliminates soap residue that could affect future brews. We pay special attention to spouts and internal components where coffee oils tend to accumulate. For percolators, we disassemble the basket and stem for complete cleaning.
Preventing Stains and Odors
We avoid leaving coffee grounds in our pot overnight to prevent permanent staining and lingering odors. Coffee residue creates stubborn stains that become increasingly difficult to remove over time. Fresh cleaning immediately after use prevents these issues from developing.
Baking soda mixed with water creates an effective paste for removing tough stains when soap isn’t sufficient. We apply this mixture, let it sit for several minutes, then scrub gently before rinsing thoroughly.
Responsible Ground Disposal
We dispose of coffee grounds responsibly by scattering them away from our campsite or adding them to compost when available. Coffee grounds provide nitrogen to soil and can benefit plants when properly distributed. We scatter grounds at least 200 feet from water sources and campsites to follow Leave No Trace principles.
Never dump grounds directly into streams or lakes, as they can affect water quality and aquatic ecosystems. We pack out grounds in trash bags when scattering isn’t appropriate for the environment.
Campfire Safety During Cleanup
We ensure our fire is completely extinguished before beginning cleanup procedures. Cold ashes pose no risk to equipment or surrounding vegetation. We stir ashes with water until no heat remains, then feel for warm spots with the back of our hand.
Proper fire extinguishing prevents equipment damage and eliminates wildfire risks. We never leave hot coals unattended while cleaning our coffee equipment, as wind can quickly reignite embers.


Conclusion
We’ve covered everything you need to transform your outdoor coffee experience from disappointing instant granules to rich aromatic brews that rival your favorite café. The journey from selecting quality ingredients to mastering different brewing methods doesn’t require expensive gear or years of practice.
What matters most is understanding the fundamentals: proper fire management hot coals for steady heat and the right coffee-to-water ratios. Whether you choose the simplicity of cowboy coffee or the precision of pour-over methods each technique we’ve shared will elevate your camping mornings.
Remember that campfire coffee is about more than caffeine – it’s about creating memorable moments in nature. With these techniques and safety practices you’ll confidently brew exceptional coffee that enhances every outdoor adventure while respecting the environment around you.
Frequently Asked Questions
What equipment do I need to make campfire coffee?
You need a fire-safe coffee pot or kettle, coffee filters or strainer, coffee grinder or pre-ground coffee, measuring cup, and heat-resistant gloves. Optional items include a thermometer, insulated mugs, tripod grill grate, and wind screen. These basic tools are sufficient to brew delicious coffee without expensive equipment.
What’s the best coffee-to-water ratio for campfire brewing?
Use 2-3 tablespoons of coarsely ground coffee per 8 oz of water for a robust brew. This ratio ensures strong, flavorful coffee that won’t be overpowered by the outdoor environment. Adjust according to your taste preferences, but this ratio provides a good starting point for most campers.
What type of wood should I use for campfire coffee?
Use dry, seasoned hardwoods like oak and maple for optimal heat without unwanted flavors. These woods burn cleanly and provide steady heat. Avoid softwoods like pine, which can impart resinous flavors to your coffee. Let the fire burn down to hot coals for consistent brewing temperature.
How long should I brew campfire coffee?
Brewing time depends on your method: Cowboy coffee takes 4-5 minutes, French press needs 4 minutes, percolator requires 6-8 minutes, and pour-over takes 3-4 minutes. Monitor closely to prevent over-extraction, which causes bitterness. Start checking after the minimum time and adjust based on taste.
What’s the ideal water temperature for campfire coffee?
Aim for water temperature around 200°F (195°F-205°F range). Water that’s too hot will scorch the coffee and create bitterness, while water that’s too cool won’t extract flavors properly. If you don’t have a thermometer, bring water to a boil, then let it cool for 30 seconds.
How do I prevent bitter campfire coffee?
Use coarsely ground coffee to reduce over-extraction, maintain proper water temperature (195°F-205°F), and don’t over-brew. Add a pinch of salt to reduce bitterness naturally. Avoid placing the pot directly over flames; use hot coals instead for even heating and better flavor control.
What should I do with coffee grounds after brewing?
Scatter used coffee grounds away from your campsite or pack them out for composting at home. Never leave grounds at the campsite as they can attract wildlife and impact the environment. Coffee grounds are biodegradable but should be disposed of responsibly in wilderness areas.
Can I prepare anything ahead of time for campfire coffee?
Yes! Grind coffee beans at home for better flavor, pre-measure coffee portions, and organize supplies before your trip. Test your brewing method at home to build confidence. Consider preparing fireside coffee mixes in advance for convenient brewing on the trail.
How do I store leftover campfire coffee?
Transfer leftover coffee to an insulated thermos to maintain warmth and flavor. Store unused coffee grounds in airtight containers to preserve freshness. Clean all equipment thoroughly with hot water and mild soap to prevent coffee residue buildup that can affect future brews.
What’s the easiest method for beginners?
Cowboy coffee is the simplest method for beginners. Just add coarsely ground coffee directly to boiling water in a pot, let it brew for 4-5 minutes, then carefully pour while leaving grounds in the pot. This method requires minimal equipment and technique while delivering great results.