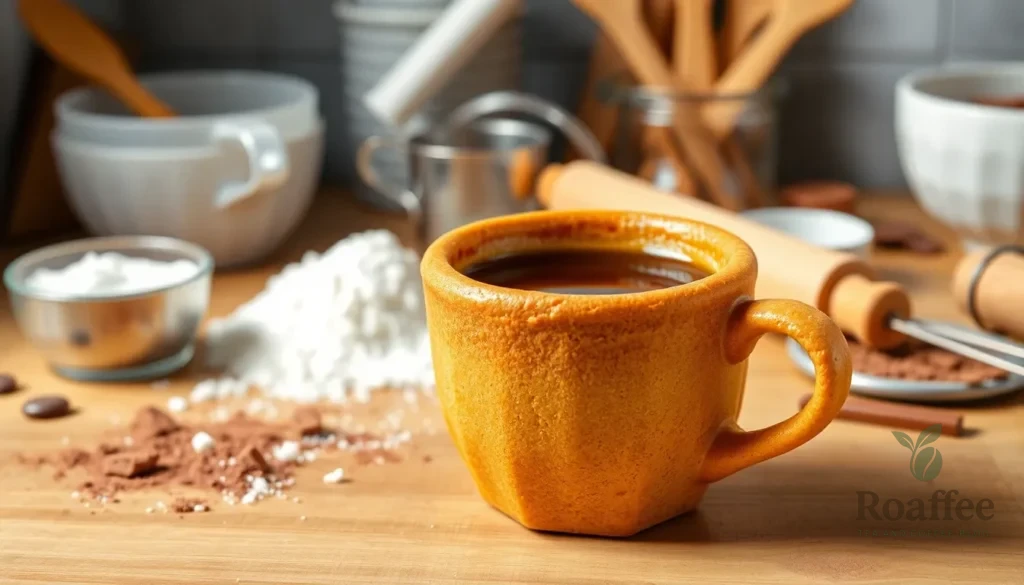
We’ve all been there – enjoying our morning coffee only to be left with another disposable cup destined for the trash. But what if we told you there’s a delicious solution that’s both eco-friendly and surprisingly tasty? Edible coffee cups are revolutionizing the way we think about sustainable coffee consumption, and they’re easier to make than you might imagine.
These ingenious cups aren’t just a gimmick – they’re crafted from simple ingredients like flour, sugar, and cocoa that create a sturdy yet delectable vessel for your favorite brew. Originally popularized by innovative cafes looking to reduce waste, edible coffee cups have become a fascinating DIY project that combines sustainability with culinary creativity.
Making your own edible coffee cups transforms your regular coffee routine into an interactive experience. You’ll sip your coffee knowing that every part of your “cup” can be enjoyed, leaving absolutely nothing behind. It’s the perfect conversation starter and a fun way to impress guests while doing your part for the environment.
What You’ll Need
Creating edible coffee cups requires basic kitchen equipment and a few specialty tools to achieve the perfect cup shape and texture. We’ll walk you through everything necessary to make these sustainable treats successfully.
Essential Equipment
Mixing bowls form the foundation of our preparation process. We need at least two medium-sized bowls for combining wet and dry ingredients separately before merging them.
Measuring cups and spoons ensure accuracy in our recipe proportions. Standard measuring tools help us achieve consistent results every time we make these edible cups.
Electric mixer or whisk creates the smooth batter texture we’re aiming for. A hand mixer works perfectly for this recipe though manual whisking requires extra effort.
Rubber spatula allows us to scrape bowl sides and fold ingredients without overmixing. This tool helps incorporate all components evenly throughout the batter.
Baking sheets provide the surface for our cups during the oven process. We recommend having two sheets available for efficiency when making multiple batches.
Parchment paper prevents sticking and makes cleanup easier. This liner protects our cups from direct contact with the baking sheet surface.
Specialty Tools
Muffin tin or cup molds shape our edible vessels into the perfect coffee cup form. Silicone molds work exceptionally well for easy removal and consistent sizing.
Rolling pin helps us achieve uniform thickness when working with dough-based cup recipes. This tool ensures even baking and professional-looking results.
Pastry brush applies egg wash or butter for that golden finish we want. Small brushes give us better control over coverage areas.
Wire cooling racks allow proper air circulation around our finished cups. Cooling racks prevent soggy bottoms and maintain the structural integrity we need.
Food processor speeds up ingredient preparation when making large batches. This appliance saves time and creates more uniform texture in our cup mixture.
Ingredients
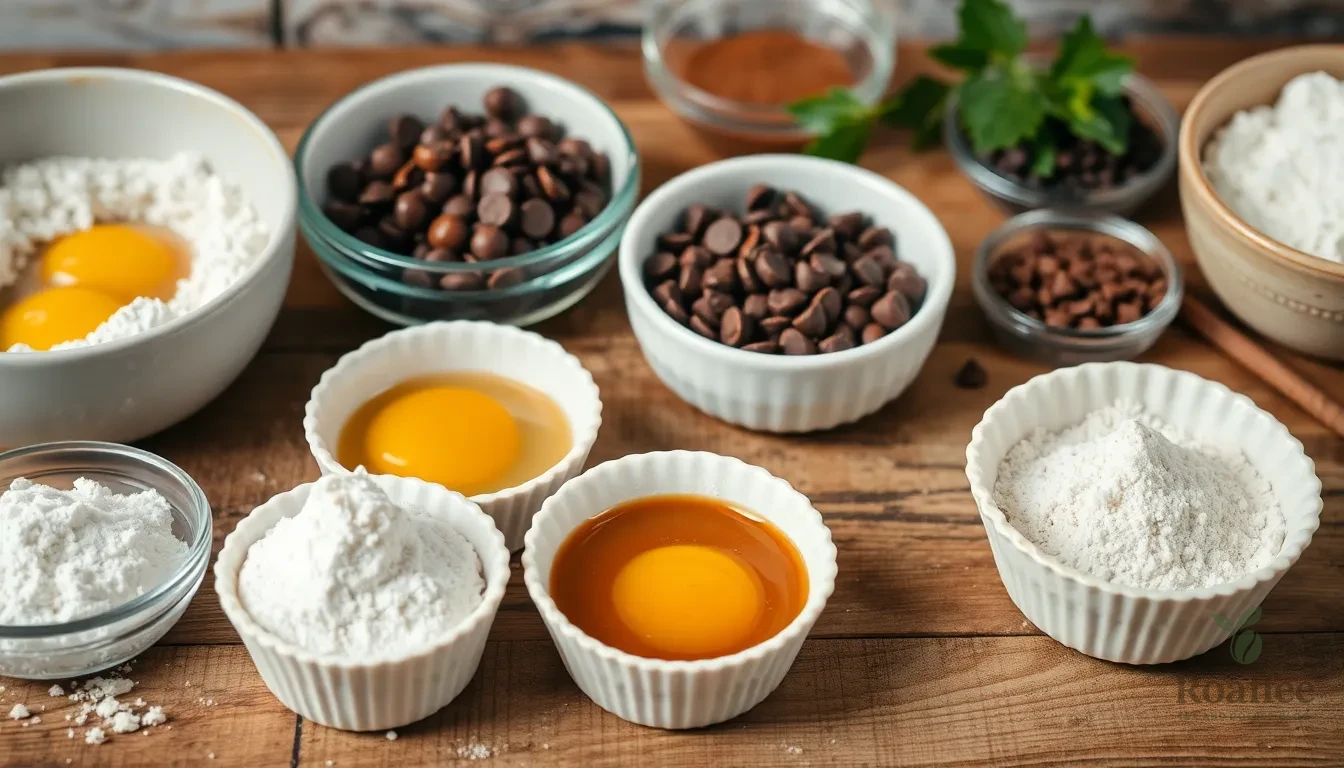
Creating edible coffee cups requires a carefully balanced combination of ingredients to achieve both structural integrity and delicious flavor. We’ve organized these ingredients into three categories to help you build the perfect cup for your coffee experience.
For the Edible Cup
Base Structure Ingredients:
- 5 parts wheat flour
- 5-10 parts corn flour
- 5 parts corn starch
- 5 parts konjac flour
- 10 parts thickening powder
Binding and Texture Agents:
- 5 parts eggs (or 1 part plant-based gelatin for vegan option)
- 10 parts water
- 0.1 part sodium bicarbonate
Flavor Components:
- 2 parts low sugar or natural sweeteners
- 2 parts white kidney bean extract
For the Chocolate Coating
Essential Coating Ingredients:
- 8 oz chocolate chips or candy melts
- 1 tablespoon coconut oil (optional, for smoothness)
Tempering Enhancement:
- 2 tablespoons room temperature melted chocolate (for professional gloss finish)
Optional Flavor Additions
Aromatic Enhancers:
- 1 teaspoon vanilla extract
- 2 tablespoons cocoa powder
- 1 teaspoon coffee essence or espresso powder
Warm Spice Options:
- 1/2 teaspoon ground cinnamon
- 1/4 teaspoon ground nutmeg
- 1/8 teaspoon cardamom powder
- Dark chocolate (70% cocoa content)
- Milk chocolate
- White chocolate
- Flavored chocolate melts
Instructions
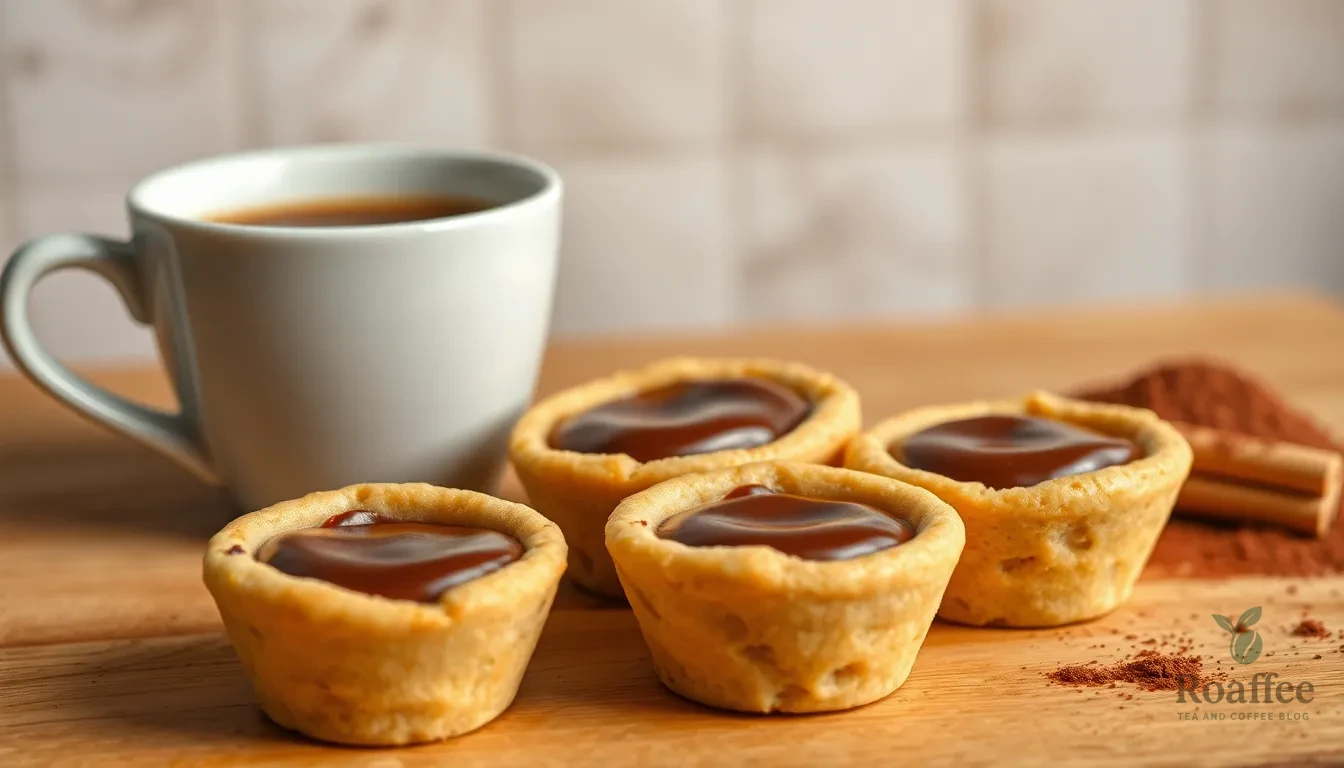
Creating edible coffee cups requires careful attention to detail throughout each step of the process. We’ll guide you through six essential phases to ensure your cups turn out sturdy and delicious.
Prep Work
We begin by gathering all necessary ingredients and equipment to streamline our workflow. Set up your mixing bowl, spatula, rolling pin, and cookie molds on a clean workspace. Preheat your oven to 350°F (180°C) to ensure consistent temperature throughout the baking process. Line your baking sheet with parchment paper to prevent sticking. Having everything organized before we start mixing saves time and prevents errors during the more time-sensitive steps.
Making the Cookie Dough Base
We start by creaming 30 to 150 grams of softened butter with 25 to 100 grams of sugar and salt until the mixture becomes light and fluffy. This process incorporates air into our dough base for better texture. Add vanilla extract and one egg or egg yolk to the creamed mixture, blending thoroughly until well combined. Gradually incorporate 73 to 150 grams of all-purpose flour, mixing until a firm dough forms. For enhanced flavor, fold in chocolate chips or espresso powder at this stage. Chill the dough in the refrigerator if it feels too soft for easy handling.
Shaping the Coffee Cups
We divide our prepared dough into 6 to 8 equal portions for consistent cup sizes. Press each portion evenly into your molds, creating walls approximately ¼ inch thick around the entire cup shape. Use your fingers, spoons, or mold presses to achieve smooth, uniform surfaces throughout each cup. Pay special attention to the base and wall connections to prevent cracking during baking. The walls should be sturdy enough to hold liquid while maintaining an even thickness for proper cooking.
Baking the Cups
We place our filled molds on the prepared baking sheet and slide them into the preheated oven. Bake for 15 to 25 minutes at 350°F (180°C) until the cups turn golden brown and feel crisp to the touch. Monitor the color closely during the final minutes to prevent over-browning. Remove the baking sheet carefully and allow the cups to cool completely in their molds before attempting to release them. This cooling period prevents breaking and ensures structural integrity.
Preparing the Chocolate Coating
We melt cooking chocolate using either a microwave or double boiler method until smooth and glossy. The chocolate should flow easily without being too thick or thin. Brush or pour the melted chocolate evenly inside each cooled cookie cup, ensuring complete coverage of all interior surfaces. This chocolate lining serves as a barrier that prevents liquid from making the cups soggy. Refrigerate the coated cups for 20 to 30 minutes to set the chocolate layer completely.
Finishing Touches
We remove our cups from the refrigerator once the chocolate coating has hardened and set properly. The cups are now ready to fill with espresso, coffee, milk, or dessert fillings like tiramisu cream. Dust with cocoa powder or add decorative elements if desired for an elegant presentation. Serve the filled cups chilled or at room temperature, encouraging guests to enjoy eating the cup along with their beverage for the complete edible experience.
Directions for Serving
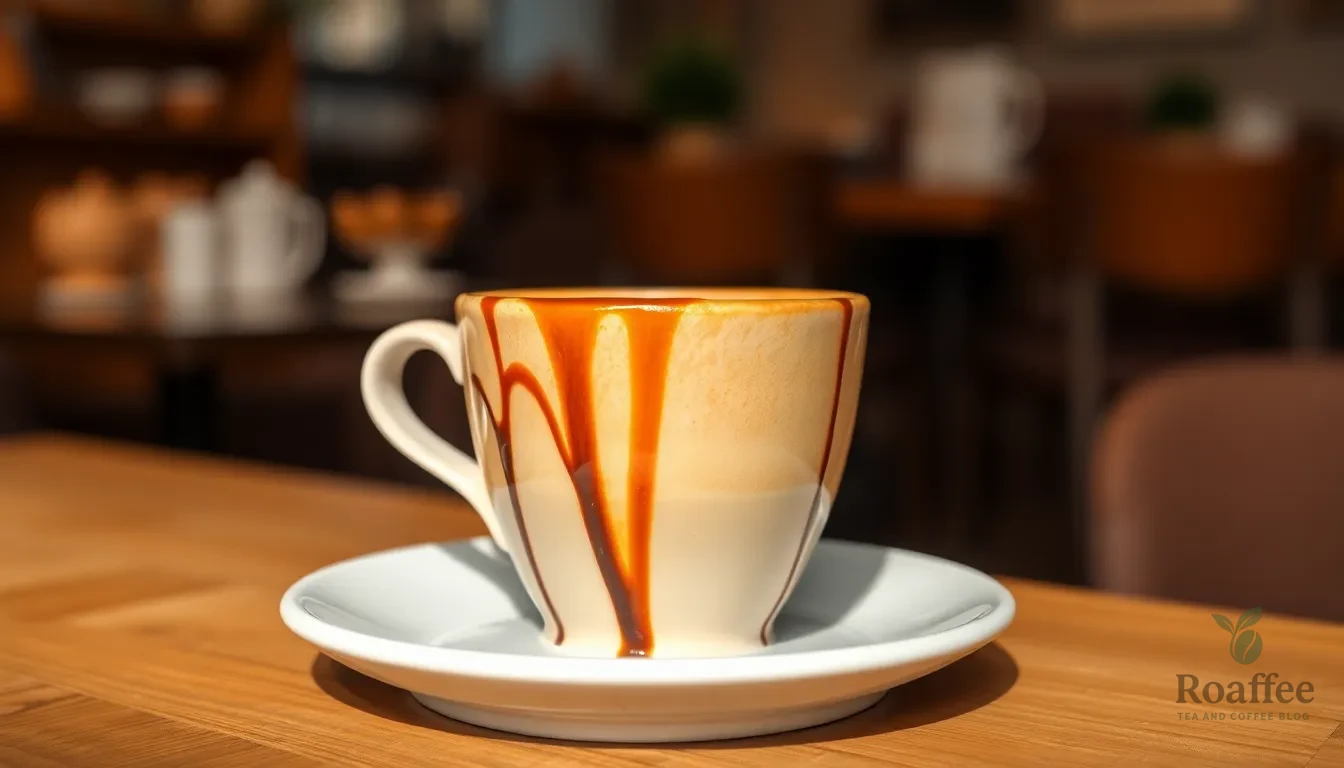
Proper serving technique ensures our edible coffee cups maintain their structural integrity while delivering the best flavor experience. Following these guidelines will help you maximize both the enjoyment and functionality of your homemade cups.
Best Beverages to Use
Espresso works exceptionally well in our edible coffee cups due to its concentrated flavor and smaller serving size. The rich intensity of espresso complements the sweet cookie base without overwhelming the cup’s delicate structure. Strongly brewed coffee also performs excellently as it provides robust flavors that balance beautifully with the chocolate coating.
We recommend avoiding extremely hot liquids that exceed our recommended temperature guidelines. These beverages can cause cup deformation or create safety concerns for your guests. Cold brew coffee offers another excellent option as it eliminates temperature concerns while providing smooth flavor profiles.
Tea lovers can enjoy their favorite blends in these cups with proper temperature control. Herbal teas work particularly well since they typically brew at lower temperatures than black or green teas.
Temperature Guidelines
Coffee should be brewed between 91°C and 96°C (195°F to 205°F) for optimal extraction. But we must serve the coffee at cooler temperatures to protect both the cup integrity and our guests’ safety.
| Temperature Range | Purpose | Celsius | Fahrenheit |
|---|---|---|---|
| Brewing | Optimal extraction | 91°C – 96°C | 195°F – 205°F |
| Serving | Safe consumption | 49°C – 60°C | 120°F – 140°F |
| Maximum safe | Health protection | 65°C | 149°F |
| Milk heating | Texture preservation | 55°C – 65°C | 131°F – 149°F |
Temperatures above 65°C (149°F) pose potential health risks and can compromise cup stability. We discourage serving beverages at these elevated temperatures. Milk should be heated between 55°C and 65°C (131°F to 149°F) but never exceed 70°C (158°F) to prevent scalding and maintain proper texture.
Serving Tips
Serve coffee immediately after pouring to maintain cup integrity and deliver optimal flavor. The chocolate lining inside each cup helps maintain water resistance while adding complementary sweetness to your beverage.
Present each cup with a small plate or napkin since the edible nature makes them more delicate than traditional cups. Your guests will appreciate this thoughtful touch as they enjoy their unique coffee experience.
Consider chilling cups in the refrigerator before serving to improve firmness and heat resistance. This simple step extends the cup’s functional life and provides a more stable drinking experience.
Fill cups gradually to prevent overwhelming the cookie structure. Start with smaller amounts and allow guests to request additional servings if desired. This approach ensures everyone can fully enjoy both the beverage and the edible cup itself.
Make-Ahead Instructions
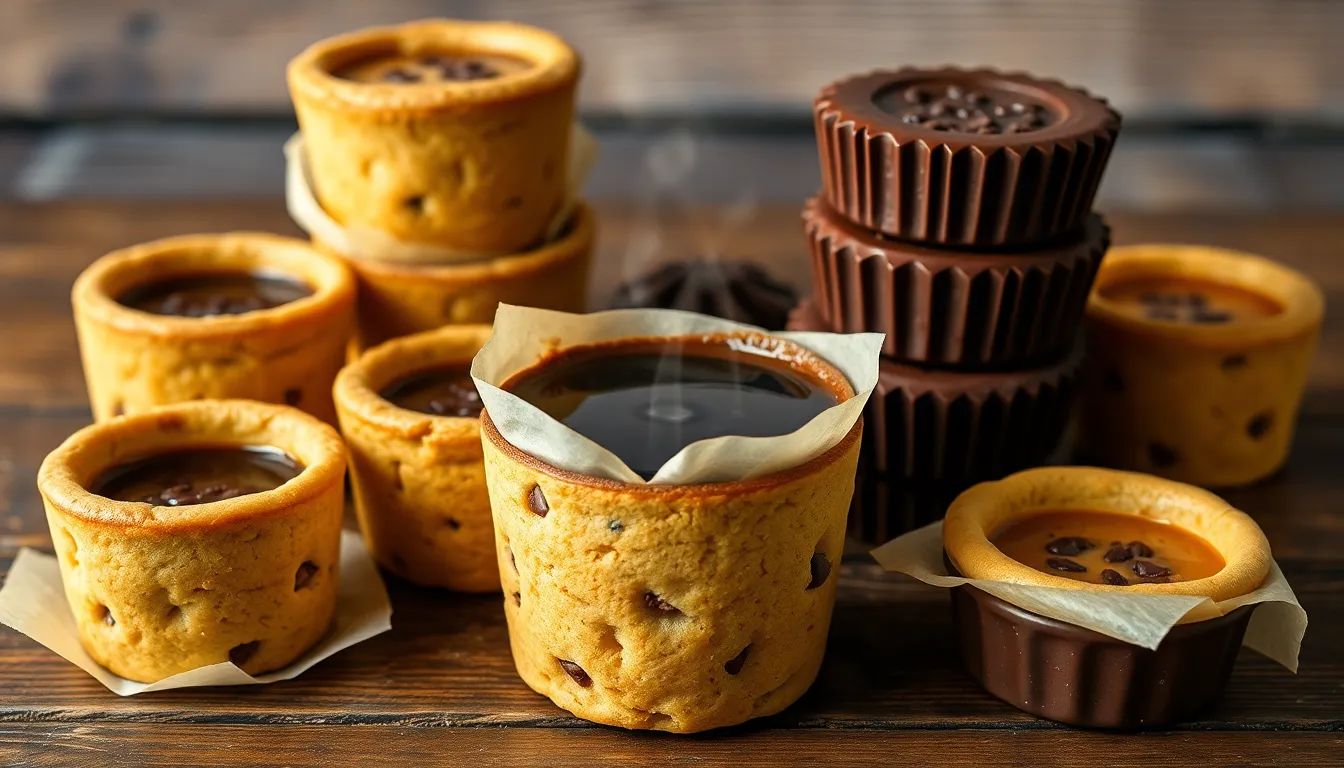
We can prepare these edible coffee cups several days in advance to save time and ensure stress-free entertaining. Storage timing depends on your preparation method and the final use of the cups.
Basic Cookie Cup Storage
Our cookie-based edible cups store beautifully when properly handled. After baking and cooling completely, we place the uncoated cups in airtight containers at room temperature for up to 5 days. Layer them carefully with parchment paper between each cup to prevent cracking or chipping.
Chocolate-Coated Cup Storage
When we add the chocolate coating, storage requirements change slightly. We store chocolate-lined cups in the refrigerator for up to 1 week in sealed containers. The chocolate coating maintains its integrity better in cooler temperatures and prevents any potential melting or softening.
Dough Preparation Timeline
We can prepare the cookie dough up to 2 days ahead of baking. Wrap the dough tightly in plastic wrap and refrigerate until ready to use. This advance preparation actually improves the dough’s workability and flavor development.
Freezer Storage Options
For longer storage, we freeze the baked cups for up to 1 month. Wrap each cup individually in plastic wrap, then place them in freezer bags. Thaw at room temperature for 30 minutes before serving to restore their original texture.
Pre-Service Preparation
We recommend removing refrigerated cups 15 minutes before serving to bring them to optimal temperature. This timing ensures the cups maintain their structural integrity while providing the best eating experience. Check each cup for any cracks or weak spots before filling with coffee.
Quality Control Tips
We inspect stored cups before use to ensure they remain structurally sound. Any cups showing signs of moisture absorption or softening should be discarded. Properly stored cups maintain their crisp texture and ability to hold hot liquids effectively.
Storage and Shelf Life
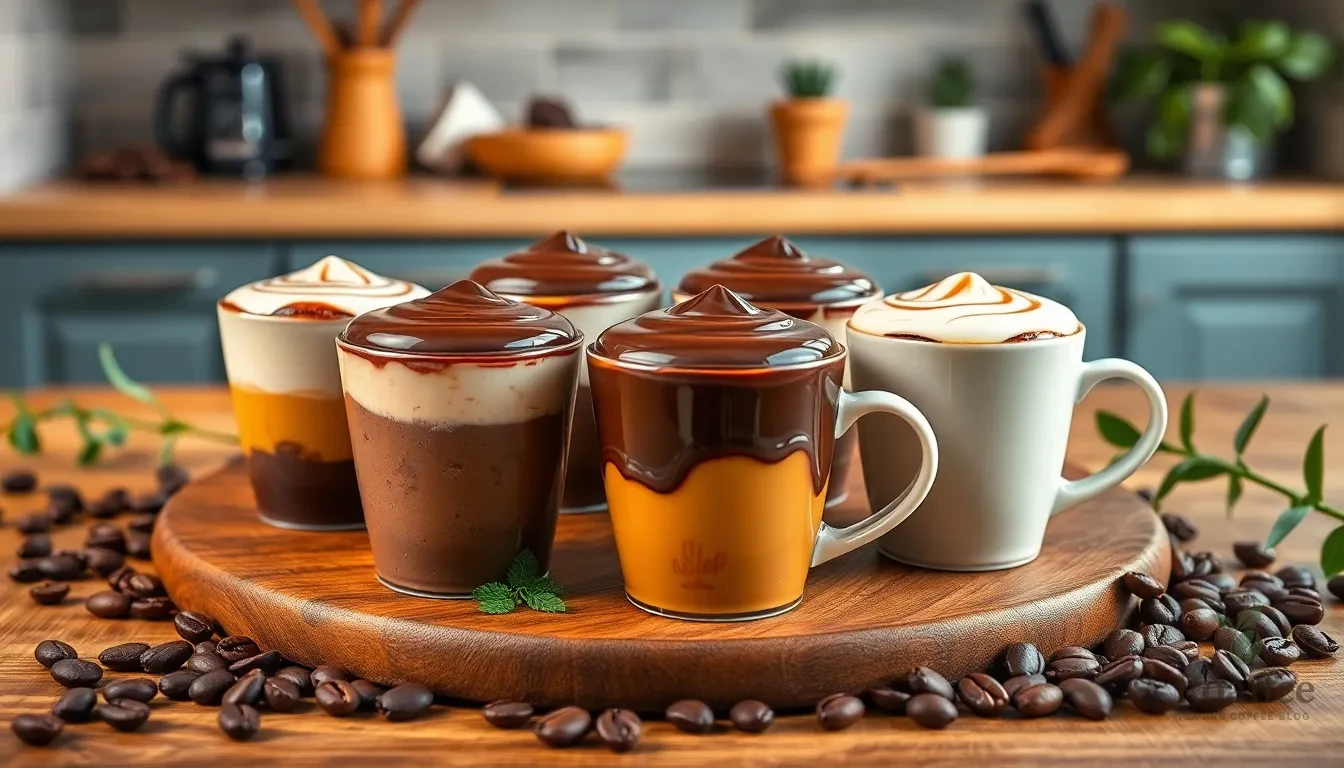
Proper storage techniques ensure our edible coffee cups maintain their structural integrity and delicious flavor for extended periods. We recommend storing finished cups in airtight, moisture-resistant packaging to prevent humidity from compromising their crispness. Cool, dry environments away from direct sunlight provide optimal conditions for preserving both texture and taste.
Storage Requirements
Our edible coffee cups require exact storage conditions to maximize their lifespan. We store them in sealed containers with tight-fitting lids that block moisture and air exposure. Room temperature storage works best for maintaining the cups’ natural crunchiness, while refrigeration can extend shelf life for chocolate-coated versions.
| Storage Method | Duration | Conditions |
|---|---|---|
| Airtight containers | 3-4 weeks | Room temperature, dry environment |
| Refrigerated storage | Up to 1 week | Sealed containers, chocolate-coated cups |
| Frozen storage | Up to 1 month | Wrapped individually, baked cups only |
Shelf Life Expectations
We can expect our edible coffee cups to maintain quality for several weeks to months depending on ingredients and storage methods. Cups with protective chocolate coatings or food wax layers typically last longer than uncoated versions. The protective barriers help preserve structural integrity while extending flavor retention.
Before use, properly stored cups remain fresh for a few weeks up to several months when kept in optimal conditions. Coated cups demonstrate superior longevity due to their moisture-resistant barriers that prevent staleness and maintain crispness.
Performance When Filled
Our edible coffee cups demonstrate impressive durability when filled with hot beverages. Most cups retain their shape and resist sogginess for approximately 30 to 60 minutes after filling with hot coffee or tea. Cups with thicker coatings or higher fat content may maintain structural integrity for up to an hour without compromising.
We recommend serving beverages promptly after filling to ensure the best experience. The chocolate or food wax coating creates a protective barrier that prevents immediate sogginess while allowing guests to enjoy their drinks without rushing.
Quality Indicators
Fresh edible coffee cups exhibit a crisp texture and maintain their original shape without cracks or soft spots. We check for any signs of moisture absorption, which appears as softening around the rim or base. Properly stored cups should sound crisp when tapped gently and show no visible mold or discoloration.
The protective coatings should remain intact and glossy, indicating proper storage conditions. Any cloudiness or cracking in chocolate coatings suggests temperature fluctuations or excessive moisture exposure during storage.
Troubleshooting Common Issues
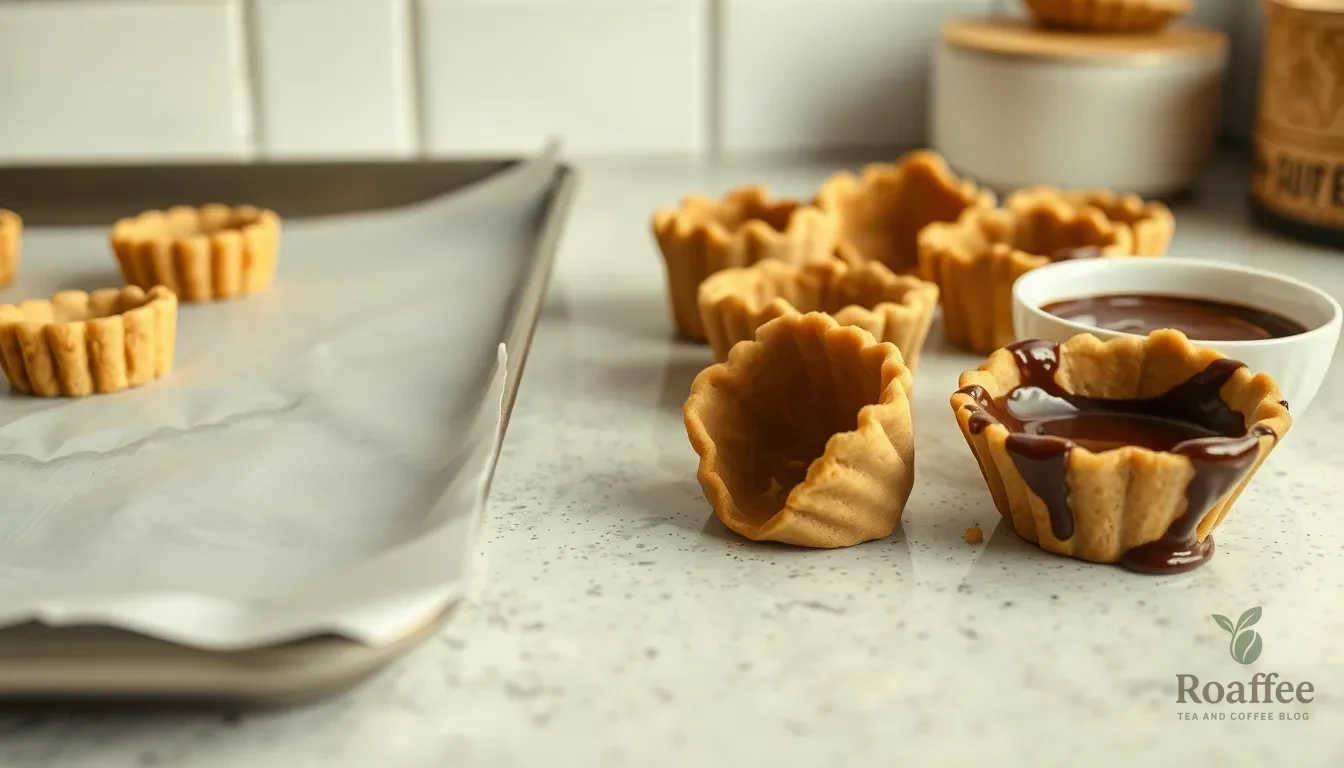
Even with careful preparation, you might encounter some challenges when making edible coffee cups. We’ve identified the most common problems and their answers to help you achieve perfect results every time.
Cups Breaking or Cracking
When your edible coffee cups break or crack, uneven thickness and thermal shock during baking are typically the culprits. We recommend maintaining a consistent dough thickness of approximately 1/4 inch throughout the entire cup structure. This measurement provides the optimal balance between durability and baking time.
Temperature management plays a crucial role in preventing cracks. Rapid temperature changes cause the dough to expand and contract too quickly, creating stress fractures. We always bake our cups using slow, even heat and allow them to cool gradually in the oven with the door slightly ajar.
Removing cups from molds too early can also lead to breakage. Wait until the cups have cooled completely before attempting to unmold them. The cooling process allows the structure to set properly and become more resilient.
Uneven Thickness
Inconsistent pressing or molding of dough creates cups with varying wall thickness, which leads to uneven baking and structural weak points. We solve this issue by applying uniform pressure when shaping the dough in molds.
Using proper molds ensures consistent size and thickness across all your cups. Silicone or metal molds work best for achieving uniform results. Press the dough firmly and evenly into every corner of the mold, paying special attention to the bottom and sides.
| Thickness Issue | Measurement | Solution |
|---|---|---|
| Too thin walls | Less than 1/8 inch | Add more dough and redistribute |
| Uneven sides | Varies by section | Use consistent pressure throughout |
| Thick bottom | More than 1/2 inch | Remove excess dough before baking |
Rolling the dough to a uniform thickness before molding helps prevent these issues. We recommend using rolling pin guides or measuring the dough thickness at multiple points to ensure consistency.
Coating Problems
Protective coatings prevent sogginess and extend the cup’s lifespan when filled with liquids. When the coating is too thin or applied unevenly, your cups may become soggy or develop cracks when filled with hot beverages.
We apply an even, sufficient layer of melted chocolate or food-grade wax to the interior of each cup. The coating should cover all surfaces that will contact liquid, creating a complete barrier. Allow the first coat to set completely before applying a second layer if needed.
Temperature control during coating application is essential. Chocolate that’s too hot can cause the cup to soften or crack, while chocolate that’s too cool won’t spread evenly. We maintain our melted chocolate at approximately 90-95°F for optimal application.
Properly coated cups maintain their structure for 30-60 minutes when filled with hot coffee. This duration depends on the coating thickness and the fat content of your coating material. Store coated cups in airtight packaging away from humidity and heat to preserve their protective barrier.
Creative Variations
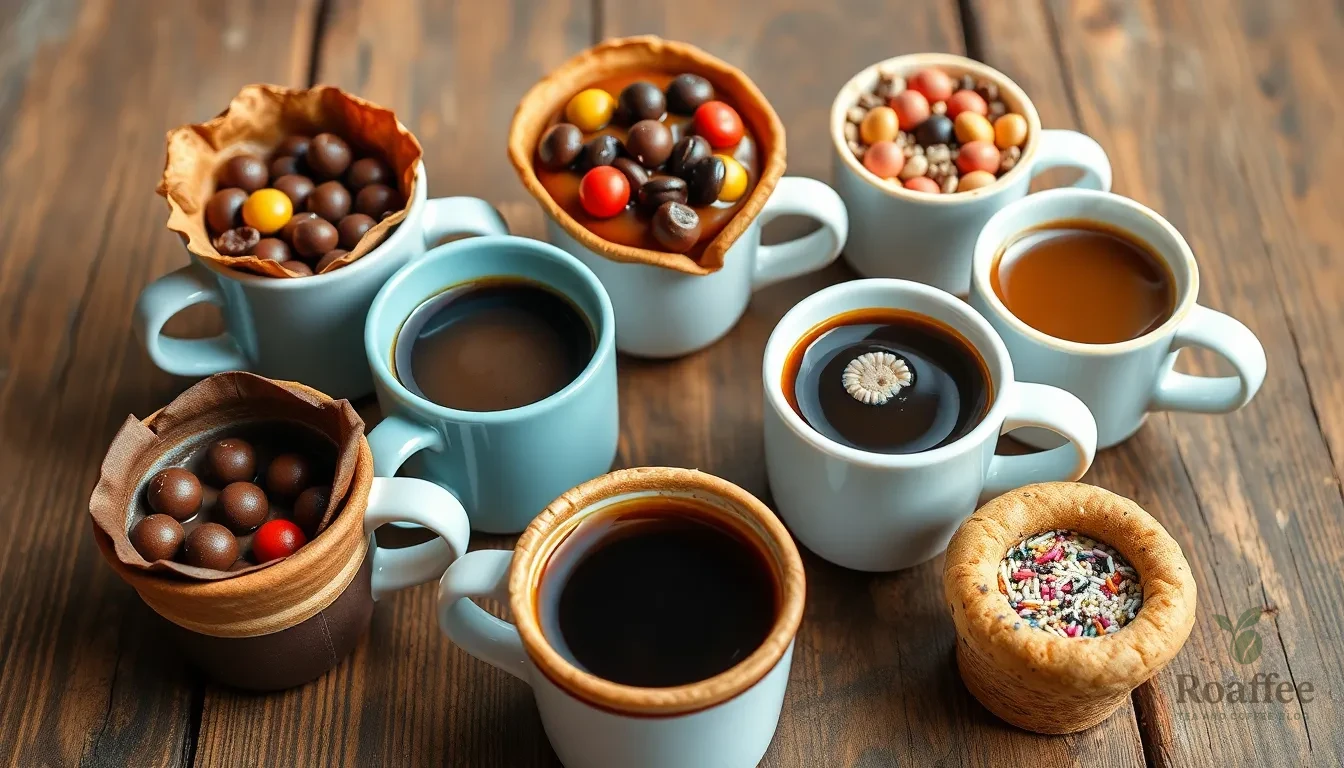
Once you’ve mastered the basic edible coffee cup recipe, we can explore countless ways to customize these delightful creations. The beauty of edible cups lies in their versatility and the opportunity to experiment with different flavors and presentations.
Flavor Combinations
Classic Chocolate & Coffee remains our most popular variation, where we incorporate chocolate chips directly into the cookie dough base. We line the finished cups with melted chocolate, creating a rich barrier that prevents sogginess while adding a decadent flavor that complements the coffee’s natural bitterness.
Nut & Espresso Glaze offers a sophisticated twist we love to recommend. We combine finely chopped nuts like peanuts, pecans, macadamia, or almonds with brown sugar, butter, and a shot of espresso. This mixture creates both a crunchy coating and a flavor reinforcement that pairs beautifully with hot coffee.
Sugar Cone Cups provide a completely different approach we find irresistible. We use sugar cones as ready-made coffee vessels, eliminating the baking process while delivering a sweet, crunchy container. These cones complement coffee naturally and can be enhanced with additional candies or chocolate decorations.
Espresso-Enriched Dough involves incorporating raw cane sugar and extra egg yolk into our base recipe. We bake these enhanced cups in small tins, then fill them with freshly brewed espresso for an elegant coffee-dessert hybrid that impresses guests.
Decorating Ideas
Chocolate Lining serves as both decoration and function in our edible cups. We melt high-quality chocolate and carefully brush it inside each cooled cup, creating a smooth barrier that prevents liquid seepage while adding visual appeal and rich flavor.
Edible Artistic Designs transform simple sugar cone cups into works of art. We hand-paint these cones or attach sugar flowers, hearts, and smiley faces using food-safe adhesives. These decorative elements make each cup unique and photogenic.
Nut Mix Topping creates texture and visual interest on our finished cups. We drizzle the nut and espresso glaze over the rim or create patterns on the exterior, adding both flavor complexity and appealing color contrast.
Candy and Chocolate Enhancements elevate sugar cone cups to new heights. We attach small candies, chocolate chips, or decorative sprinkles to the exterior using melted chocolate as adhesive, creating cups that are as beautiful as they are delicious.
Conclusion
We’ve shown you how to create edible coffee cups that transform your daily coffee routine into an eco-friendly experience. These sustainable alternatives eliminate waste while adding a delicious twist to your beverage enjoyment.
The process might seem challenging at first but with proper preparation and our troubleshooting tips you’ll master the technique quickly. Remember that temperature control and timing are crucial for achieving cups that maintain their structural integrity.
Whether you’re hosting guests or simply wanting to reduce your environmental footprint these edible cups offer the perfect solution. They’re conversation starters that demonstrate your commitment to sustainability while delivering a unique taste experience.
Start with our basic recipe then experiment with different flavors and decorations to make them uniquely yours. Your coffee breaks will never be the same again.
Frequently Asked Questions
What are edible coffee cups made from?
Edible coffee cups are made from simple ingredients like wheat flour, corn starch, sugar, cocoa powder, and eggs. These ingredients create a cookie-like dough that’s shaped into cups and baked until golden brown. A chocolate coating is often applied to the interior to prevent sogginess and add flavor.
How long do edible coffee cups last?
Uncoated edible coffee cups can be stored at room temperature for up to 5 days or 3-4 weeks in airtight containers. Chocolate-coated cups should be refrigerated and consumed within 1 week. Frozen cups can last up to 1 month when properly stored.
Can I make edible coffee cups ahead of time?
Yes, you can prepare edible coffee cups in advance. The dough can be made up to 2 days ahead and refrigerated. Baked cups can be stored for several days or frozen for up to 1 month. Allow refrigerated cups to come to room temperature before serving.
What type of coffee works best with edible cups?
Espresso or strongly brewed coffee works best with edible cups. Avoid extremely hot liquids that could deform the cups. The ideal serving temperature is around 140-160°F (60-71°C) to maintain cup integrity while ensuring safe consumption.
How long can I drink from an edible coffee cup before it gets soggy?
Edible coffee cups can retain their shape and resist sogginess for 30 to 60 minutes after being filled with hot beverages. The chocolate coating helps extend this time by providing a protective barrier against moisture.
Do I need special equipment to make edible coffee cups?
Basic kitchen equipment includes mixing bowls, measuring cups, an electric mixer, and baking sheets. Specialty tools like muffin tins or cup molds help shape the cups, while a rolling pin ensures uniform thickness. A pastry brush is useful for applying coatings.
What should I do if my edible coffee cups crack or break?
Cracking usually results from inconsistent dough thickness or temperature issues during baking. Ensure even dough thickness using a rolling pin, manage oven temperature carefully, and allow cups to cool completely before unmolding to prevent structural damage.
Can I customize the flavor of my edible coffee cups?
Yes, you can create various flavor combinations like Classic Chocolate & Coffee, Nut & Espresso Glaze, or Espresso-Enriched Dough. You can also add decorative elements like chocolate lining, edible designs, or candy enhancements for personalization.
