
We’ve all been mesmerized by those Instagram-worthy coffee cups adorned with intricate foam designs – hearts, leaves, and swirling patterns that transform our morning brew into edible art. What seems like barista magic is actually an achievable skill that anyone can master with the right techniques and a little practice.
Coffee foam art, also known as latte art, originated in Italy and has become a beloved create worldwide. The secret lies in understanding milk texture, pouring techniques, and timing. We’ll guide you through creating silky microfoam and mastering the fundamental pouring motions that form the foundation of stunning designs.
Whether you’re using an espresso machine, French press, or simple milk frother, we’ll show you how to create café-quality foam art from your own kitchen. With our step-by-step approach, you’ll be impressing friends and elevating your daily coffee ritual in no time.
Essential Equipment for Coffee Foam Art
Mastering coffee foam art requires the right tools to achieve professional results. We’ll walk you through each essential piece of equipment that transforms ordinary coffee into stunning edible artwork.
Espresso Machine with Steam Wand
The espresso machine serves as the foundation for all coffee foam art creations. We recommend investing in a machine with a powerful steam wand that produces consistent pressure between 1-2 bars. The steam wand should feature a single or double hole tip for optimal milk texturing control.
Professional grade espresso machines deliver the best results, but quality home machines can produce exceptional foam art too. Look for machines with adjustable steam pressure settings and quick heating recovery times. The steam wand must reach temperatures between 140-160°F to create the perfect microfoam texture without scalding the milk.
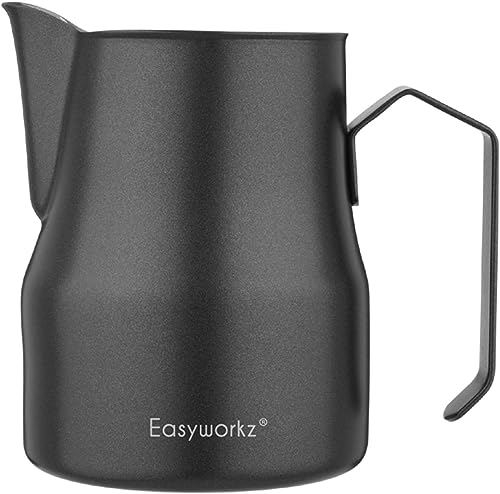
Milk Frothing Pitcher
Stainless steel milk pitchers are non-negotiable tools for achieving smooth, consistent foam. We always use pitchers with a capacity between 12-20 ounces to allow proper milk expansion during steaming. The spout design matters significantly – a narrow, tapered spout provides precise control for detailed pattern work.
The pitcher’s shape affects your pouring technique and final design quality. Choose pitchers with a round bottom for better milk circulation and heat distribution. Professional baristas prefer pitchers with measurement markings to ensure consistent milk quantities and foam ratios.
Coffee Cups and Saucers
Cup selection directly impacts your foam art presentation and success rate. We use wide-mouth cups with a 6-8 ounce capacity for optimal canvas space and proper milk-to-espresso ratios. The cup’s interior should be white or light-colored to showcase design contrast effectively.
Ceramic cups retain heat longer than glass alternatives, keeping your artwork intact during presentation. The cup’s depth and angle influence how the milk flows and settles, affecting pattern formation. Wide, shallow cups work best for intricate designs like rosettas and swans.
Optional Tools for Advanced Designs
Advanced foam artists benefit from specialized tools that enhance creativity and precision. Etching tools, thin wooden picks, and food-safe brushes allow for detailed pattern manipulation after initial pouring. These tools help create hearts, leaves, and complex geometric patterns.
Chocolate powder shakers and cinnamon dispensers add color contrast and finishing touches to your designs. Stencils provide consistent shapes for beginners learning pattern fundamentals. Digital thermometers ensure precise milk temperature control for optimal foam consistency and longevity.
Ingredients

Creating beautiful coffee foam art requires just a few key ingredients, each playing a crucial role in achieving the perfect microfoam texture and rich espresso base. We’ll walk you through the essential components that transform ordinary coffee into stunning latte art.
Coffee Beans or Espresso
Fresh coffee beans or quality espresso capsules form the foundation of exceptional foam art. We recommend using freshly ground coffee beans to brew a rich espresso shot that provides the bold flavor contrast needed for stunning designs. The espresso serves as your canvas, so investing in quality beans ensures your artwork sits atop a delicious base worth showcasing.
Whole Milk
Whole milk stands as our top recommendation for creating smooth, velvety foam that’s ideal for latte art. The fat content in whole milk produces microfoam with a creamy texture that holds its shape beautifully during pouring. We find that whole milk creates the most stable foam structure, allowing for crisp design definition and longer-lasting artwork that won’t fade quickly.
Alternative Milk Options
Oat milk emerges as our preferred non-dairy alternative due to its foaming properties that closely mimic whole milk’s performance. We’ve found that oat milk creates reliable microfoam suitable for most latte art techniques. Almond milk presents more challenges, requiring careful steaming techniques to avoid large bubbles that can disrupt your designs. When using almond milk, we recommend reducing air intake during steaming to achieve better foam texture, though it remains less suitable for cappuccino foam compared to whole milk or oat milk options.
Preparing the Perfect Espresso Base

The foundation of stunning coffee foam art begins with crafting the perfect espresso base. We need to focus on three critical elements: grinding technique, extraction timing, and temperature control to create the rich canvas our designs require.
Grinding Your Coffee Beans
We recommend using a burr grinder for consistent grind size control, which directly affects extraction quality. The grind consistency impacts how water flows through the coffee grounds during extraction. Fine grounds slow water flow while coarser particles allow faster passage.
Fresh grinding makes a important difference in flavor extraction. We grind our beans immediately before brewing to preserve the aromatic oils and achieve the freshest taste possible. The ideal grind resembles fine sand rather than powder or coarse salt.
Adjust your grind size based on extraction timing results. We aim for a grind that allows proper water flow during the 21-24 second extraction window. Too fine creates bitter over-extraction while too coarse produces weak under-extraction.
Pulling the Espresso Shot
We use 7 to 8 grams of ground coffee per shot for optimal strength and crema formation. Distribute the grounds evenly in the portafilter to ensure uniform water contact. Tamp using 30-40 lbs of pressure to create a compact, level surface.
Insert the tamped portafilter into your espresso machine and begin extraction promptly. We target a 21-24 second extraction time for balanced sweetness and proper crema development. The shot should flow steadily like warm honey rather than dripping slowly or gushing rapidly.
Watch for the thick crema layer that forms on top during extraction. This golden foam indicates good extraction and provides the perfect base for our foam art designs. The crema should be rich and persistent rather than thin or quickly dissipating.
Temperature and Timing Guidelines
| Parameter | Target Range | Purpose |
|---|---|---|
| Extraction Time | 21-24 seconds | Balanced flavor extraction |
| Coffee Dose | 7-8 grams | Optimal strength and crema |
| Tamping Pressure | 30-40 lbs | Even water distribution |
| Water Temperature | 195-205°F | Proper extraction without burning |
We maintain water temperature between 195-205°F for optimal extraction without scorching the coffee. Too hot water burns the grounds while too cool water fails to extract sufficient flavor compounds. Most quality espresso machines automatically regulate this temperature range.
Timing coordination between espresso extraction and milk steaming ensures both components are ready simultaneously. We start steaming milk shortly after beginning the espresso shot to achieve perfect temperature synchronization. This prevents the espresso from cooling while we prepare the milk foam.
Steaming and Frothing Milk

Now that we have our espresso base prepared, we need to master the art of steaming and frothing milk to create the perfect microfoam for our designs. This process requires precision and practice, but understanding the fundamentals will set us up for success.
Choosing the Right Milk
We recommend using whole milk as our primary choice because its fat content creates creamy, stable microfoam that holds its shape beautifully. The higher fat percentage helps maintain the foam’s structure while providing that luxurious texture we’re after.
For those seeking plant-based alternatives, barista-style oat milk serves as our top non-dairy option. These specially formulated oat milk products are designed specifically for frothing and produce results comparable to dairy milk.
Other plant-based milks can work, but they require more careful handling and may not achieve the same consistency. We find that experimenting with different milk types helps us understand how each one behaves during the steaming process.
Proper Steam Wand Technique
We start by pouring cold milk into our metal steaming pitcher, filling it about one-third full to allow room for expansion. This measurement ensures we have enough space for the milk to increase in volume without overflowing.
Next, we insert the steam wand into the milk jug’s side near the bottom corner at an angle. This positioning creates optimal circulation patterns that help us achieve uniform heating and frothing.
We turn on the steam and create a vortex by holding the pitcher steady so the milk spins in a whirlpool motion. This technique draws in air to form microbubbles while thickening the milk texture.
Initially, we maintain the steam tip just below the surface to introduce air gently until the milk volume expands slightly. Once we achieve this expansion, we submerge the wand deeper to heat the milk evenly throughout.
We continue heating until the pitcher becomes almost too hot to touch, which occurs around 140-150°F. At this point, we turn off the steam to prevent overheating and maintain the ideal temperature for pouring.
Achieving the Perfect Microfoam Texture
Our goal is to create microfoam with tiny, uniform bubbles that look glossy and paint-like rather than thick or frothy. This texture is essential for creating detailed latte art designs that hold their shape.
Perfect microfoam appears thin, shiny, and has a smooth texture like wet paint. We can tell we’ve achieved the right consistency when the milk looks almost luminous and flows smoothly from the pitcher.
If we notice large bubbles in our foam, we tap the pitcher on the counter to break them up and swirl the milk to integrate everything smoothly. This technique helps us eliminate any imperfections before pouring.
We can practice our frothing technique using a pitcher filled with water and a drop of dish soap steamed with the wand. This method mimics real milk texture without wasting ingredients while we perfect our skills.
The key to consistent results lies in maintaining steady movements and controlling our timing throughout the entire steaming process. With practice, we’ll develop the muscle memory needed to create perfect microfoam every time.


Basic Foam Art Techniques

Now that we have perfectly steamed microfoam and a rich espresso base, we can transform these elements into stunning visual masterpieces. Mastering these fundamental techniques requires understanding milk texture manipulation, precise pouring angles, and exact pattern movements.
Mastering the Pour
We begin every design by positioning our milk pitcher and cup at complementary angles toward each other. Starting from a few centimeters above the cup surface allows us to blend the milk seamlessly with the espresso without disturbing the crema layer.
Our pouring technique involves gradually lowering the pitcher tip closer to the coffee surface as we create our design. We manipulate the flow rate through controlled wrist movements while maintaining steady pitcher positioning throughout the entire process.
The “wiggle” motion becomes our most essential skill for creating layers and shapes in the foam. We execute small side-to-side wrist movements that generate the flowing patterns characteristic of professional latte art. Practice with consistent flow control helps us achieve the precise movements needed for complex designs.
Creating the Heart Design
We start the heart pattern by pouring a centered dot of milk into our coffee cup. This initial placement serves as the foundation for our entire design and determines the final positioning of our heart shape.
When our cup reaches near-full capacity, we slow our pour significantly and execute a “cutting” motion through the center. We move the pitcher slightly upward while cutting to form the distinctive pointed tip that defines our heart shape.
Adding gentle wiggle motions before the final cut creates additional texture within our heart design. This optional technique enhances the visual appeal and demonstrates advanced pouring control.
Making the Rosetta Pattern
We begin the rosetta by pouring steadily in the center while implementing our wiggle technique side-to-side to establish a flowing base pattern. This foundational movement creates the organic, leaf-like texture that characterizes the rosetta design.
Our pour speed slows slightly as we pull the pattern upward with gentle wave motions. We maintain consistent wiggle movements throughout this phase to ensure uniform layering across the entire design.
We complete the rosetta by pouring a small heart shape at the top of our pattern. The final step involves cutting through the entire design to create the distinctive leaves and stem that give this pattern its botanical appearance.
Perfecting the Tulip Design
We establish the tulip foundation by pouring a base dot centered in our coffee cup. This initial placement requires precision since all subsequent layers will stack upon this starting point.
Our stacking technique involves pushing additional dots on top of the base, with each layer shaped through controlled wiggle motions. We repeat this stacking process to create multiple layered petals that build the tulip’s dimensional appearance.
The finishing touch requires cutting through all layers simultaneously to form the stem. This final motion connects all individual petals into a cohesive tulip design that showcases our mastery of flow control and pattern manipulation.
Advanced Foam Art Patterns

After mastering the basic techniques, we can elevate our coffee foam art to professional-level designs. These sophisticated patterns require precise control and practice but create stunning visual impacts that transform ordinary coffee into artistic masterpieces.
Swan Design
We begin the swan by creating a half rosetta shape to form the elegant body of our design. The technique requires us to pour steadily while keeping the pitcher spout close to the coffee surface.
Next, we add small heart shapes at the top portion to create the swan’s head. This step demands careful flow control to maintain the proper proportions between the body and head elements.
Creating the graceful neck involves using a slow, curved line that connects the head to the body. We reduce our milk flow significantly near the top to achieve those delicate, fine lines that give the swan its distinctive appearance.
The finishing touch comes when we use a toothpick or specialized latte art tool to draw the beak with a quick, sharp motion. Advanced variations include double swans, 3D swans, and multicolored designs using natural colorings like matcha powder.
Leaf Pattern
The leaf pattern, also known as the rosetta, starts with tilting our cup at an angle while pouring milk steadily over the espresso surface. This initial positioning creates the foundation for our intricate leaf design.
We move the pitcher from side to side in controlled motions to create the distinctive leaf veins. The key lies in maintaining consistent rhythm while keeping the spout close to the coffee’s surface throughout the process.
Our final step involves pulling the pour through the center to form the leaf’s stem. This cutting motion requires a swift, confident movement that brings all the elements together into a cohesive leaf shape.
Multiple Heart Designs
Creating multiple hearts begins with pouring a series of small, evenly spaced hearts around the cup’s edge. Each heart requires identical timing and flow control to maintain consistent shapes and sizes.
We finish this complex design by adding a larger heart in the center for visual balance. This focal point ties the entire composition together while demonstrating our mastery of spacing and proportion.
The technique demands exceptional hand steadiness and precise timing to ensure each heart maintains its distinct shape without bleeding into adjacent designs.
Abstract Art Techniques
Abstract coffee art gives us creative freedom to experiment with unconventional patterns and flowing designs. We use swift pouring motions to create sharp, bold lines that form the foundation of our abstract compositions.
Combining slower pours allows us to achieve soft shading effects that add depth and dimension to our artwork. The contrast between quick and deliberate movements creates visual interest and complexity.
We modify our cup angle and pitcher height to change flow speed and design clarity throughout the creation process. These adjustments give us precise control over how the milk interacts with the espresso canvas.
For enhanced detail work, we employ tools like sticks or toothpicks to refine shapes or add finishing touches to our designs. Advanced 3D foam art involves spooning thick foam directly onto the coffee surface to sculpt dimensional shapes like animals, then using toothpicks and food coloring to add facial details and defining features.
Troubleshooting Common Issues

Even experienced baristas encounter challenges when creating foam art. We’ve compiled the most common problems and their answers to help you perfect your technique.
Fixing Lumpy or Thick Foam
Lumpy or thick foam typically results from introducing too much air during steaming or overheating the milk. We recommend reducing your steaming time and introducing air more slowly to achieve the silky microfoam texture you need. Keep your milk temperature between 140-150°F (60-65°C) to prevent breaking down the milk proteins.
| Issue | Cause | Solution |
|---|---|---|
| Lumpy foam | Too much air introduced | Reduce steaming time and introduce air slowly |
| Thick foam | Milk overheated | Maintain temperature at 140-150°F (60-65°C) |
After steaming, tap your milk pitcher on a surface and swirl the milk to break any large bubbles that formed during the process. This creates the glossy, paint-like texture essential for smooth pouring.
Dealing with Flat Designs
Flat designs often occur when there’s poor contrast between the milk and espresso or when the foam lacks proper texture. We suggest mixing your milk and espresso well before attempting to pour your design. Pour closer to the surface of your coffee and control your flow rate to create clear, defined patterns.
Weak foam is another culprit behind flat designs. Ensure your microfoam has the right consistency by checking that it appears glossy and moves like paint when you swirl the pitcher. If your crema gets disrupted too early in the pouring process, start from a higher position to allow proper mixing before lowering your pitcher for the design work.
Temperature Problems
Temperature control affects both foam texture and taste quality. We use a thermometer to monitor our milk temperature and avoid overheating, which breaks down milk proteins and creates an unpleasant texture. The ideal steaming temperature ranges from 140-150°F for optimal foam stability.
Cold milk won’t steam properly and creates large, unstable bubbles that collapse quickly. Always start with fresh, cold milk from the refrigerator to achieve the best results. If your milk becomes too hot, it will taste scalded and won’t hold its foam structure during pouring.
Consistency Issues
Inconsistent texture or persistent bubbles indicate problems with your milk preparation or equipment maintenance. We always use fresh, cold milk and clean our steam wand before each use to prevent residue from affecting the foam quality.
Avoid re-aerating milk late in the steaming process, as this reintroduces large bubbles that disrupt your smooth microfoam. If you notice inconsistent results, check that your milk is fresh and your steam wand is producing consistent pressure. Practice your technique with the same milk type and temperature to develop muscle memory for reliable results.
Practice Tips and Techniques

Mastering coffee foam art requires consistent practice and strategic techniques that build both technical skill and artistic confidence. We’ll explore proven methods to accelerate your learning process while developing the precision needed for professional-quality designs.
Daily Practice Routine
We recommend establishing a consistent daily practice routine that focuses on building muscle memory through deliberate, slow-paced movements. Start each session by concentrating on how you hold the pitcher and control both pour height and speed rather than rushing through multiple designs.
To minimize waste during practice sessions, we suggest reusing steamed milk and mixing instant coffee with steamed milk to maintain the contrast needed for designs without requiring fresh espresso shots every time. This approach allows you to practice extensively without the expense of pulling multiple shots.
Train your pouring and design skills separately before combining them fully. We find this method develops precision more effectively than attempting complex patterns before mastering fundamental movements. Focus on one aspect at a time to build confidence and accuracy.
Using Different Milk Types
Whole milk remains our preferred choice for creating creamy microfoam due to its fat content and protein structure that produces stable, velvety texture. But, we encourage experimenting with alternative milks to discover different textures and flavors that can enhance your art.
Oat milk performs exceptionally well among non-dairy alternatives, offering reliable foaming properties that closely mimic whole milk’s behavior. Almond and soy milk present greater challenges but can yield unique textures when steamed correctly, though they require adjusted steaming times and techniques.
Each milk type responds differently to steaming, so we recommend adjusting your steaming duration and temperature based on the milk you’re using. Alternative milks often require gentler steaming to avoid breaking down their protein structures.
Experimenting with Pour Heights
Understanding pour height control is essential for creating distinct, contrasted designs that showcase clear definition between milk and espresso. We start by pouring from a higher height initially to help the milk mix with the espresso base, creating a stable canvas for your art.
As you progress through your design, transition to pouring close to the espresso surface to help create detailed patterns where the foam stays on top rather than sinking into the drink. This technique allows for sharp, defined edges in your designs.
Mastering the transition from high to low pour is key to achieving professional-looking results. We practice this movement repeatedly until it becomes second nature, as smooth transitions create the contrast that makes designs pop visually.
Building Muscle Memory
Slowing down your practice sessions significantly improves muscle memory by making you conscious of every hand and wrist movement involved in creating foam art. We emphasize deliberate, controlled motions over speed during the learning phase.
Repetition over time develops the steadiness and coordination necessary for smooth pouring and consistent art patterns. We recommend dedicating at least 15-20 minutes daily to focused practice, concentrating on maintaining steady pitcher control and consistent flow rates.
Your muscle memory will develop naturally through consistent practice, allowing you to focus more on creative expression rather than technical execution. We notice that students who practice slowly and deliberately achieve better results faster than those who rush through practice sessions.
Conclusion
We’ve taken you through every step of creating stunning coffee foam art from understanding the basics to mastering advanced techniques. With the right equipment quality ingredients and consistent practice you’ll transform your daily coffee routine into an artistic expression.
Remember that foam art isn’t just about impressing others – it’s about elevating your entire coffee experience. The smooth microfoam and precise pouring techniques we’ve covered will enhance both the visual appeal and taste of your beverages.
Start with simple designs like hearts and gradually work your way up to complex patterns. Don’t get discouraged if your first attempts aren’t perfect – even professional baristas needed time to develop their skills. Keep practicing with different milk types and refining your steaming technique.
Your journey to creating café-quality foam art at home starts now. With patience dedication and the techniques we’ve shared you’ll soon be crafting beautiful designs that rival those from your favorite coffee shop.
Frequently Asked Questions
What equipment do I need to start making coffee foam art?
You’ll need an espresso machine with a powerful steam wand, a stainless steel milk frothing pitcher, and wide-mouth ceramic cups. The steam wand should have adjustable pressure and quick heating recovery for optimal microfoam texture. A good frothing pitcher with a precise spout is essential for creating smooth designs.
What type of milk works best for latte art?
Whole milk is the top choice for coffee foam art because it creates smooth, velvety foam with excellent stability. For non-dairy alternatives, oat milk (specifically barista-style) works reliably due to its superior foaming properties. Almond milk can be more challenging and requires careful steaming techniques.
How do I create the perfect microfoam texture?
Position the steam wand just below the milk surface and create a vortex for uniform heating. The ideal microfoam should look glossy and paint-like with tiny, uniform bubbles. Steam until the milk reaches 140-150°F, then tap the pitcher to break large bubbles and swirl to integrate the foam.
What’s the best way to practice foam art without wasting coffee?
Practice your pouring technique using water and soap mixture to develop muscle memory. You can also reuse steamed milk for multiple practice attempts. Focus on training pouring motions and design skills separately before combining them, and slow down your practice sessions for better precision.
How long does it take to master basic latte art designs?
With consistent daily practice, you can master basic designs like hearts and rosettas within 2-4 weeks. Advanced patterns like swans and leaves may take several months to perfect. The key is establishing a regular practice routine and focusing on deliberate, controlled movements rather than speed.
What are the most common mistakes beginners make?
Common issues include creating lumpy foam from over-steaming, pouring from too high which breaks the crema, and incorrect milk temperature. Many beginners also pour too fast or at the wrong angle. Maintaining proper equipment cleanliness and controlling pour height are crucial for consistent results.