We’ve all been there – it’s early morning and you’re craving that perfect cup of coffee, but your coffee maker decided to break down or you’re camping without your usual equipment. Don’t panic! Making delicious coffee without a traditional coffee pot isn’t just possible – it’s actually quite simple and can produce surprisingly excellent results.
Whether you’re dealing with a broken coffee maker, traveling without your gear, or simply want to explore alternative brewing methods, we’ll show you several foolproof techniques using items you likely already have in your kitchen. From the classic stovetop method to the ingenious Mason jar technique, these methods will save your morning routine and might even become your new favorite way to brew.
These brewing alternatives aren’t just emergency answers – they’re legitimate methods that coffee enthusiasts around the industry use daily. You’ll discover that making coffee without a coffee pot can actually give you more control over your brew’s strength and flavor profile.
Equipment and Tools Needed
Making coffee without a traditional coffee maker requires surprisingly few items. Most of these tools likely exist in your kitchen already.
Essential Items for All Methods:
- Ground coffee beans (medium to coarse grind works best)
- Hot water (heated to 195-205°F)
- Fine mesh strainer or coffee filter
- Heat-resistant container or bowl
- Measuring spoons or coffee scoop
Method-Exact Equipment:
For Stovetop Brewing:
- Medium saucepan or pot
- Wooden spoon for stirring
- Timer
For Mason Jar Technique:
- Large mason jar with lid
- Kitchen towel for handling hot jar
For French Press Alternative:
- Large bowl or pitcher
- Clean kitchen towel or cheesecloth
- Rubber band or string
For Cowboy Coffee:
- Camping pot or large saucepan
- Cold water for settling grounds
Optional but Helpful Tools:
- Kitchen thermometer for water temperature
- Coffee grinder (if using whole beans)
- Scale for precise measurements
- Insulated mug to keep coffee warm
We recommend gathering your chosen equipment before starting the brewing process. This preparation ensures smooth execution and prevents your coffee from cooling while you search for tools. The beauty of these alternative methods lies in their simplicity and accessibility using common household items.


Ingredients
 2")
Making coffee without a coffee pot requires just a few simple ingredients that you likely already have in your kitchen. The beauty of these alternative brewing methods lies in their simplicity and accessibility.
Basic Ingredients for All Methods
- Coffee grounds – 2 tablespoons per 6 ounces of water (adjust to taste preference)
- Water – Fresh, cold water for best flavor extraction
- Optional flavor enhancers – Sugar, cream, milk, or your preferred coffee additions
Method-Exact Ingredients
For Cowboy Coffee Method:
- Medium to coarse ground coffee
- Clean drinking water
- Large pot or saucepan
For Coffee Bag Method:
- Medium ground coffee
- Paper coffee filter or clean cloth
- Kitchen string or twist tie
- Heat-resistant mug
For French Press Style Method:
- Coarse ground coffee
- Hot water (not boiling)
- Heat-resistant container or large mug
Coffee Ground Preparation Tips
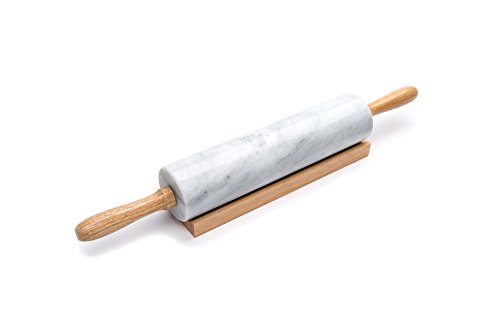
We recommend using freshly ground coffee beans for the best flavor profile. If you only have whole beans available, you can crush them using a rolling pin or the bottom of a heavy pan. Pre-ground coffee works perfectly for these methods and saves time during your brewing process.
The coffee-to-water ratio remains consistent across all three methods, though you can adjust the strength by increasing or decreasing the amount of grounds used. Start with the standard measurement and modify according to your taste preferences.


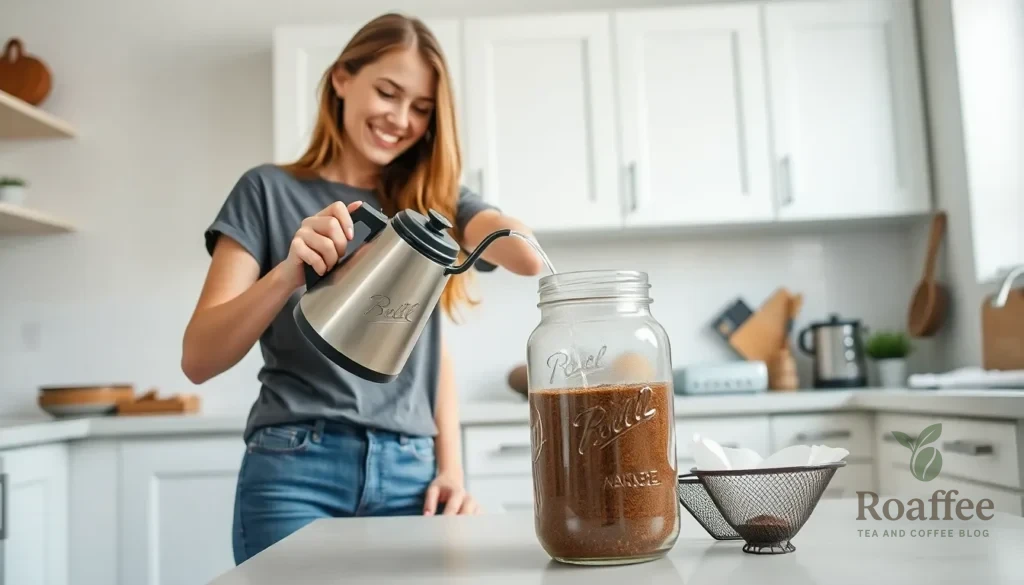
Method 1: French Press Alternative (Mason Jar Method)
 4")
We’ll transform your mason jar into an effective French press alternative that delivers rich and flavorful coffee. This method combines the steeping process of a French press with the convenience of everyday kitchen items.
Prep
We start by heating water until it reaches a rolling boil then letting it sit for one to two minutes to avoid burning the coffee grounds. Place a Chemex or standard coffee filter into the mouth of a wide-mouth mason jar. Fold the filter edges over the rim of the jar and secure them with the mason jar ring if available.
Add coarsely ground coffee to the filter using approximately 8 scoops per 8 cups of water. We recommend adjusting this ratio to match your taste preferences for stronger or milder coffee. The coarse grind prevents over-extraction and ensures smooth brewing similar to traditional French press methods.
Brew
We slowly pour the hot water over the coffee grounds inside the filter while being careful not to overflow the jar. Let the coffee steep for several minutes to allow the flavors to develop fully and create a rich extraction. Gently stir the mixture if needed to ensure all grounds become saturated with water.
The steeping process mimics the French press technique by allowing extended contact between water and coffee grounds. This creates the deep and robust flavor profile that French press enthusiasts appreciate.
Strain
After the brewing time completes we carefully remove the filter containing the used grounds from the mason jar. Allow any remaining coffee to drain completely into the jar before discarding the filter and grounds. The filter effectively traps all the grounds while allowing the smooth coffee to flow through.
This straining method eliminates the need for additional filtering steps and produces clean coffee similar to what a French press would deliver. Our mason jar now contains perfectly brewed coffee ready for serving.


Method 2: Cowboy Coffee (Stovetop Method)
 6")
We’ll explore the rustic cowboy coffee method that produces a bold and flavorful brew reminiscent of traditional percolator coffee. This straightforward stovetop technique requires minimal tools and delivers a robust cup without specialized equipment.
Prep
We begin by measuring our cold water at approximately 12 to 13 ounces per cup we plan to serve. Our coffee grounds should be measured at roughly 1 tablespoon per 5 ounces of water to achieve the proper strength. We combine both the water and coffee grounds directly in a saucepan or pot rather than brewing them separately.
Cook
We set our pot over medium high heat and bring the mixture to a rolling boil. Once the water reaches a full boil we continue boiling for about 45 seconds before stirring the coffee grounds gently but thoroughly. We make sure to loosen any grounds that may have stuck to the pot’s sides during this stirring process.
After removing the pot from heat we let it steep for 2 minutes before stirring again gently. We allow the coffee to steep for an additional 2 minutes to complete the extraction process.
Settle and Serve
We add a small amount of cold water on top after the total steeping time of around 4 minutes to help the coffee grounds settle to the bottom. Our careful pouring technique involves slowly transferring the coffee into mugs while being mindful not to disturb the settled grounds.
We strain the coffee if needed to remove any remaining grounds that may have escaped during pouring. Serving immediately ensures the best taste since letting the coffee sit can cause over extraction and unwanted bitterness. This method works exceptionally well for camping situations or when we lack a traditional coffee maker.


Method 3: Pour Over with Makeshift Filter
 8")
We move to another practical brewing technique that transforms everyday items into an effective coffee maker. This method gives us excellent control over flavor and strength while requiring minimal equipment.
Prep
We start by gathering our makeshift filter materials from common household items. A clean paper towel, cloth napkin, or actual coffee filter works perfectly for this technique.
We position the filter over a cup or wide-mouth jar, securing it by folding the edges over the rim. A rubber band or string helps hold the makeshift filter firmly in place. We then add our desired amount of ground coffee directly onto the filter surface.
Pour and Brew
We heat water until it reaches the optimal temperature – about 1-2 minutes after boiling to avoid burning the coffee grounds. The water should be just off boiling for the best extraction.
We slowly pour the hot water over the coffee grounds, allowing the water to saturate them completely. The brewing liquid drips steadily into our cup or jar below as we maintain a controlled pour. We let the coffee steep for 3-4 minutes depending on our preferred strength.
Finally, we carefully remove the filter containing the spent coffee grounds. Our freshly brewed coffee is ready to enjoy, delivering a clean taste with full control over the brewing process.
Method 4: Cold Brew in a Jar
 10")
Cold brew coffee in a jar offers the smoothest and least acidic brewing method when you don’t have a coffee maker. This technique requires patience but delivers exceptional flavor using nothing more than a Mason jar.
Prep
We begin by coarsely grinding our coffee beans to a texture similar to coarse cornmeal. Measure 1 cup of coffee grounds for every 4 cups of cold or room temperature water to achieve the proper strength. Place the grounds in a large jar or Mason jar that can accommodate the full volume of water.
Pour the water over the coffee grounds slowly to ensure even saturation. Stir gently with a spoon to combine the grounds and water thoroughly. Cover the jar tightly with its lid to prevent contamination and maintain consistent temperature during steeping.
Steep
Allow the coffee mixture to steep at room temperature or in the refrigerator for 12 to 24 hours. Longer steeping times create a stronger brew but we recommend avoiding steeping beyond 15 hours to prevent excessive bitterness. Room temperature steeping produces a more robust flavor while refrigerator steeping creates a milder taste.
| Steeping Time | Flavor Profile | Best For |
|---|---|---|
| 12 hours | Mild and smooth | Light coffee preference |
| 15 hours | Balanced strength | Most coffee drinkers |
| 24 hours | Bold and intense | Strong coffee lovers |
Strain and Serve
After steeping we strain the coffee to remove all grounds and avoid a gritty texture. Line a fine mesh strainer with cheesecloth or paper filters for the clearest results. Pour the coffee through the strainer into a clean jar or pitcher slowly to capture all sediment.
Serve the cold brew over ice and dilute with milk or water according to your taste preferences. We can also heat the cold brew gently if you prefer hot coffee. Store your finished cold brew in the refrigerator for up to two weeks.
Use filtered water for the best flavor results and consider making coffee ice cubes to chill your drink without diluting the taste. This method produces a smooth and less acidic cup compared to hot brewing techniques while using only common kitchen items.


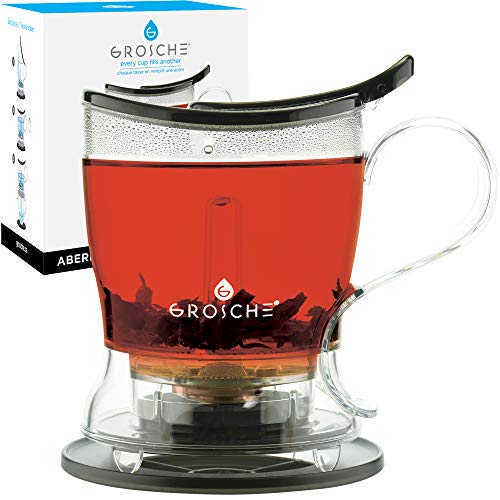
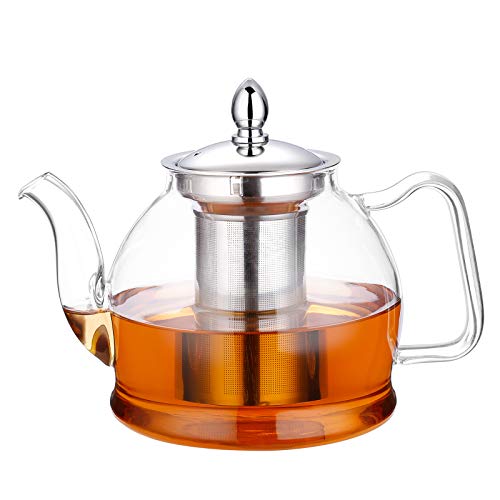
Method 5: Tea Infuser Method
 12")
We can easily transform our tea brewing tools into an effective coffee maker with this simple technique. This method leverages the same principles used for loose leaf tea brewing to create a clean and flavorful cup of coffee.
Prep
We gather our coffee grounds and a tea infuser or create a DIY version using aluminum foil. For the DIY option we take a piece of aluminum foil and poke small holes throughout to create a makeshift pouch. We heat water until it reaches the optimal temperature just below boiling point. Our coffee grounds should be medium grind to prevent them from escaping through the infuser holes. We ensure our mug or cup is ready and within reach for the brewing process.
Brew
We place our coffee grounds inside the tea infuser or aluminum foil pouch and secure it properly. The infuser goes directly into our mug or cup before we add any water. We pour the hot water slowly over the infuser allowing it to saturate the grounds completely. The coffee steeps for 3 to 4 minutes to extract maximum flavor from the grounds. We remove the infuser carefully to avoid any grounds falling into our cup. This method produces a clean brew similar to how loose leaf tea steeps without requiring any specialized coffee equipment.


Method 6: Microwave Coffee Bag Method
 14")
When we need coffee quickly and only have a microwave available, this ingenious method creates a DIY coffee bag that delivers surprisingly good results. The microwave coffee bag technique requires minimal equipment and produces a clean brew with easy cleanup.
Prep
We start by creating our coffee bag using a paper coffee filter folded into a small pouch. Place 2 to 4 tablespoons of ground coffee inside the filter pouch, adjusting the amount based on your preferred strength. Seal the bag securely using a binder clip, rubber band, or paper clip to prevent coffee grounds from escaping during the brewing process.
Pour approximately 12 ounces of water into a microwave-safe mug. Add a non-metallic utensil such as a wooden stick or popsicle stick to the water. This prevents dangerous hotspots and superheating that can occur when microwaving water alone.
Heat and Steep
We microwave the water for 1 to 3 minutes, depending on your microwave’s wattage. The water should reach 195°F to 205°F, which represents the optimal brewing temperature for coffee extraction. Remove the mug carefully from the microwave and take out the utensil using tongs or a towel.
Place the sealed coffee filter bag into the hot water immediately. Let the coffee steep for 3 to 5 minutes, depending on your desired strength preference. We can clip the bag to the side of the mug for convenience during steeping.
Remove the coffee bag carefully using a fork or similar tool if the bag feels too hot to handle. Discard the used coffee bag and add milk, sugar, or enjoy the coffee black according to your taste preferences.


Tips for Best Results
 16")
These professional techniques will elevate your coffee brewing experience regardless of which method you choose. We’ve discovered that attention to these key details makes the difference between mediocre and exceptional coffee.
Water Temperature
We recommend heating water to the optimal temperature range of 92-96°C (197.6-204.8°F) for perfect extraction. Boiling water and letting it cool for about 30 seconds achieves this ideal temperature without specialized equipment.
Water that’s too hot extracts bitter compounds and tannins that overpower your coffee’s natural flavors. Conversely, water that’s too cool fails to extract the full range of flavors and oils from your coffee grounds. We avoid reboiling water since this removes oxygen that enhances extraction and improves overall flavor quality.
| Temperature Range | Result |
|---|---|
| 92-96°C (197.6-204.8°F) | Optimal extraction |
| Above 96°C (204.8°F) | Bitter, over-extracted |
| Below 92°C (197.6°F) | Weak, under-extracted |
Coffee-to-Water Ratio
We use the standard ratio of 2 tablespoons of coffee per 6 ounces of water as our starting point for balanced flavor. This ratio works consistently across all brewing methods from cowboy coffee to makeshift pour-over techniques.
Personal taste preferences vary significantly, so we encourage adjusting this ratio slightly to find your perfect strength. Those who prefer stronger coffee can increase to 2.5 tablespoons per 6 ounces, while lighter coffee drinkers might reduce to 1.5 tablespoons.
We measure coffee grounds using a kitchen scale when possible since volume measurements can vary based on grind size and density. This precision ensures consistent results every time you brew.
Grinding Tips
We select grind size based on your chosen brewing method for optimal extraction. Coarser grinds work best for cowboy coffee and French press alternatives, while medium-coarse grinds suit filter bag methods perfectly.
Grinding coffee beans just before brewing preserves maximum freshness and releases the full spectrum of flavors. We store whole beans in an airtight container and grind only what we need for each brewing session.
Pre-ground coffee loses flavor compounds quickly, so we recommend using it within two weeks of opening. When grinding at home, we aim for uniform particle size to ensure even extraction across all grounds.
We bloom our coffee by wetting grounds with a small amount of water and letting them rest for 30-45 seconds before full brewing. This technique releases carbon dioxide trapped in the grounds and significantly improves taste extraction.


Troubleshooting Common Issues
 18")
Even experienced coffee enthusiasts encounter challenges when brewing without traditional equipment. We’ve identified the most common problems and their answers to help you achieve consistently delicious results.
Water Temperature Problems
Water temperature directly impacts extraction quality and overall flavor. We recommend heating water to 195-205°F for optimal results. Boiling water vigorously while steeping burns the coffee and creates bitter flavors. Allow boiling water to cool for 30 seconds before adding coffee grounds. Use a thermometer for precision or look for small bubbles forming at the bottom of your pot as an indicator of proper temperature.
Coffee Strength Issues
Finding the right coffee-to-water ratio prevents weak or overpowering brews. We suggest starting with 1 to 2 tablespoons of coffee per 6 ounces of water as your baseline. Adjust gradually based on your taste preferences. Too much coffee creates excessive bitterness while too little produces weak and flavorless results. Keep notes of successful ratios for consistent brewing.
Grind Size Complications
Medium-coarse grind works best for most steeping methods without specialized equipment. Fine grounds create bitter flavors and result in muddy coffee with excessive sediment. Coarse grounds may produce weak extraction and watery taste. Invest in a burr grinder for consistent particle size or purchase pre-ground coffee specifically labeled for French press brewing.
Brewing Time Difficulties
Proper steeping time ensures balanced extraction without bitterness. We recommend 3-5 minutes for most methods. Rushing the process produces weak and underdeveloped flavors. Over-steeping extracts harsh compounds and creates bitter notes. Set a timer and remove grounds promptly when brewing time completes.
Sediment and Grit Problems
Excessive coffee grounds in your cup indicate filtering issues or improper settling time. Allow grounds to settle at the bottom for 30 seconds before pouring. Pour slowly and stop when you see grounds approaching the cup. Double-strain your coffee through a fine mesh strainer if sediment persists. Consider using paper filters or clean cloth for cleaner results.
Stirring Technique Errors
Gentle agitation ensures even extraction without disturbing settled grounds. We recommend stirring once during the first minute of steeping. Over-stirring suspends grounds and creates cloudy coffee. Use a spoon to gently break the surface crust that forms during brewing. Avoid aggressive stirring that releases bitter compounds.


Make-Ahead Instructions
 20")
We can streamline our coffee brewing process by preparing several components in advance. This approach saves precious time during busy mornings and ensures consistent results with any method we choose.
Ground Coffee Preparation
Grinding our coffee beans ahead of time eliminates morning rush while maintaining freshness. We recommend grinding enough beans for 3-4 days maximum to preserve optimal flavor. Store ground coffee in an airtight container away from light and heat. Pre-ground coffee works well for the Cowboy Coffee method and pour-over techniques when stored properly.
Water Temperature Management
Preparing hot water in advance requires careful temperature control. We can heat water to the ideal 195-205°F range and store it in a thermal carafe or insulated container. This method works exceptionally well for the Mason jar technique and Turkish coffee preparation. Alternatively we can mark our preferred water level in our heating vessel to speed up the morning process.
DIY Coffee Bag Assembly
Creating coffee bags using paper filters saves important time during the brewing process. We can assemble 5-7 coffee bags at once by placing 2 tablespoons of medium ground coffee in each filter and securing with kitchen twine. Store these pre-made bags in an airtight container for up to one week. This preparation method works perfectly for the tea bag style brewing technique.
Cold Brew Concentrate
Preparing cold brew concentrate provides us with coffee ready for several days. We mix coarsely ground coffee with cold water in a 1:4 ratio and let it steep for 12-24 hours. After straining we store the concentrate in our refrigerator for up to one week. This concentrate dilutes with hot or cold water depending on our preference.
Equipment Organization
Setting up our brewing station the night before eliminates morning delays. We arrange our chosen strainer fine mesh strainer or makeshift filter materials in an easily accessible location. Pre-measuring our coffee grounds into small containers or bowls speeds up the entire process. This organization method works effectively for all manual brewing techniques we’ve discussed.
Storage and Reheating
 22")
Fresh coffee tastes best when consumed immediately after brewing, but we understand that real life doesn’t always allow for perfect timing. Your freshly brewed coffee from any of these methods can be stored effectively using proper techniques.
Immediate Storage Options
We recommend transferring your hot coffee to a vacuum flask or insulated bottle to maintain optimal temperature for several hours. These containers preserve both heat and flavor much better than regular mugs or ceramic cups. Thermal carafes work exceptionally well for keeping multiple servings warm without continuing to cook the coffee.
Short-Term Storage Guidelines
| Storage Method | Duration | Temperature Retention |
|---|---|---|
| Vacuum Flask | 6-8 hours | 85-90% heat retention |
| Insulated Bottle | 4-6 hours | 80-85% heat retention |
| Thermal Carafe | 3-4 hours | 75-80% heat retention |
Room temperature storage works for cold brew concentrate, which we can keep in the refrigerator for up to one week. Regular hot coffee should not sit at room temperature for more than 2 hours due to bacterial growth concerns.
Proper Reheating Techniques
Gentle reheating preserves the coffee’s original flavor profile better than aggressive heating methods. We suggest using a microwave on 50% power for 30-45 seconds, stirring halfway through to ensure even heating. This prevents the bitter compounds from developing that harsh reheating often creates.
Stovetop reheating requires low heat and constant attention. Pour your stored coffee into a small saucepan and warm it slowly over low heat, stirring occasionally. Never let stored coffee reach a rolling boil, as this destroys the delicate flavor compounds we worked to extract during brewing.
Maintaining Quality During Storage
Coffee quality diminishes over time, but proper storage minimizes flavor loss. We notice that coffee stored in airtight containers maintains better taste than coffee left exposed to air. Adding a pinch of salt to reheated coffee can help restore some of the original flavor balance.
Your homemade cold brew concentrate offers the best storage flexibility among all brewing methods. We can dilute it with hot water for an instant warm cup or mix it with cold water and ice for a refreshing cold beverage. This versatility makes cold brew an excellent option for meal prep and busy schedules.


![Freshware Meal Prep Containers [50 Pack] 1 Compartment with Lids,](https://m.media-amazon.com/images/I/5100woitKcL._SL500_.jpg)


Conclusion
We’ve shown you that great coffee doesn’t require expensive equipment or complicated setups. From the simple stovetop method to the smooth cold brew technique these alternatives offer complete control over your brewing process while using items you already have at home.
The beauty of these methods lies in their flexibility and accessibility. Whether you’re dealing with a broken coffee maker camping in the wilderness or simply wanting to try something new you now have multiple reliable options that deliver exceptional results.
Remember that perfect coffee comes down to understanding your ratios water temperature and timing. With these fundamentals mastered you’ll consistently brew delicious coffee using any method we’ve covered. Your morning routine just became much more resilient and adventurous.
Frequently Asked Questions
What kitchen items can I use to make coffee without a coffee maker?
You can use common household items like a medium saucepan, mason jar, fine mesh strainer, paper towels, cloth napkins, tea infuser, or even aluminum foil. These everyday items can be transformed into effective coffee brewing tools using methods like stovetop brewing, mason jar technique, pour-over with makeshift filters, or cold brew preparation.
How much coffee should I use for each brewing method?
The standard ratio is 2 tablespoons of coffee per 6 ounces of water. However, you can adjust this based on your taste preferences. For cold brew, use a stronger ratio since it’s typically diluted. Medium to coarse ground coffee works best for most alternative brewing methods.
What’s the ideal water temperature for brewing coffee without a machine?
The optimal water temperature range is 195-205°F (90-96°C). If you don’t have a thermometer, bring water to a boil and let it cool for 30 seconds to 1 minute. This temperature ensures proper extraction without over-extracting bitter compounds from the coffee grounds.
How long should I steep coffee using alternative brewing methods?
Steeping time varies by method: 3-4 minutes for pour-over and tea infuser methods, 4-5 minutes for stovetop cowboy coffee, and 12-24 hours for cold brew. Longer steeping times generally result in stronger flavor, but over-steeping can lead to bitterness.
Can I make coffee in advance using these methods?
Yes! You can grind coffee beans ahead of time, prepare cold brew concentrate that lasts several days, and assemble DIY coffee bags for quick use. Cold brew concentrate is especially convenient as it can be stored in the refrigerator and enjoyed hot or cold.
How do I prevent sediment and grit in my coffee?
Use a fine mesh strainer, coffee filter, or clean cloth napkin to strain your coffee. For cleaner results, let the coffee settle for a minute before pouring, and strain twice if necessary. Coarser coffee grounds also help reduce sediment in the final brew.
What’s the best way to store and reheat brewed coffee?
Store hot coffee in a vacuum flask or insulated bottle for best temperature retention. For reheating, use gentle methods like low microwave power or stovetop warming to preserve flavor. Cold brew concentrate can be stored in the refrigerator for up to one week in an airtight container.
Which alternative brewing method is quickest?
The microwave coffee bag method is the fastest, taking only 2-3 minutes total. The pour-over with makeshift filter and tea infuser methods are also quick options, requiring 4-5 minutes from start to finish. These methods are perfect for busy mornings or when you need coffee quickly.